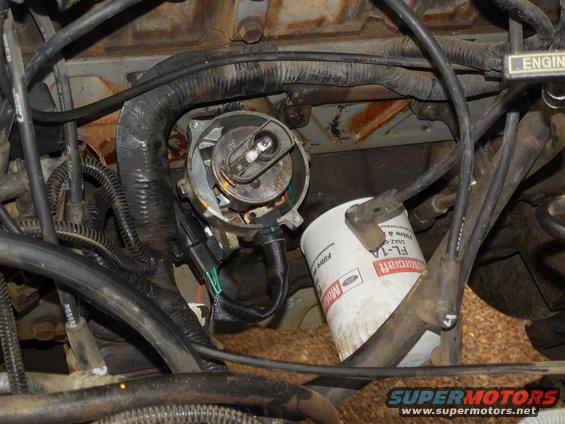
Since I set it to #1TDC & marked the rotor & block (note the orange line below the PIP connector) before removal, it was easy to get it back in time & cranked, as this caption explains:

I also coated the cap with dielectric grease as Ford recommends:

Then I set it to 10BTDC with the timing light, and closed the hood.
_______________________________________________________
Distributor Installation
I recommend keeping a trickle charger on the battery all the time until you get it running. The Battery Tender (~$40 @ Sam's Club or Costco) or Battery Tender Jr. (~$35 on Amazon) are among the better ones.
The V8 timing marks are stamped into the edge of the harmonic balancer; I6 are bolted to the timing cover on the passenger side, between the smog pump & HB. Use steel wool, a wire brush, or sandpaper if necessary to clean the the marks so they're clearly visible. Use a socket & breaker bar to rotate the crankshaft if necessary. The V8 timing pointer is bolted to the timing cover; I6 is a tiny notch stamped into the lip of the HB.

If you didn't set the engine to 0�TDC before pulling the distributor, remove the #1 spark plug (V8 RHF) and rotate the crankshaft until the pointer aligns with 0. Use a hose to blow into the spark plug hole - if it's easy, and you hear the air coming out the throttle body, rotate the crank 1 full rev back to 0, and recheck. If it's difficult (#1 compression stroke), and ALL the air comes out around the threads, drop a plastic drinking straw into the hole so it rests on the piston and rock the crankshaft gently to make sure you have the piston EXACTLY at top dead-center (straw as high as possible). Then re-check the pointer. If it's off, adjust it so it's dead-on 0. If the straw falls perceptibly, replace the balancer.
Set the cap into place on the distributor body and make a mark on the bowl directly under the #1 tower (should be molded into the cap). Remove the cap, install the rotor on the dist shaft, & rotate the rotor so it points at the mark. With the dist bore clean & a light coat of clean motor oil on it & the dist O-ring, drop the dist into the bore so its connector points toward the wiring harness connector. You'll have to wiggle the rotor to get the gear teeth to align AND the oil pump shaft to fit into the bottom of the dist. shaft. When it drops all the way down, check if the dist body can be rotated so your mark moves to both sides of the rotor tip. If not, raise it, & reset the rotor so it's centered in the mark's range of adjustment. Then loosely install the dist clamp & bolt so the dist can't rise, but it can be rotated with some effort.
Next, read this caption & check for timing chain/gear slop:

Replacing the gears is a BIG job that's best done by removing the engine, so don't dive into it on a whim. But if it's worn out, the engine will never run right until it IS replaced. Only you can decide since you're the one looking at it & paying for it. When you're finished, set the HB to 0 and the dist with your mark directly under the rotor tip.
Finally, install the cap & wires EXACTLY as shown in this diagram:

.

After checking everything (connectors, fluid levels, battery charge, rags hanging in the fan blades, etc.), put the key in RUN and use
a starter relay trigger to crank the engine while you GENTLY work the distributor back & forth until it fires up. When it does, use either a timing light (SPOUT pulled) or vacuum gauge to set the timing close while it warms up. Then follow the instructions on the VECI label to set timing properly.