|
|
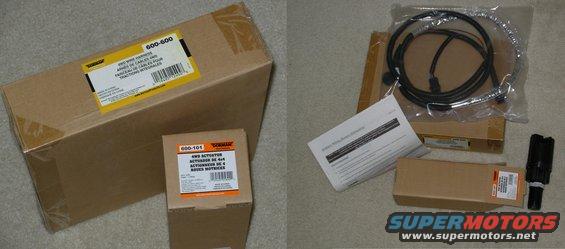
 Dorman600-101,600.JPG | Hits: 1204 | Size: 32.42 KB | Posted on: 4/4/12 | Link to this image Dorman600-101,600.JPG | Hits: 1204 | Size: 32.42 KB | Posted on: 4/4/12 | Link to this image
I don't know why these are sold separately - neither will work without the other. Note that the steel spacer slug isn't with the actuator (600-101) - it's packaged with the wiring harness (600-600).
The instruction sheet is in later pics.
|
|
|
This is GM's crappy idea - basically a light bulb filled with oil that swells & pushes a lever inside the axle housing. I spent an hour or so washing the undercarriage before beginning, and this truck was relatively clean to begin with.
|
|
|
As soon as the threads were exposed, I could see there was a problem - the bright yellow oil from the actuator had leaked out.
|
|
|
The rubber boot on the tip has also ruptured & become entangled in the piston.
|
|
|
This is just actuator oil - none of the differential oil came out.
|
|
|
The new actuator is much larger outside, but for some reason, it's shorter inside, requiring this slug, which is included in the kit. The instructions say to push it in with a screwdriver & then install the actuator, but I decided I'd rather have it attached. I used E6000 the day before, so it's secure today.
The revised GM actuator looks exactly like this one, other than having "POLLACK" molded into the connector end - even the threadlocker is the same color, which makes me think they come off the same assembly line. All the aftermarket actuators I looked at in local parts stores (BWD & some other brand) were absolutely identical to this one in every way, other than price.
|
|
|
The body of the actuator is VERY close to the axle housing, but mine had no interference. It took some effort to get the threads started.
|
|
|
I didn't check this before beginning, so I was surprised to find the new harness DOESN'T FIT the truck connector. (Referring only to the 2 on the Right.)
|
|
|
Since 600-600 is the only harness available, I simply cut the old actuator's connector off & attached it to the new harness. Later, I had to reverse the pins to get the actuator to work - the new harness' DB wire went to my truck's LG wire, and Bk to Bk.
|
|
|
If I hadn't cut & spliced the connector, I suspect I would have been forced to route the wiring UNDER the axle tube, or not attach it to the clip.
|
|
|
The instructions say to route the Br wire over the transmission & then splice it into the truck wiring somewhere between 2 connectors that are NOT identified by locaction OR shape. But since the harness is almost inaccessible in my truck, I decided to route it inside through a firewall grommet, and to the factory-provided tap (labelled "DRK GRN") in the same circuit. I used an old fuse terminal that I found in a junkyard with 2 Br wires, and left the 2nd wire loose for future use.
|
|
|
Just for curiousity, I cut the old actuator open. My best guess is that the oil leaked out, allowing the heater filament to overheat & melt, falling against the housing & shorting out, which blew the 25A fuse.
|
|
|
Instruction sheet (packaged with Dorman 600-600)
IF THE TEXT IS TOO SMALL, click it.
|
|
|
Instruction sheet (packaged with Dorman 600-600)
IF THE IMAGE IS TOO SMALL, click it.
|
|
|
Instruction sheet (packaged with Dorman 600-600)
IF THE IMAGE IS TOO SMALL, click it.
|
|
|
Instruction sheet (packaged with Dorman 600-600)
IF THE IMAGE IS TOO SMALL, click it.
|
|
|
Instruction sheet (packaged with Dorman 600-600)
IF THE IMAGE IS TOO SMALL, click it.
|
|
|
Instruction sheet (packaged with Dorman 600-600)
IF THE IMAGE IS TOO SMALL, click it.
|
|
|
Instruction sheet (packaged with Dorman 600-600)
IF THE IMAGE IS TOO SMALL, click it.
|
|
|
Instruction sheet (packaged with Dorman 600-600)
IF THE IMAGE IS TOO SMALL, click it.
|
|
|