SuperMotors SuperMotors SUPERMOTORS Search: try “orange Bronco on 35s”
Home/ Lincoln/ Town Car/ 1990-1997/ “Mileage Master”/ How-to

How-to

1990 Lincoln Town Car Fuel Pump Harness Connector Replacement

1990 Lincoln Town Car · Repair · Moderate

Documented by SuperMotors from Sixlitre’s photos

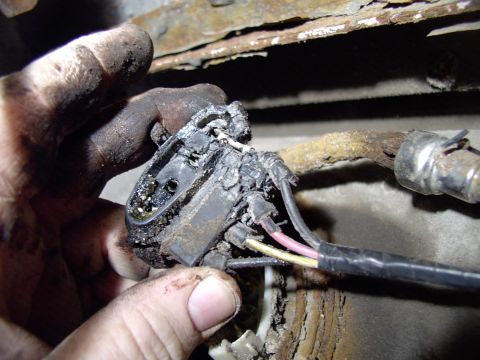
The fuel pump on this 1990 Lincoln Town Car had been cutting out intermittently, and the cause was a corroded, crumbling harness connector at the pump. Sixlitre fitted a new harness plug, reusing the stock wires and terminals after cleaning them.

  1. Step 1

    Suspect the pump harness connection when the fuel pump cuts out intermittently. Sixlitre reports the pump would work and then die, as though the connection or ground were bad.
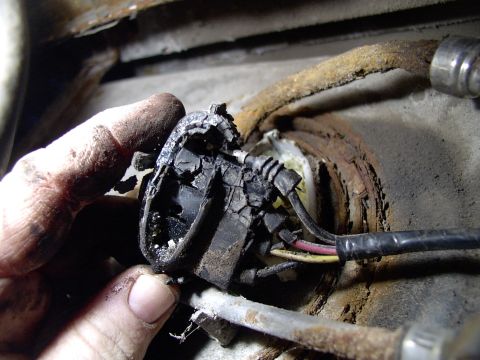
    Step 1: Suspect the pump harness connection when the fuel pump cuts out intermittently. Sixlitre reports the pump (photo 1 of 3) Step 1: Suspect the pump harness connection when the fuel pump cuts out intermittently. Sixlitre reports the pump (photo 2 of 3) Step 1: Suspect the pump harness connection when the fuel pump cuts out intermittently. Sixlitre reports the pump (photo 3 of 3)
  2. Step 2

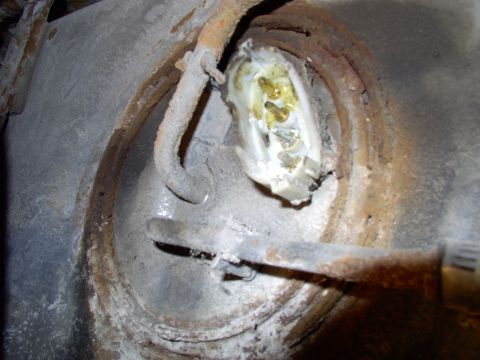
    Unplug the connector at the fuel sending unit and inspect the pins. Look for corrosion on the pin faces.
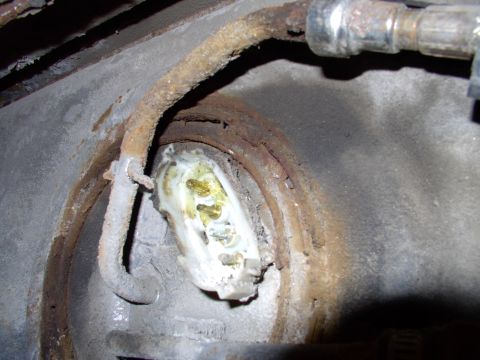
    Step 2: Unplug the connector at the fuel sending unit and inspect the pins. Look for corrosion on the pin faces.
  3. Step 3

    Free the corroded terminals from the old connector body and soak them to dissolve the corrosion. Sixlitre stood the two terminals in straws filled with vinegar.
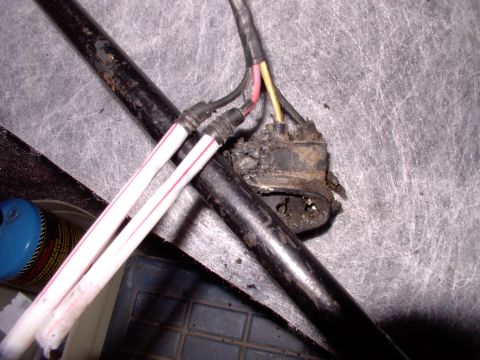
    Step 3: Free the corroded terminals from the old connector body and soak them to dissolve the corrosion. Sixlitre
  4. Step 4

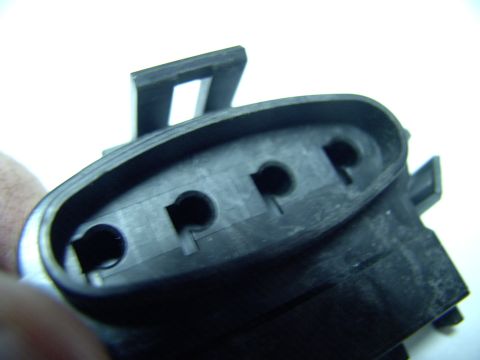
    Push each terminal into its socket in the new connector until the metal tang seats in the recess beside the socket hole with a positive click. Seat the rubber barbs on the stock wires into the matching holes in the connector so the plug stays weatherproof.
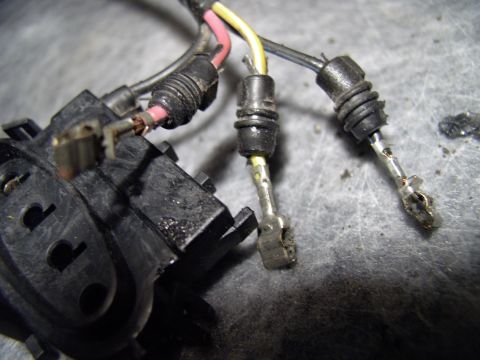
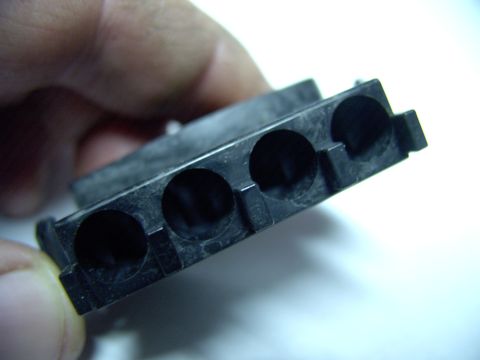
    Step 4: Push each terminal into its socket in the new connector until the metal tang seats in the recess beside the (photo 1 of 3) Step 4: Push each terminal into its socket in the new connector until the metal tang seats in the recess beside the (photo 2 of 3) Step 4: Push each terminal into its socket in the new connector until the metal tang seats in the recess beside the (photo 3 of 3)
  5. Step 5

    Reuse the stock wires rather than cutting them in, since the wire itself does not deteriorate the way the connector does. Four terminal clips come with the connector; Sixlitre found the original connector brittle enough that the stock terminals broke free of it.
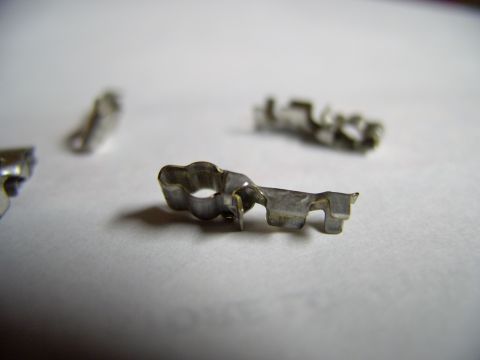
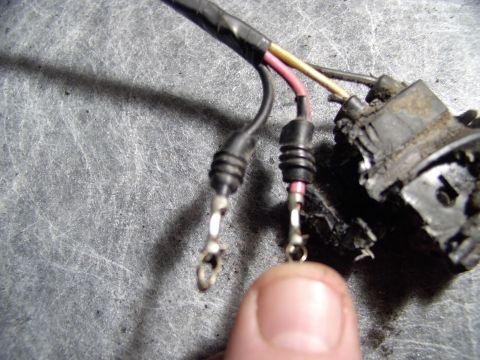
    Step 5: Reuse the stock wires rather than cutting them in, since the wire itself does not deteriorate the way the (photo 1 of 2) Step 5: Reuse the stock wires rather than cutting them in, since the wire itself does not deteriorate the way the (photo 2 of 2)
  6. Step 6

    Clean the corrosion off the pin terminals before final assembly. Coat them with dielectric grease.
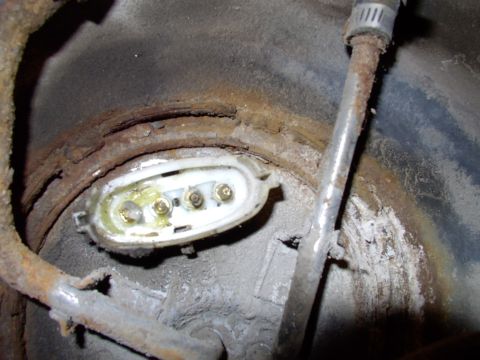
    Step 6: Clean the corrosion off the pin terminals before final assembly. Coat them with dielectric grease.
  7. Step 7

    Click the new connector onto the sending unit pins and start the engine to confirm the repair. Sixlitre reports it fired right up, and the photos end there.
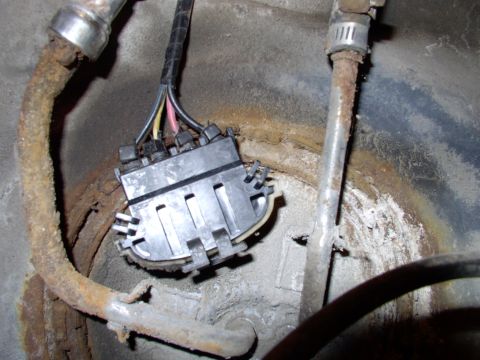
    Step 7: Click the new connector onto the sending unit pins and start the engine to confirm the repair. Sixlitre

Some product links go to the supplier the owner bought from. SuperMotors does not earn a commission today; if that changes, this line will say so and creators will be paid from it.