Sep 6, 2006 at 12:29 AM
STEP 1: Join or login to SuperMotors
If you haven't already, join SuperMotors. Otherwise, simply login via the username and password fields at the top of the site.
STEP 2: Create a registry entry
If you already have a registry entry, skip to step 3.
If you haven't already, you'll first need to create a registry entry. A registry entry is where your photo albums will go, but first you need a place for your photo albums to be stored. That's what a registry entry is for. Create your registry entry at http://www.supermotors.net/mygarage/index.php
STEP 3: Edit album
Visit http://www.supermotors.net/mygarage/index.php and click on "Edit Album" next to the corresponding registry entry you wish to add photos, sounds, and/or videos to.
STEP 4: Add or edit an album section
If you haven't already, create an album section. Album sections are created so you may categorize or group your photos, sounds, and videos together. As you continue to post more media files, it will be easier to find them based on your album sections.
If you already have an album section created, simply click on the album section name.
STEP 5: Select a photo, audio, or video to post
Click the "Choose File" button and lcoate the file on your computer you wish to post.
STEP 6: Enter a description and click "Send File"
Enter a description for your photo. Descriptions are optional, but the more detailed you are, the better. Users can search the registry based on descriptions you enter in your captions. Now, click the "Send File" button! This may take several seconds to several minutes depending on your Internet connection speed and the size of the file you are posting.
STEP 7: Verify your posted photo and caption
Once the file has been posted, the page wil refresh and you will see an "EXISTING FILES" table at the bottom of the page showing you the thumbnail of the file you just posted, the caption, action steps, and the file's stats. Click on the thumbnail to view the file in full detail. You can also edit the caption by clicking the "edit caption" link or delete the file entirely by clicking the "delete" link.
-Eric
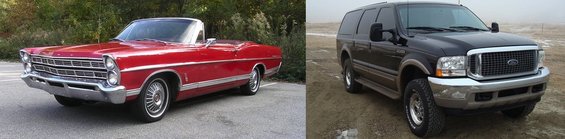
'67 Galaxie 500 - 390 FE, .030" over, FE to AOD adapter, disc brake conversion. The Daily Driver.
'00 Excursion - 7.3L PSD, LANDYOT Gen-II Radius Rods, Factory Tech Valve Body, 200K+ miles and going
'67 Galaxie 500 - 390 FE, .030" over, FE to AOD adapter, disc brake conversion. The Daily Driver.
'00 Excursion - 7.3L PSD, LANDYOT Gen-II Radius Rods, Factory Tech Valve Body, 200K+ miles and going
