How-to
1996 Mercury Grand Marquis Driver's Window Regulator Replacement
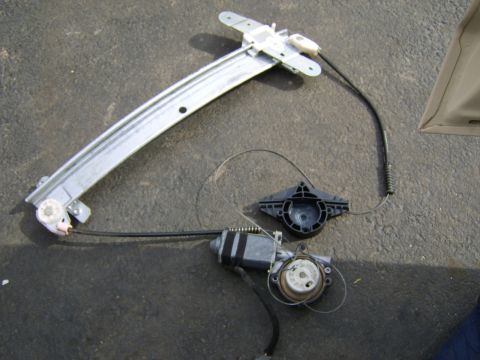
The driver's window regulator in this 1996 Mercury Grand Marquis failed when its cable snapped, so the door was opened up and the regulator was drilled out and replaced. Drock96marquis fitted an aftermarket Dorman regulator and secured it with 1/4" hardware instead of rivets, and the photos also cover removing and polishing the door glass.
-
Step 1
Confirm the failure at the regulator itself. Drock96marquis reports the cable snapped while the car was being driven for the first time that year, a common issue on aging Panthers.
-
Step 2
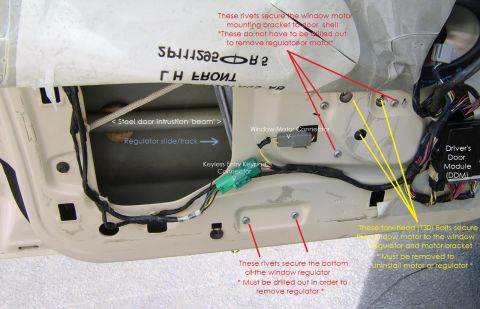
Remove the door panel, then remove the felt covered rubber inner molding so the window glass can come out. Drock96marquis documents the door panel removal separately on their own webpage. The labeled overview photo marks what holds the regulator: the two rivets at the bottom of the regulator must be drilled out, the torx-head bolts that secure the window motor to the regulator and motor bracket must be removed, and the rivets that secure the window motor bracket to the door shell do not have to be drilled out to remove the regulator or motor.
-
Step 3
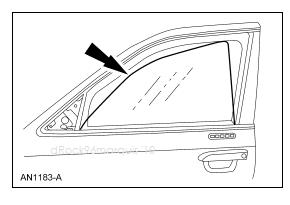
Take the door glass out before any regulator work. The service manual illustration shows how far to rotate the glass while lifting it, working in either direction. Drock96marquis slid the glass out and put it in the trunk to keep it out of the way while the regulator was replaced and the glass polished.
-
Step 4
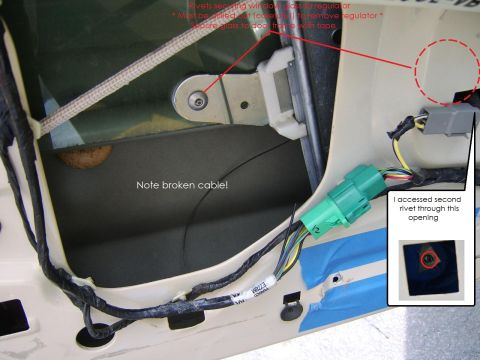
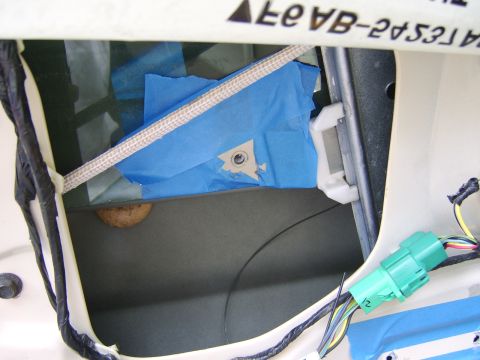
Reach the rivets that attach the glass to the regulator's sliding mechanism, which are the hardest ones to remove. They must be drilled out carefully, and the photo notes to secure the glass to the door frame with tape first. Drock96marquis found this working position worked well for that.
-
Step 5
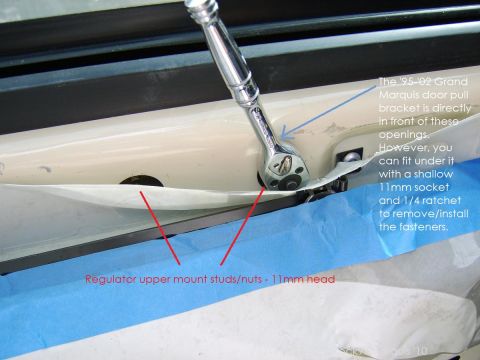
Work around the door pull bracket, which sits directly in front of the openings for the regulator's upper mount studs and nuts on the Grand Marquis. Drock96marquis used a shallow 11mm socket on a ratchet to fit under it and remove or install those fasteners, and notes this is a non-issue for Crown Victoria owners.
-
Step 6
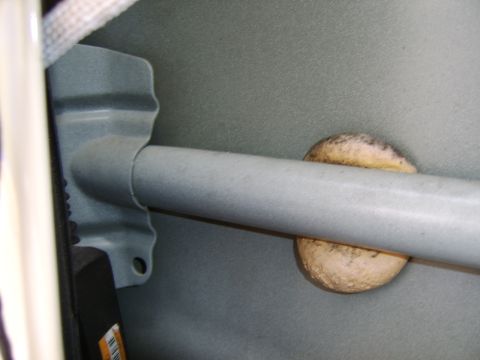
Close-up of the steel door beam shown in the previous overview. The small black part at the lower left is the lock actuator.
-
Step 7
Drill out the bottom rivets. Before using a hammer and punch, stabilize the back side of the glass with wood or similar backing so the glass is not cracked or smashed.
-
Step 8
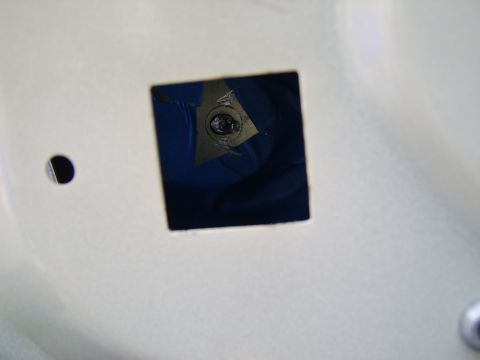
Remove the bottom rivet on the opposite side through the hole where the window motor wiring passes, which Drock96marquis used for access.
-
Step 9
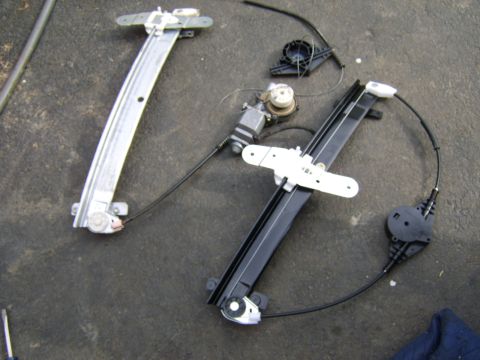
Compare the old regulator with the replacement before fitting it. Drock96marquis used an aftermarket Dorman part because the Ford dealer had none in stock and would have taken a few days, while the local parts store had it on the shelf, and advises using an OEM/Ford unit if available.
-
Step 10
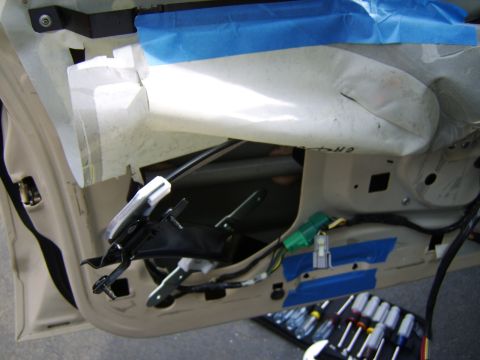
Snake the new regulator into the door and secure it; Drock96marquis used 1/4" bolts, washers and locknuts rather than rivets, and warns against overtightening the regulator-to-glass bolts. Reinstall the glass in the reverse of removal, inserting it rotated and on an angle and rotating it into position as it goes down, taking care not to scratch aftermarket tinting.
-
Step 11
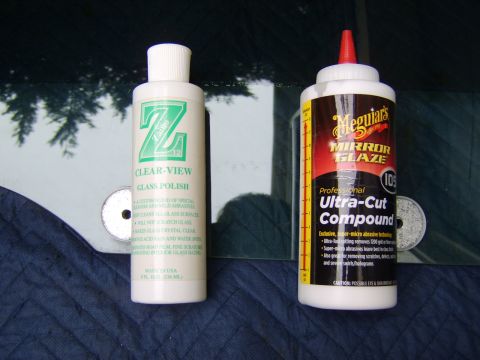
Polish the glass while it is out of the door to remove water spots and etching. Drock96marquis used both the Zaino product, which was made for this and works better by hand, and M105, and reports the Zaino product also works well with a DA polisher. The album's photos end here, with no images of the door panel going back on.
Some product links go to the supplier the owner bought from. SuperMotors does not earn a commission today; if that changes, this line will say so and creators will be paid from it.