How-to
1989 Ford Bronco Auto Hub Removal for Warn Manual Hubs
The factory auto locking hubs on a 1989 Ford Bronco were taken apart to make way for Warn manual hubs. The photos cover removing the auto hub assembly, the C-clip and spacer, and getting the snap ring installed, then end with before and after views of the front hub.
-
Step 1
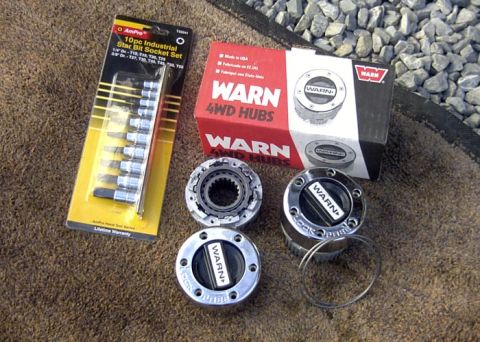
Lay out the new Warn hubs and the Torx sockets. Identify the stock factory auto locking hubs on the truck.
-
Step 2
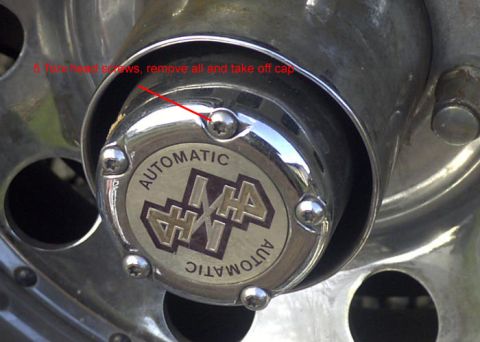
Remove the cap screws and take off the auto hub cover.
-
Step 3
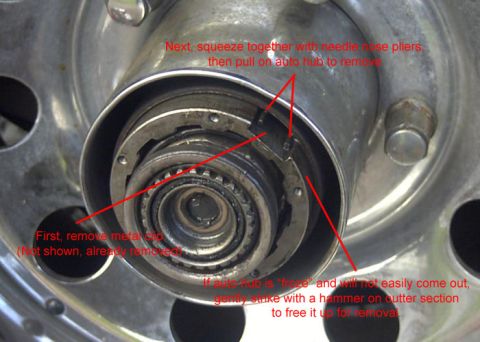
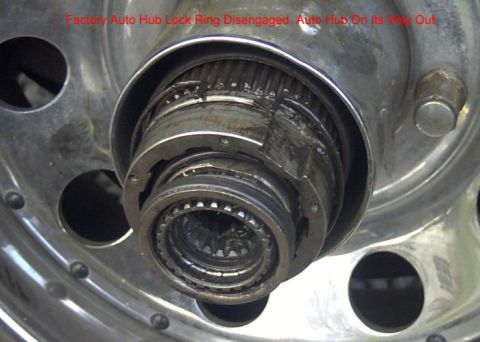
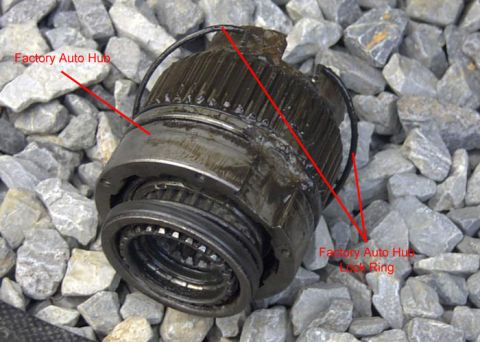
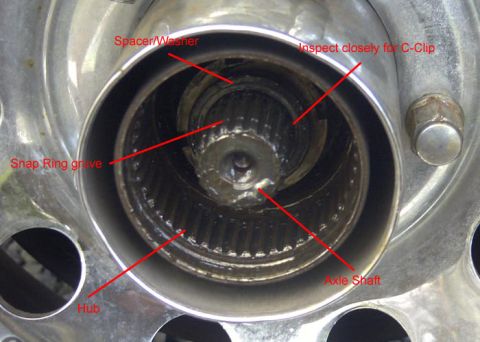
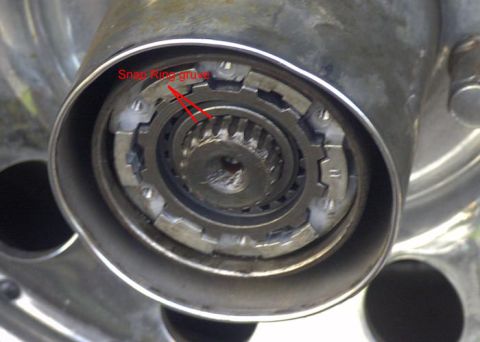
Remove the metal clip, then squeeze the tabs of the locking ring together with needle nose pliers and pull gently to draw the auto hub assembly out. If the lockout is frozen in the drum, tap gently around the outside to free it, and re-insert some of the cap screws to help pull the assembly out. The last photo in this step is a detail of the open hub with the spacer/washer and C-clip groove labeled.
-
Step 4
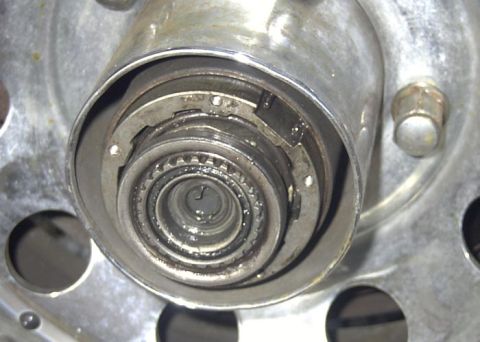
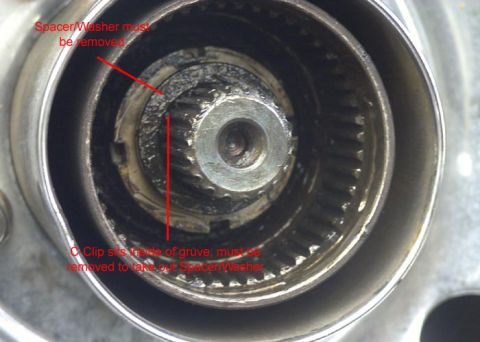
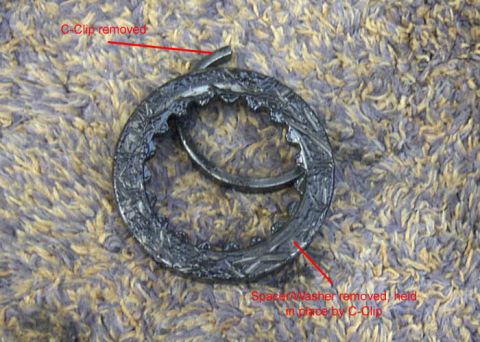
With the auto locking assembly removed, inspect for the groove that holds the C-clip. Remove the C-clip and then the spacer/washer.
-
Step 5
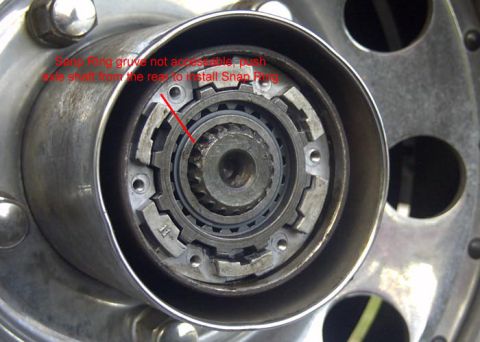
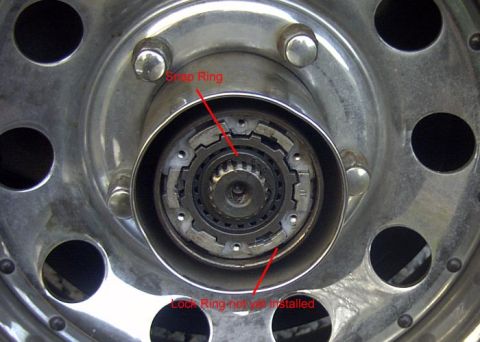
Check the snap ring groove before fitting the manual hub. In this state the groove is not visible and cannot be accessed, and the snap ring must be installed.
-
Step 6
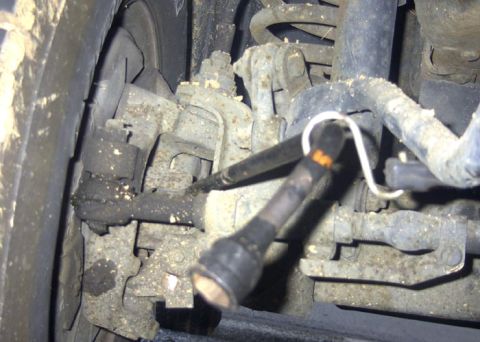
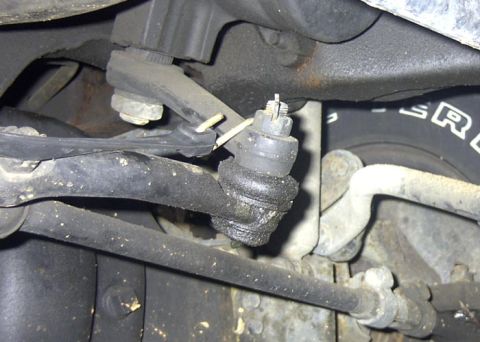
Apply outward pressure on the axle shaft u-joint to expose the groove. Working alone, the owner placed a standard crow bar behind the u-joint and used a black rubber tie-down strap hooked to the Pittman arm to pull tension on the bar.
-
Step 7
With pressure held on the u-joint, the axle shaft is pressed in just the right distance for the snap ring. Install the snap ring in the groove.
-
Step 8
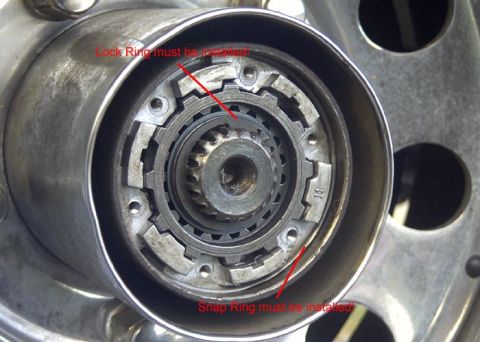
The owner's caption says the part tags in this photo were swapped and that both parts are shown installed. The photo labels the snap ring and the lock ring on the hub.
-
Step 9
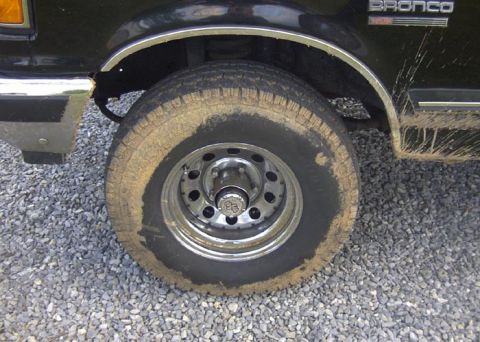
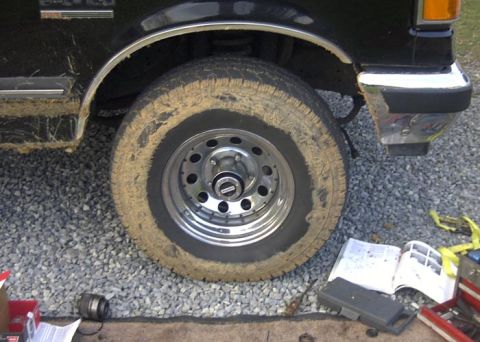
The album closes with before and after views of the front wheel hub from outside. Fitting the Warn manual hub itself is not photographed, so the steps above stop at the point where the hub is ready to receive it.
Some product links go to the supplier the owner bought from. SuperMotors does not earn a commission today; if that changes, this line will say so and creators will be paid from it.