SuperMotors SuperMotors SUPERMOTORS Search: try “orange Bronco on 35s”
Home/ Lincoln/ Town Car/ 1990-1997/ “Mileage Master”/ How-to

How-to

1990 Lincoln Town Car Rear Power Window Gear Plug Repair

1990 Lincoln Town Car · Repair · Moderate

Documented by SuperMotors from Sixlitre’s photos

The rear power window regulator on this 1990 Lincoln Town Car was repaired by replacing the crushed nylon gear plugs inside the window motor's gearbox rather than replacing the motor or the regulator assembly. Sixlitre reached the motor through three drilled access holes in the inner door so the lift framework and cables were never disturbed.

  1. Step 1

    Obtain the nylon power window regulator gear plugs, Help # 74410. Sixlitre paid $6.00 for the set at AutoParts Extra in Canada and notes the original motor can be kept if it is still making noise.
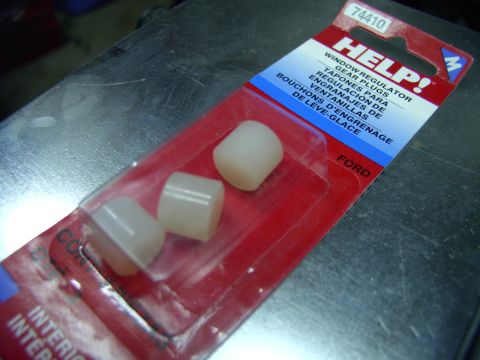
    Step 1: Obtain the nylon power window regulator gear plugs, Help # 74410.
  2. Step 2

    Pop the door pull handle trim covers off with a small screwdriver and set them somewhere they will not be stepped on. Remove the screws underneath.
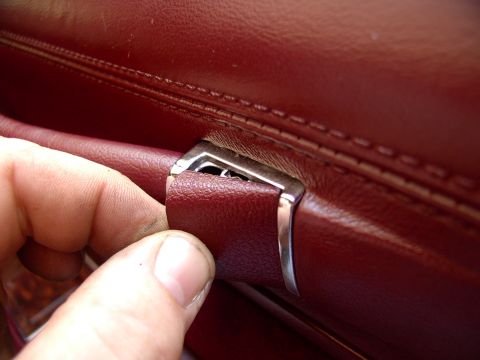
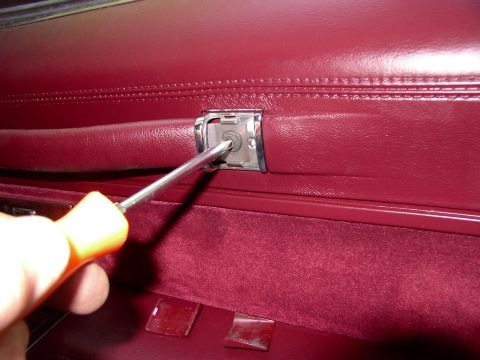
    Step 2: Pop the door pull handle trim covers off with a small screwdriver and set them somewhere they will not be (photo 1 of 2) Step 2: Pop the door pull handle trim covers off with a small screwdriver and set them somewhere they will not be (photo 2 of 2)
  3. Step 3

    Remove the third screw and the fourth screw on the inner side. Pull the door panel from the bottom to release it.
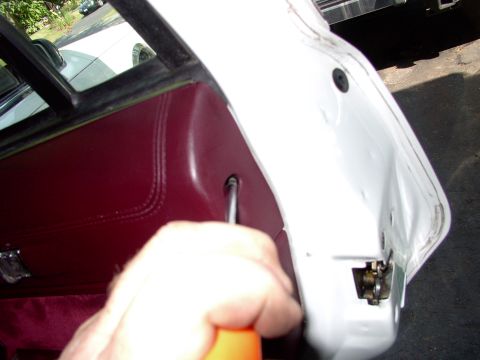
    Step 3: Remove the third screw and the fourth screw on the inner side. Pull the door panel from the bottom to release
  4. Step 4

    Drill three half inch holes in the inner door to expose the Robertson head motor retaining bolts. Sixlitre chose this over drilling out all the rivets and removing the entire lift framework, which would have meant re-stringing the cables and bolting the framework back in.
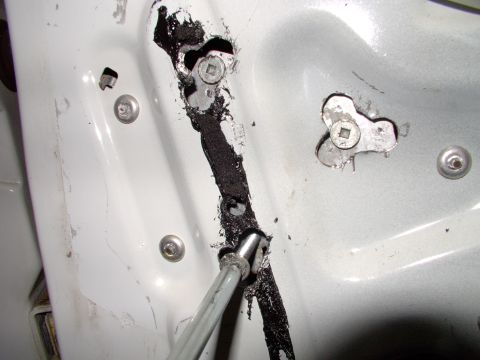
    Step 4: Drill three half inch holes in the inner door to expose the Robertson head motor retaining bolts. Sixlitre
  5. Step 5

    Remove the three bolts and unplug the motor. Pull the motor out only far enough to work on it, so the cables are never disturbed, removed or adjusted.
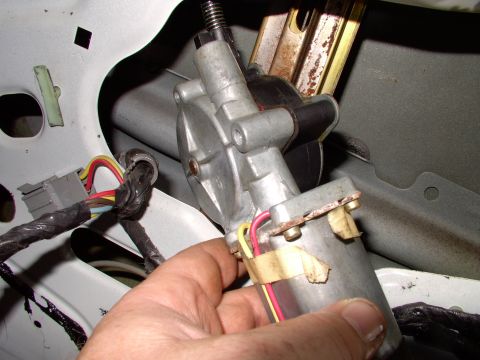
    Step 5: Remove the three bolts and unplug the motor. Pull the motor out only far enough to work on it, so the cables
  6. Step 6

    Separate the motor from the cable gearbox; it pulls straight off. Take the motor to the bench and leave the cable gearbox in place and untouched.
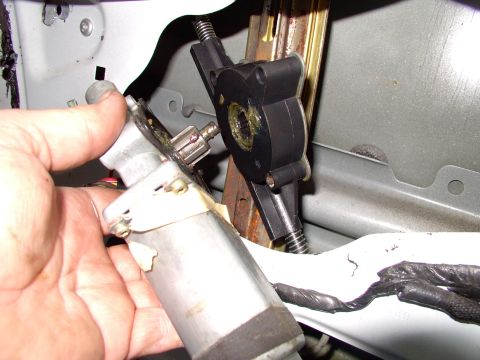
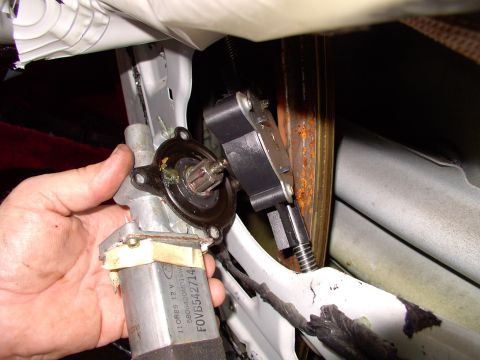
    Step 6: Separate the motor from the cable gearbox; it pulls straight off. Take the motor to the bench and leave the (photo 1 of 3) Step 6: Separate the motor from the cable gearbox; it pulls straight off. Take the motor to the bench and leave the (photo 2 of 3) Step 6: Separate the motor from the cable gearbox; it pulls straight off. Take the motor to the bench and leave the (photo 3 of 3)
  7. Step 7

    Remove the single philips screw and take the cover off the gearbox. Sixlitre reports everything looked normal at this point.
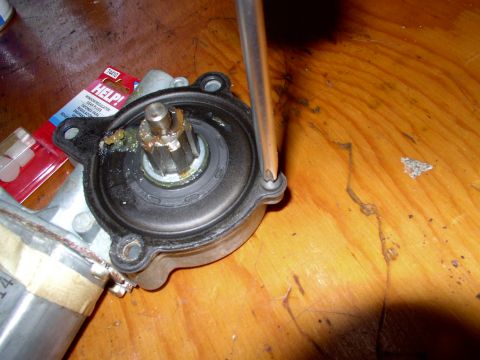
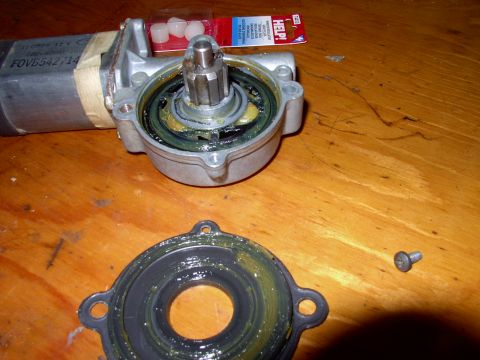
    Step 7: Remove the single philips screw and take the cover off the gearbox. Sixlitre reports everything looked normal (photo 1 of 2) Step 7: Remove the single philips screw and take the cover off the gearbox. Sixlitre reports everything looked normal (photo 2 of 2)
  8. Step 8

    Index mark the gear against the case before going further. The marks give a reference point for reassembly if anything moves.
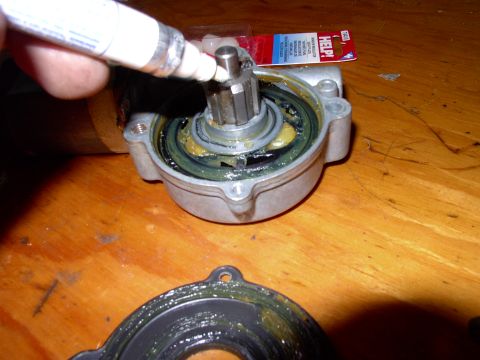
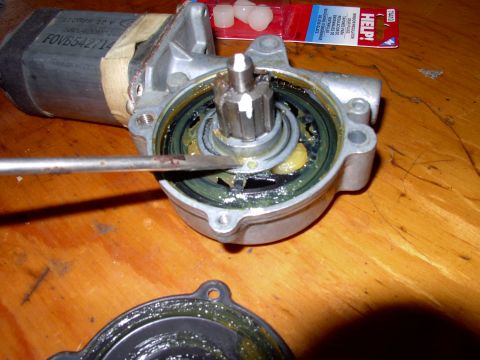
    Step 8: Index mark the gear against the case before going further. The marks give a reference point for reassembly if (photo 1 of 2) Step 8: Index mark the gear against the case before going further. The marks give a reference point for reassembly if (photo 2 of 2)
  9. Step 9

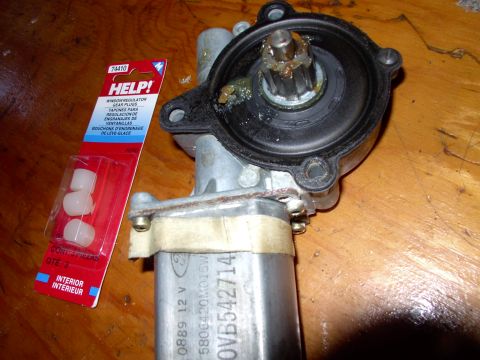
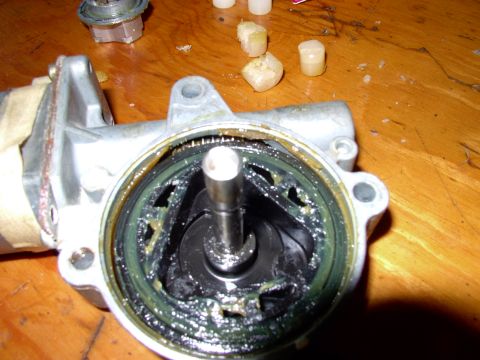
    Lift off the center gear to expose the nylon gear plugs, which Sixlitre found crushed. Compare the new plugs against the crushed originals and note the empty gear casing.
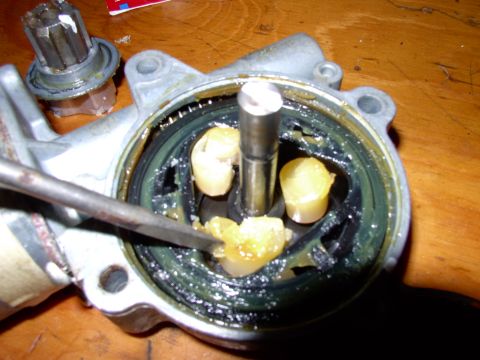
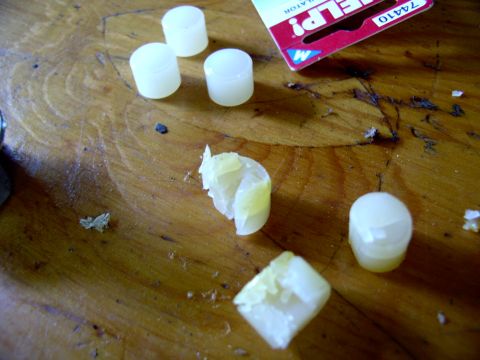
    Step 9: Lift off the center gear to expose the nylon gear plugs, which Sixlitre found crushed. Compare the new plugs (photo 1 of 3) Step 9: Lift off the center gear to expose the nylon gear plugs, which Sixlitre found crushed. Compare the new plugs (photo 2 of 3) Step 9: Lift off the center gear to expose the nylon gear plugs, which Sixlitre found crushed. Compare the new plugs (photo 3 of 3)
  10. Step 10

    Pre-spray the housing with motorcycle chain lube, then drop in the new nylon gear plugs. Sixlitre describes this as the whole of the gearbox internals and a cheap, fast and easy change.
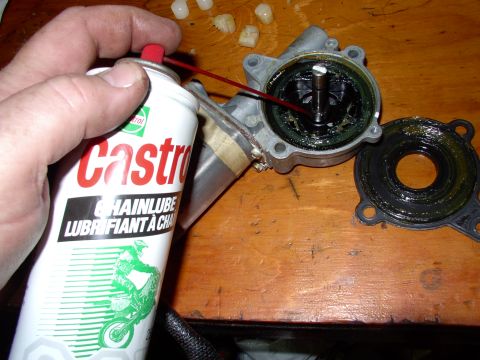
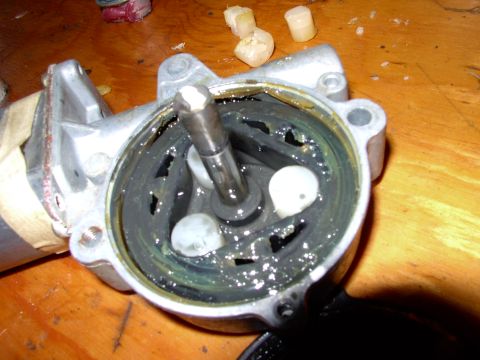
    Step 10: Pre-spray the housing with motorcycle chain lube, then drop in the new nylon gear plugs. Sixlitre describes (photo 1 of 2) Step 10: Pre-spray the housing with motorcycle chain lube, then drop in the new nylon gear plugs. Sixlitre describes (photo 2 of 2)
  11. Step 11

    Apply plenty of synthetic grease to the top gear and push it back onto the shaft, lined up with the index marks. Refit the cover with its one screw and bolt the motor back onto the cable gearbox through the new holes in the inner door; the photos end here, with no further reassembly shown.
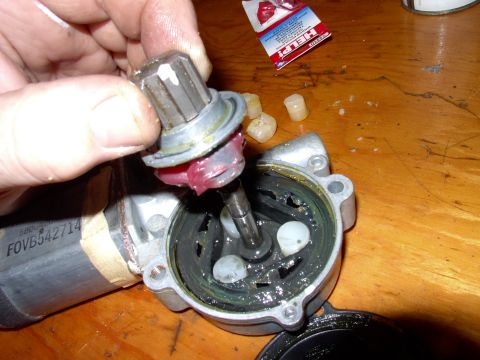
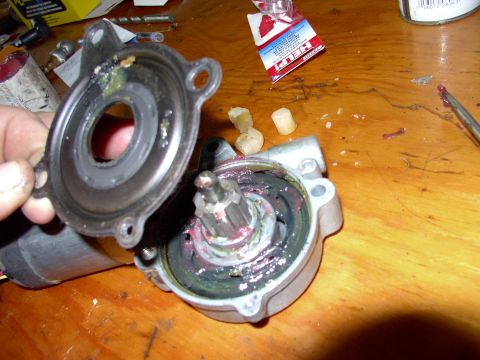
    Step 11: Apply plenty of synthetic grease to the top gear and push it back onto the shaft, lined up with the index (photo 1 of 2) Step 11: Apply plenty of synthetic grease to the top gear and push it back onto the shaft, lined up with the index (photo 2 of 2)

Some product links go to the supplier the owner bought from. SuperMotors does not earn a commission today; if that changes, this line will say so and creators will be paid from it.