Home/
Registry/
Ford/
Crown Victoria/
1998-2011/
2004 Ford Crown Victoria/
Photo
supermotors.net/registry/media/616862
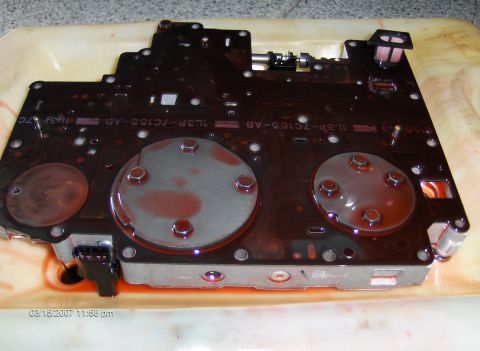
Blue Oval Chips Valve Body Kit Installation Instructions - Page 1, Pan Removal
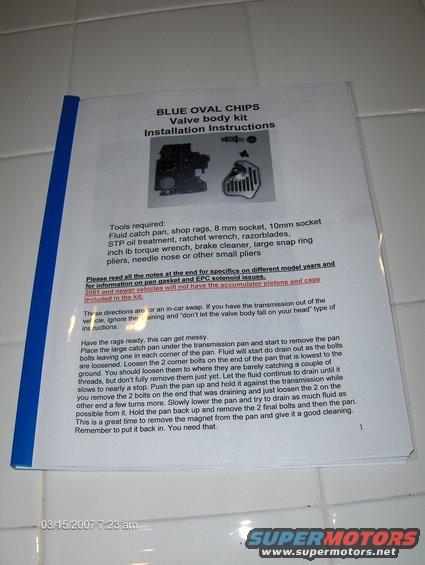
Blue Oval Chips valve-body kit install instructions listing required tools (8mm/10mm sockets, inch-lb torque wrench, snap ring pliers) and the transmission pan removal/drain procedure.
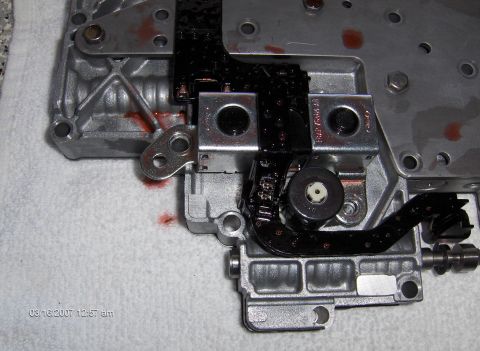
This document is page 1 of installation instructions for a Blue Oval Chips valve body kit for an automatic transmission. It lists the tools required: fluid catch pan, shop rags, 8 mm and 10 mm sockets, STP oil treatment, ratchet wrench, razorblades, inch-lb torque wrench, brake cleaner, large snap ring pliers, and needle nose or other small pliers. A highlighted warning directs the reader to notes at the end regarding different model years, pan gasket and EPC solenoid issues, and states that 2001 and newer vehicles will not have the accumulator pistons and caps included in the kit. The instructions are written for an in-car swap and begin with draining the transmission fluid: place a catch pan under the transmission pan, remove pan bolts while leaving one in each corner, loosen the two corner bolts on the lowest end to allow fluid to drain, then progressively lower and remove the pan while draining as much fluid as possible. The page ends by advising the reader to remove and clean the magnet from the pan and to remember to reinstall it. A photo at the top shows the valve body separator plate, filter, solenoid, and small kit components.
Is this accurate? Sign in to help verify it.
Frequently asked questions
- What tools are required to install the Blue Oval Chips valve body kit?
- Fluid catch pan, shop rags, 8 mm socket, 10 mm socket, STP oil treatment, ratchet wrench, razorblades, an inch-lb torque wrench, brake cleaner, large snap ring pliers, and needle nose or other small pliers.
- Do 2001 and newer vehicles get accumulator pistons and caps in the kit?
- No. The instructions state that 2001 and newer vehicles will not have the accumulator pistons and caps included in the kit.
- Can these instructions be used with the transmission out of the vehicle?
- Yes. The directions are written for an in-car swap, but if the transmission is out of the vehicle you can ignore the draining and 'don't let the valve body fall on your head' type of instructions.
- How do you drain the transmission pan according to these instructions?
- Place a large catch pan under the transmission pan, remove pan bolts leaving one in each corner, loosen the two corner bolts on the lowest end so they barely catch a couple of threads, let fluid drain until it slows, then remove the bolts on the draining end, loosen the other two, slowly lower the pan to drain remaining fluid, and finally remove the last two bolts and the pan.
- What should be done with the pan magnet?
- Remove the magnet from the pan, give it a good cleaning, and remember to put it back in — you need it.
Comments
More from this build


No comments yet.