
This document page contains technical diagrams and explanatory text, likely from a manual.
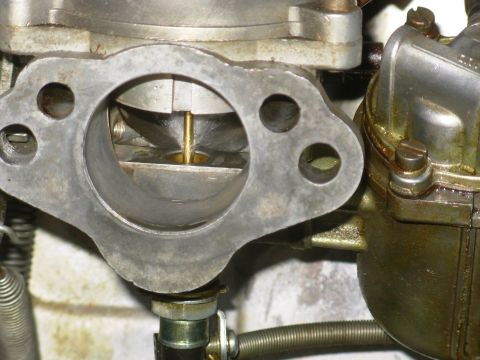
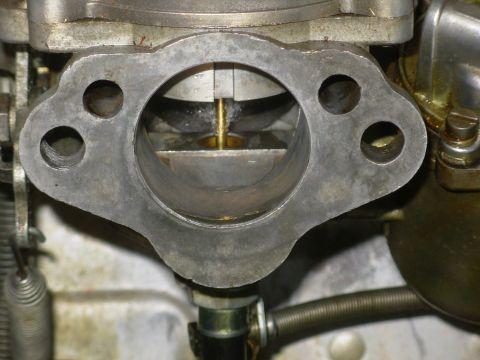
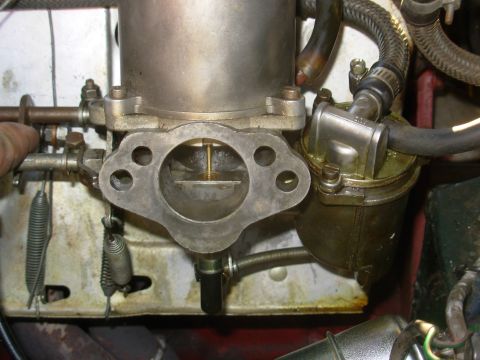
CARBURETTERS (22) Unscrew the two disc retaining screws (64). Open the throttle and ease out the disc from its slot in the throttle spindle (65). The disc is oval and will jam if care is not taken; store the disc in a safe place until required for reassembly. (23) Tap back the tabs of the tab washer (66) securing the spindle nut (67). Note the location of the lever arm (68) in relation to the spindle and carburetter body; remove the nut and detach the arm. A6694B Reassembling Carburettersall types NOTEBefore reassembling, examine all components A6277 its position as necessary. With the throttle closed there must be clearance between the throttle lever and the carburetter body. Tighten the screws fully and spread their split ends just enough to prevent turning. (4) Examine the oat needle and seating for damage. Check that the spring-loaded plunger in the end of the plastic-bodied needle operates freely. (5) Screw the seating into the oat-chamber carefully. Do not overtighten. Replace the needle in the seating, coned end rst. Test the assembly for leakage with air pressure. Ret the oat and lever to the lid and insert the hinge pin and invert the oat-chamber lid. With the needle valve held in the shut-off position by the weight of the oat only, there should be a g; to {g in. gap (arrowed) between the oat lever and the rim of the oat-chamber lid. (6) for wear and damage. Renew unserviceable components, ensuring that only parts to the correct specication (see TUNING DATA) are used. (7) Examine the lid gasket for re-use. Assemble the gasket on the lid and ret the lid to the oat- chamber in the position marked on dismantling. (1) Examine the throttle spindle and its hearings in the carburetter body. Check for excessive play. Renew parts as necessary. (2) Ret the spindle to the body. Assemble the operat- ing lever with tab washer and spindle nut, to the spindle. Ensure that when the stop on the lever is against the abutment on the carburetter body (i.e. throttle closed position) the countersunk ends of the holes in the spindle faCe outwards. Tighten the spindle nut and lock with the tab washer. (3) Insert the throttle disc in the slot in the spindle in its original position as marked. Manoeuvre the disc in its slot until the throttle can be closed, snap the throttle open and shut to centralize it in the bore of the carburetter, taking care not to damage the throttle limit valve. When assembled, the valve must be positioned at the bottom of the disc with the head of the valve towards'the engine. Fit two new disc retaining screws but do not fully tighten. Check visually that the disc closes fully, and adjust Engine Emission. Issue 3. 16939 423 Tighten the securing screws evenly. (8) Ret the oat-chamber assembly to the carburetter body and tighten the retaining bolt fully, making sure that the registers on the body and the chamber engage correctly. (9) Ret the piston lifting pin, spring and circlip. (10) Examine the piston assembly for damage on the piston rod and the outside surface of the piston. The piston assembly must be scrupulously clean. Use gasoline or methylated spirit (denatured alcohol) as a cleaning agent. Do not use abrasives. Wipe dry, using a clean dry cloth. (11) Clean inside the suction chamber and piston rod guide using gasoline or methylated spirit (de- natured alcohol) and wipe dry. Ret the damper and washer. Temporarily plug the piston-transfer holes (69) and t the piston into the; suction-cham- ber. Fit a nut and screw, with a large'at waSher under the head of the screw into oneof the suction 4-7
Comments
More from this build


No comments yet.