How-to
1983 Ford Bronco Radiator Leak Test and Temporary Patch
A used junkyard radiator was inspected, pressure tested, and traced to a tiny leak at one plastic tank, then patched from the inside with a piece of aluminum can and adhesive forced into the leak under pressure. The owner reports the tank failed about 3 years later and the radiator was replaced. The album closes with reference checks for the cap, coolant flow and air flow through the fins.
-
Step 1
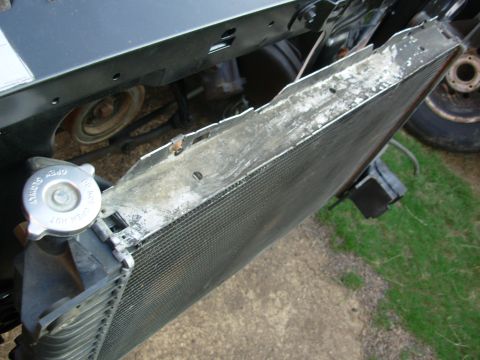
Inspect a junkyard radiator carefully before buying it, and test it while the yard's warranty still applies, usually 30 days. Steve83 weighed a couple hundred dollars for a new radiator against a junkyard unit as low as $30.
-
Step 2
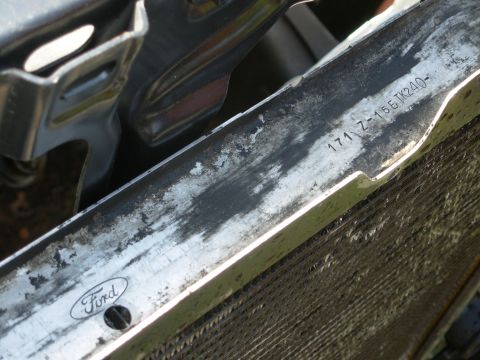
Identify the used radiator before fitting it. Steve83's unit is a roughly 19-year-old 2-core factory radiator with an ATF cooler from a '93 F150 4.9L E4OD.
-
Step 3
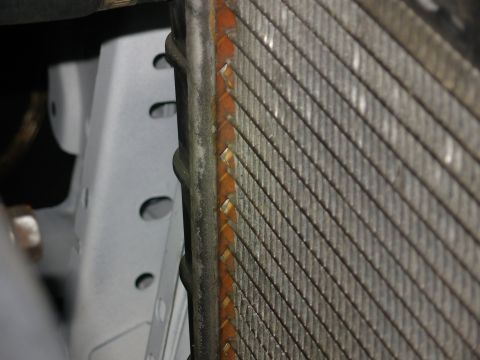
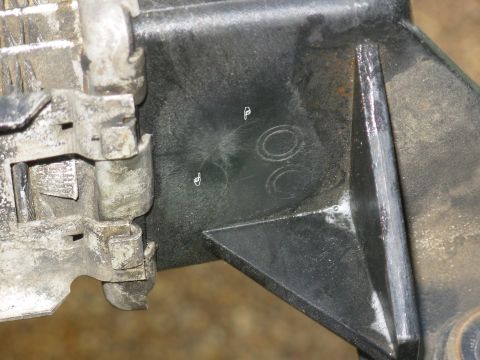
Examine the tank faces for cracks and judge whether they matter. Steve83 found cracks only on the rear face of the hot side with no coolant leaks or overheating, decided they were sealant that had cooked and curled away, and noted the radiator was holding about 12psi.
-
Step 4
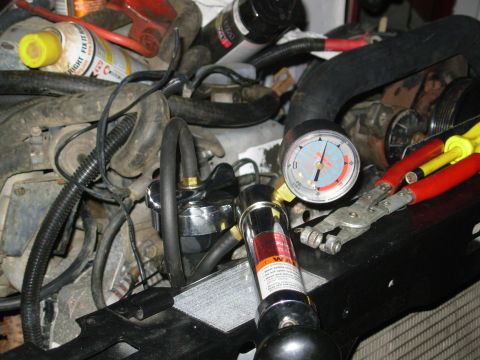
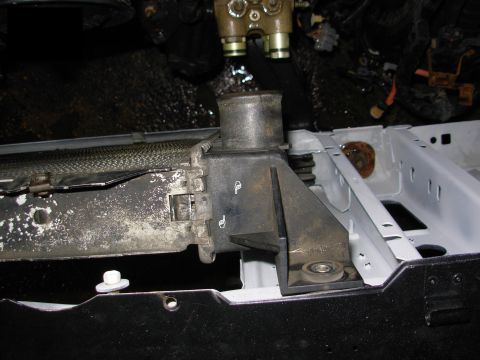
Pressurize the cooling system on the truck to the same pressure as the cap and listen for leaks. Steve83 tested at 13psi, heard a tiny fizz on the left side, and found only a speck of liquid at one end of a crack to mark the location.
-
Step 5
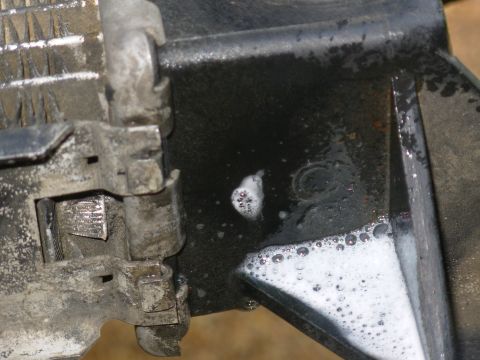
Remove the radiator, plug the ports, wet the tank with Windex, and pressurize again so the leak shows itself; it was apparent even at 7psi. Steve83 judged the leak repairable because it sits close to the large inlet nipple on a flat surface and the plastic is not degraded.
-
Step 6
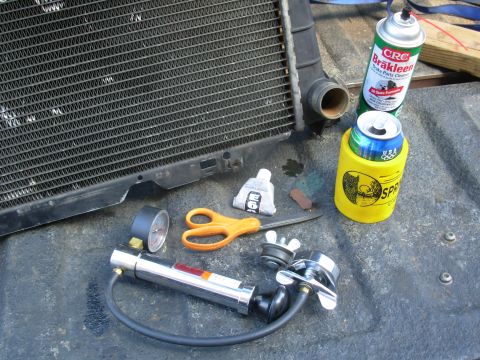
The plan: cut a patch of thin aluminum from a drink can, sand the patch and the inside of the radiator tank, then clean both surfaces with degreaser and brake cleaner and dry them thoroughly. Then quickly apply E6000 to the patch, insert it, press it into place and reinstall the plug.
-
Step 7
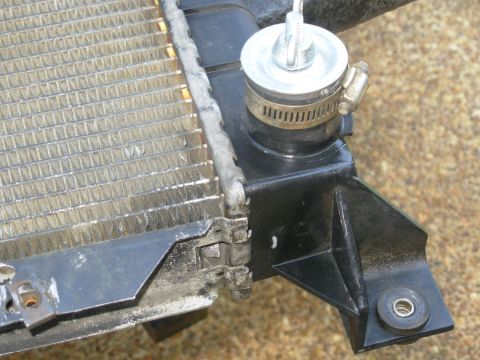
Fit a hose clamp around the nipple so the expansion plug cannot split it, then pressurize the radiator to 13psi to force the wet adhesive into the leak. Steve83 reports the leak diminished rapidly and eventually stopped, leaving one more leak nearby in the tank seam. In a later update, about 3 years after the repair, he reports this tank blew out farther down the side and he replaced the radiator with a new one, so treat this as a temporary fix.
-
Step 8
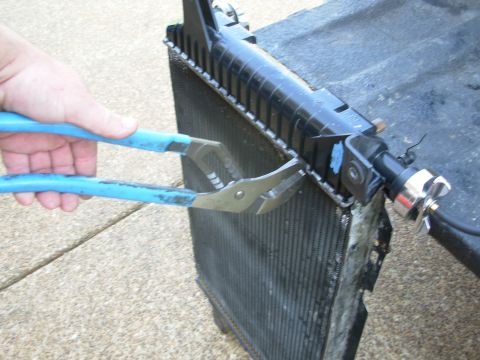
Apply gentle pressure to the tank seam to stop the remaining tiny leak. Steve83 says that as long as the cap only holds about 13psi, the repaired radiator should last many more years, and that if the leaks could not be sealed he would have returned the radiator to the junkyard for exchange or credit.
-
Step 9
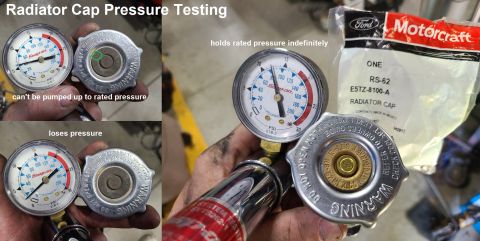
Test the radiator cap with a pressure tester and a cap adapter. Steve83 notes a new RS62 cap is about $10 if those tools are not available.
-
Step 10
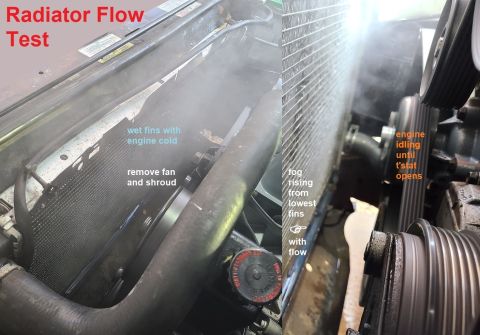
With the engine cold, the fan removed, and the radiator wet, watch the fins as the engine warms up; when the thermostat opens, fog rises off the fins over flowing tubes while plugged tubes stay wet at the bottom. Steve83 reports none stayed wet on this radiator, so its coolant side is working.
-
Step 11
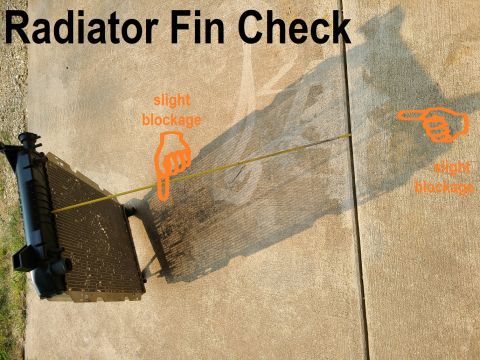
Check air flow through the fins by tilting the radiator directly at the sun and looking for areas where light is blocked. Steve83 notes the center is usually clearest because the evaporator fins catch most of the trash, while debris can go around the sides into the radiator fins near the tanks.
-
Step 12
The photos end with these checks. No reassembly or reinstallation of the radiator is shown.
Some product links go to the supplier the owner bought from. SuperMotors does not earn a commission today; if that changes, this line will say so and creators will be paid from it.