Home/
Registry/
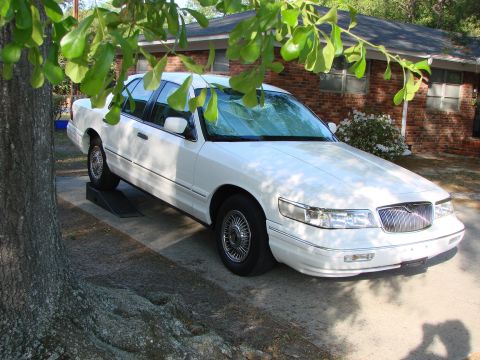
Mercury/
Grand Marquis/
1992-1997/
“Grand Marq.”/
Photo
supermotors.net/registry/media/1167344
Hinkley Ceiling Fan Wall Control Installation Instructions (2019) - Wiring Steps

Hinkley Lighting wall control installation page: connect TO FAN and TO POWER SUPPLY black wires plus green ground; control must be installed within 30 feet of fan.
This document is a single instruction page titled "Installing the Wall Control," published by Hinkley Lighting, Inc. (©2019, hinkley.com). It provides a four-step procedure for installing a wireless wall transmitter control for a ceiling fan. The page warns the installer to turn off power before beginning and notes that the control must be installed within 30 feet of the fan. Step 1 covers removing the existing wall plate and old switch from the wall outlet box (illustrated in Fig. 1, an exploded diagram labeling the outlet box, switch, and wall plate). Step 2 details wiring: one black wire from the wall connects to the transmitter wire labeled "TO FAN," and the transmitter wire labeled "TO POWER SUPPLY" connects to the remaining black wire from the wall (the A/C supply source). Step 3 instructs connecting the green ground wire from the switch to the ground wire on the wall outlet box. Step 4 covers mounting the wall transmitter to the outlet box with provided screws and attaching the wall plate (illustrated in Fig. 2, showing the transmitter and decorative wall plate). Note: despite being uploaded to a 1995 Mercury Grand Marquis gallery, this is a household ceiling fan control instruction sheet, not an automotive document.
This document covers 2019, which may differ from this 1995 Mercury Grand Marquis.
Is this accurate? Sign in to help verify it.
Frequently asked questions
- How far from the fan can the wall control be installed?
- The document states the control must be installed within 30 feet of the fan.
- How do I wire the wall transmitter?
- Connect one black wire from the wall to the transmitter wire labeled "TO FAN," and connect the transmitter wire labeled "TO POWER SUPPLY" to the remaining black wire from the wall (the A/C supply source).
- What do I do with the green ground wire?
- Connect the green ground wire from the switch to the ground wire on the wall outlet box.
- Should power be on during installation?
- No — the document says to remember to turn off the power before you begin.
- How is the transmitter mounted?
- Install the wall transmitter on the existing wall outlet box using the screws provided, then attach the wall plate with the mounting screws to finish the installation (Fig. 2).
Comments
More from this build


No comments yet.