How-to
1983 Ford Bronco Mark VIII Electric Fan Conversion
A mechanical engine-driven fan and shroud were removed from a 1983 Ford Bronco and replaced with a salvaged electric fan from a 1996 Lincoln Mark VIII 4.6L. The fan was mounted on fabricated aluminum L brackets and wired through a temperature control, a solenoid and an override switch housed in a project box.
-
Step 1
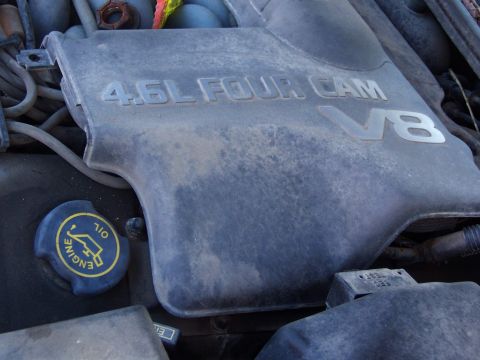
Source an electric fan from a 1996 Lincoln Mark VIII 4.6L engine. Fred Willson bought this one from a local auto recycler for $15.00.
-
Step 2
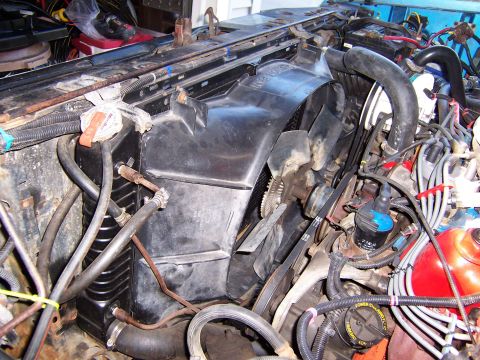
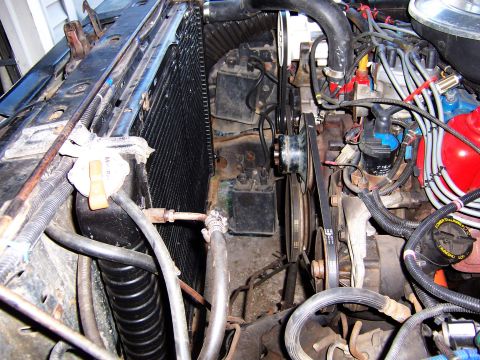
Remove the mechanical fan and its shroud from the engine. Clear the area so the electric fan can take its place.
-
Step 3
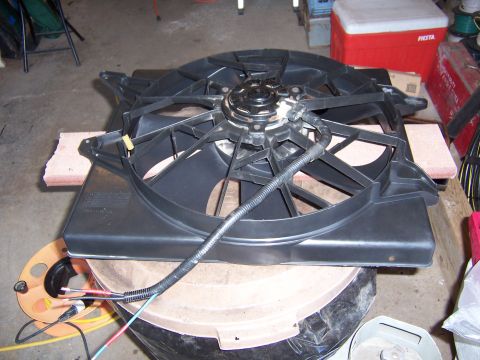
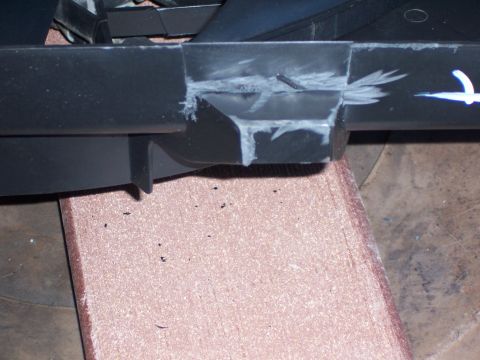
Prepare the 4200 CFM Lincoln Mark VIII fan for mounting. Fred Willson reports the only modification necessary was to cut slots in the original mounting brackets so aluminum L brackets could be fitted to the shroud, using four bolts and nuts on each side.
-
Step 4
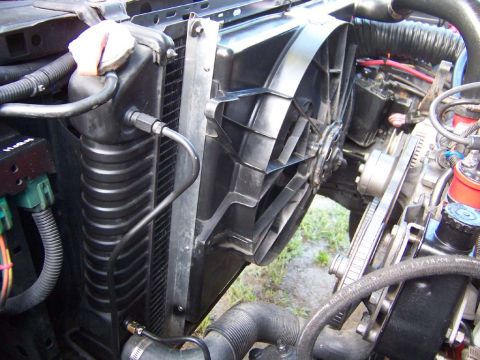
Fabricate the mounting bracket from 3/4 inch aluminum L stock, using 8 1/2 inch bolts and washers to attach it to the fan shroud. Bolt the top of the L bracket with two bolts and capture nuts, and let the bottom of the bracket lock into the radiator support without bolts.
-
Step 5
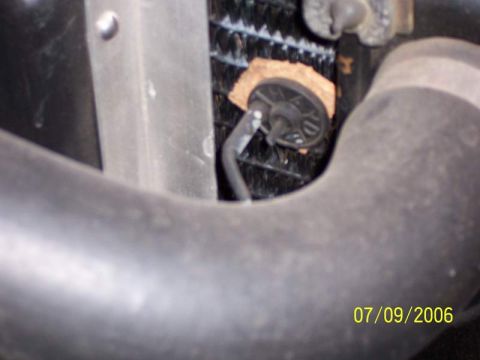
Mount the temperature probe directly under the return water hose, through the radiator where the water enters from the engine. Isolate the probe from air flow with a small disc covering the radiator fins in front of it, which Fred Willson notes is necessary for proper operation.
-
Step 6
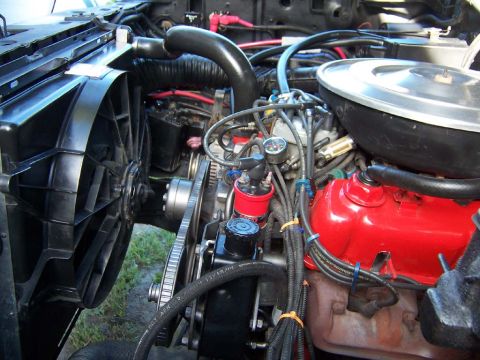
Complete the installation of the fan and shroud assembly. Adjust the temperature at which the fan turns on according to the writeup supplied with the control.
-
Step 7
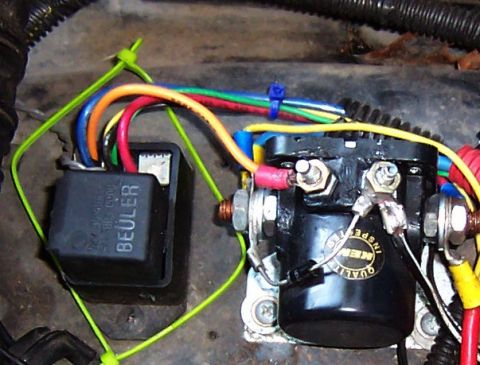
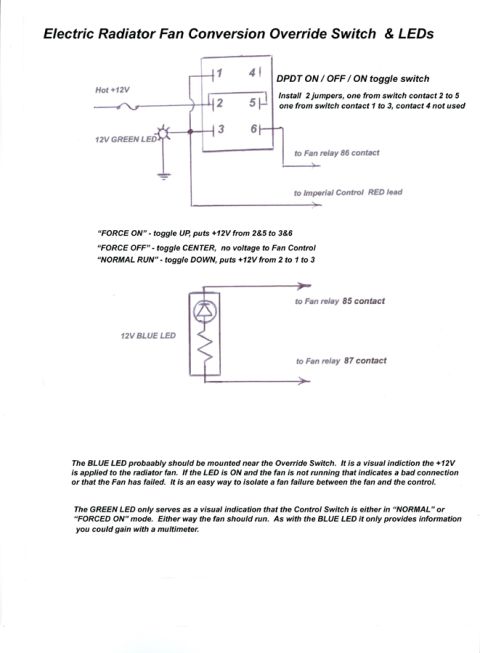
Wire the fan control relay so it operates a solenoid rated at 80 amps full time. The solenoid is needed because the fan draws 100A start current and 33A running current while the control contacts are rated at only 30 amps; include a diode to shunt the voltage spikes the inductive fan motor generates as it shuts off.
-
Step 8
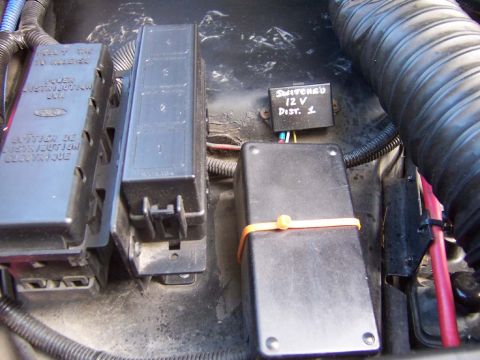
Cover the control components with the top section of a Radio Shack project box. This protects them from water sprayed directly onto the assembly.
-
Step 9
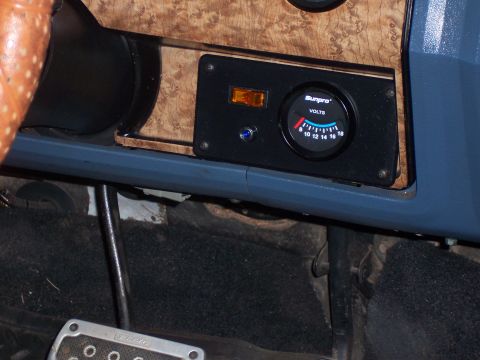
The photo shows an amber rocker switch and a blue indicator set in a dash panel beside a voltmeter. In the owner's caption, Fred Willson says he used the bottom of the Radio Shack project box to mount a fan override switch and an indicator, with the indicator connected to the solenoid contact that supplies voltage to the fan, so a fan failure can be told apart from a control failure. He also notes the voltmeter has nothing to do with the fan installation.
-
Step 10
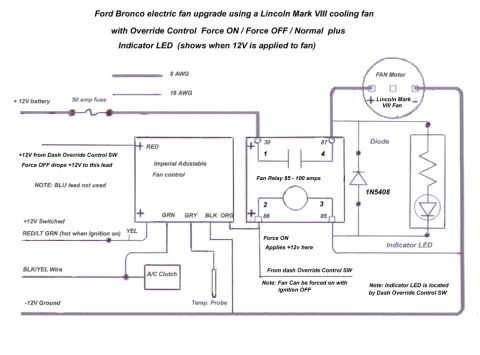
Refer to the wiring diagrams for the installation, including one showing how a standard DPDT toggle switch gives 3 function control. The album's photos end with these diagrams.
Some product links go to the supplier the owner bought from. SuperMotors does not earn a commission today; if that changes, this line will say so and creators will be paid from it.