Home/
Registry/
Ford/
Bronco/
1980–1986/
“That dirty old truck”/
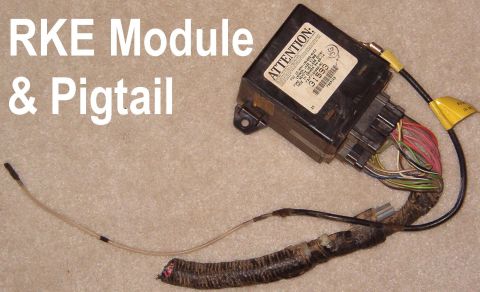
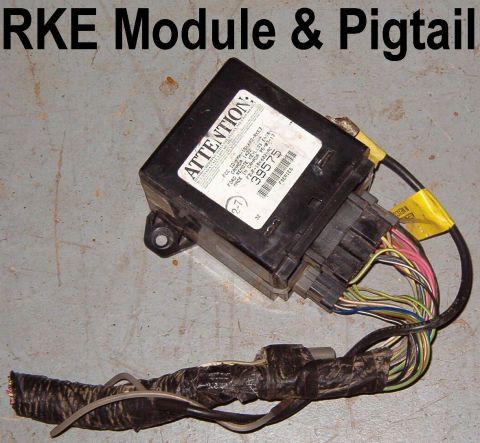
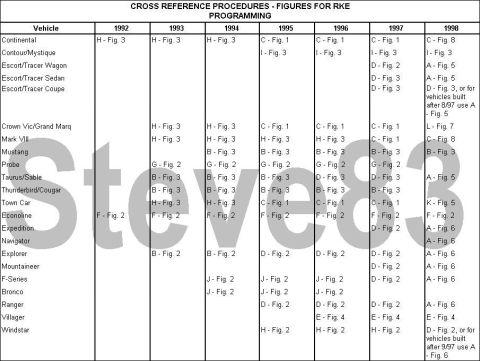
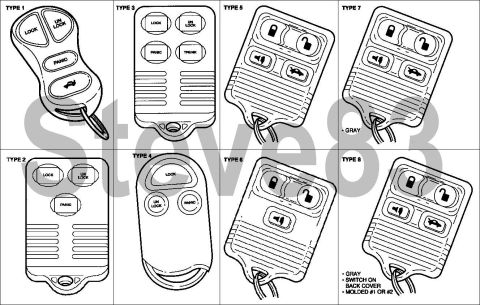
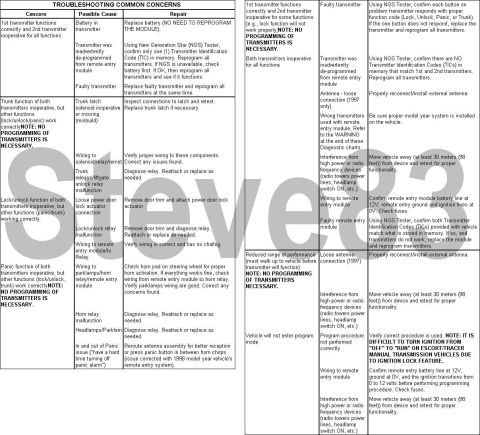
TSB 97-24-13 RKE
supermotors.net/registry/2742/54328
Album section
TSB 97-24-13 RKE
From 1983 Ford Bronco “That dirty old truck” — documented by Steve83.
6 photos
![1983 Ford Bronco - SOLD Lincoln Type 3 Remote TESTED WORKING [url=https://www.ebay.com/itm/381638543056]aftermarket copies that I've bought FSA 95B79 1994-95…](https://www.supermotors.net/thumb/530095-480.jpg)