How-to
1982 Ford Bronco TTB to Solid Axle Swap (Dana 44)
Daryl Peacock's photos follow a 1982 Ford Bronco front end conversion from Twin Traction Beam to a solid Dana 44 from an F150: the donor axle, the TTB removal, the track bar mount and custom drag link fabrication, and the first flex and alignment checks. The photos do not show every stage, such as bolting the axle in, so this is an outline of what he documented rather than a complete procedure.
-
Step 1
Start with the donor axle and confirm its condition before committing to the swap. Daryl Peacock sourced a solid Dana 44 said to come from a 79 F150, with 2-3/4 inch diameter tubes running solid to the knuckles and not welded under the radius arm attachment points, and reports the ball joints and steering components had recently been replaced.

-
Step 2
Plan to carry the existing differential internals across to the new housing. Daryl Peacock chose this route because the ARB air locker and 4.56 ratios from the TTB bolt into the new diff, which is why a Dana 60 was not used and, by his account, saved a lot of money.

-
Step 3
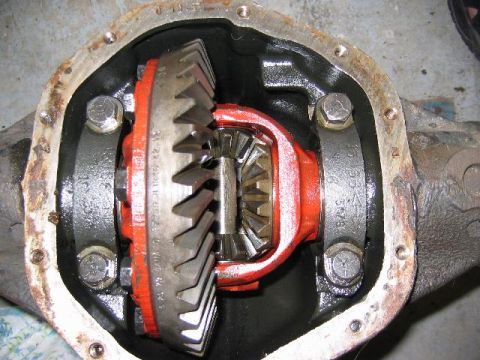
Inspect the donor centre section before setting it aside. Daryl Peacock found the ring and pinion serviceable but the spider gears showing wear marks, and notes the donor is a 2 pinion centre where the ARB air locker is a 4 pinion and much stronger.
-
Step 4
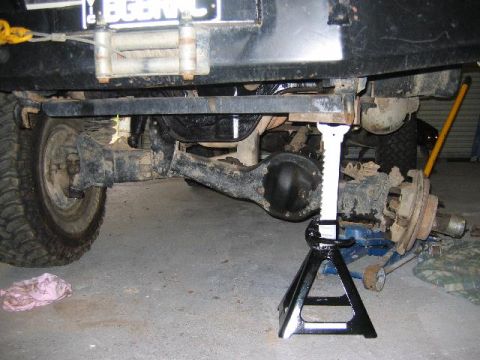
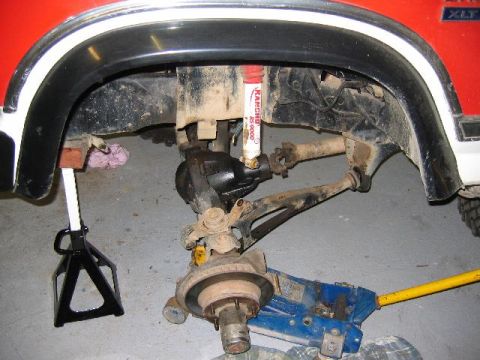
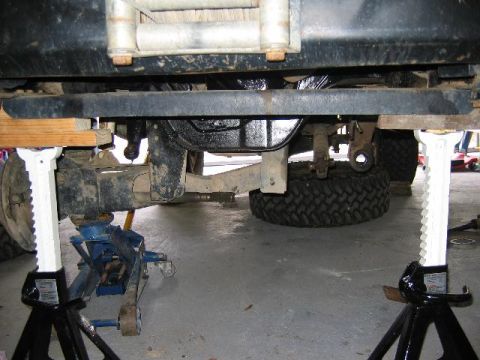
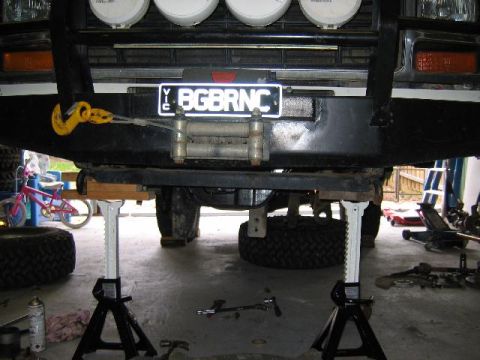
Begin the swap by removing the TTB front differential and its beams from under the truck. Daryl Peacock describes the removal as fairly simple and reports being happy with the progress at the halfway point.
-
Step 5
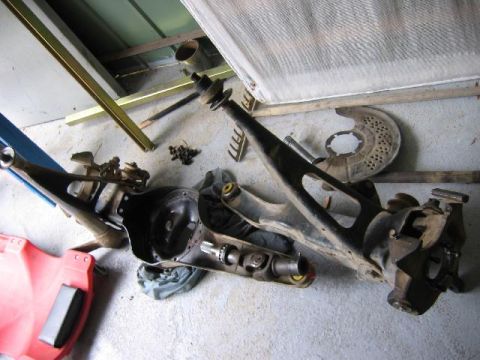
Pull the assembly clear and lay out the TTB hardware that comes off with it. Daryl Peacock characterises the TTB design as good for fast driving and jumping but bad for articulation.
-
Step 6
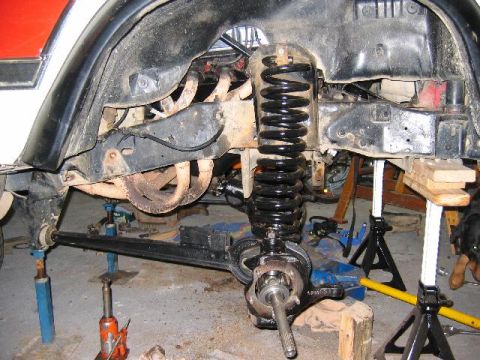
Move the solid axle and the rest of the parts into position under the truck. Daryl Peacock decided to keep the Superlift drop down radius arm brackets for the time being, with the option of swapping to F150 arms and fabricating a bracket for them later if they cause trouble.

-
Step 7
Fabricate and fit the panhard rod and track bar mount, which Daryl Peacock calls the hardest part of the job. The bracket used is off an F250 or F150 4x4, and fabrication was required because the mount had to go in this position on the Australian vehicle.

-
Step 8
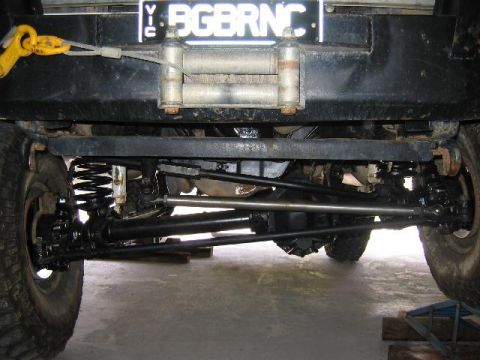
Fit a custom drag link and a modified track bar and panhard rod. Daryl Peacock built the drag link adjustable and on F250 tie rod ends so worn ends can be replaced individually and the vehicle runs a single type of tie rod end rather than a mix.

-
Step 9
Install a differential protector under the housing. Daryl Peacock used one from Jeffs Bronco Grave yard and reports it as a nice fit and very strong.

-
Step 10
Look over the finished front end. Daryl Peacock reports it drives well even with no damper or sway bar, plans to take it for an alignment to find out what degree bushes to use, is still running the 4" Superlift drop brackets from the original lift, and may swap them for F150 style if clearance becomes an issue.

-
Step 11
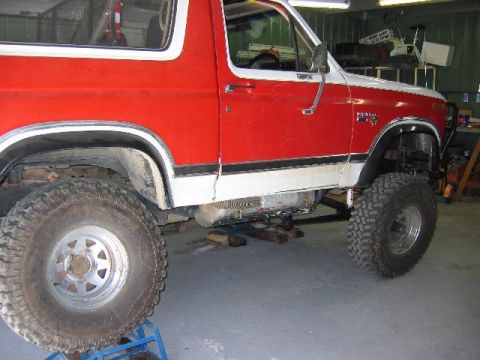
The next photos are a quick flex check done in the garage, taken after the alignment he planned in the previous step. Daryl Peacock reports the alignment went well and needed only a slight toe adjustment, with caster at -3 and -3.5, and says he will take it out in a week or so to see how it performs.


-
Step 12
The remaining photos show the truck from underneath and from the side with a front wheel raised in the garage. The photos end here, with no further build steps shown.
Some product links go to the supplier the owner bought from. SuperMotors does not earn a commission today; if that changes, this line will say so and creators will be paid from it.