SuperMotors SuperMotors SUPERMOTORS Search — try “orange Bronco on 35s”
Home/ Registry/ Ford/ Bronco/ 1980-1986/ “That dirty old truck”/ Photo supermotors.net/registry/media/1168567

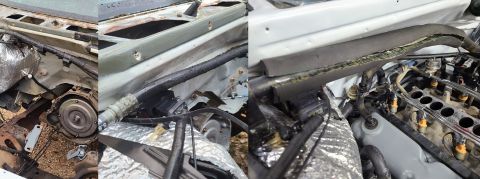
Amp or Inverter Wire Penetration IF THE IMAGE IS TOO SMALL, clic…
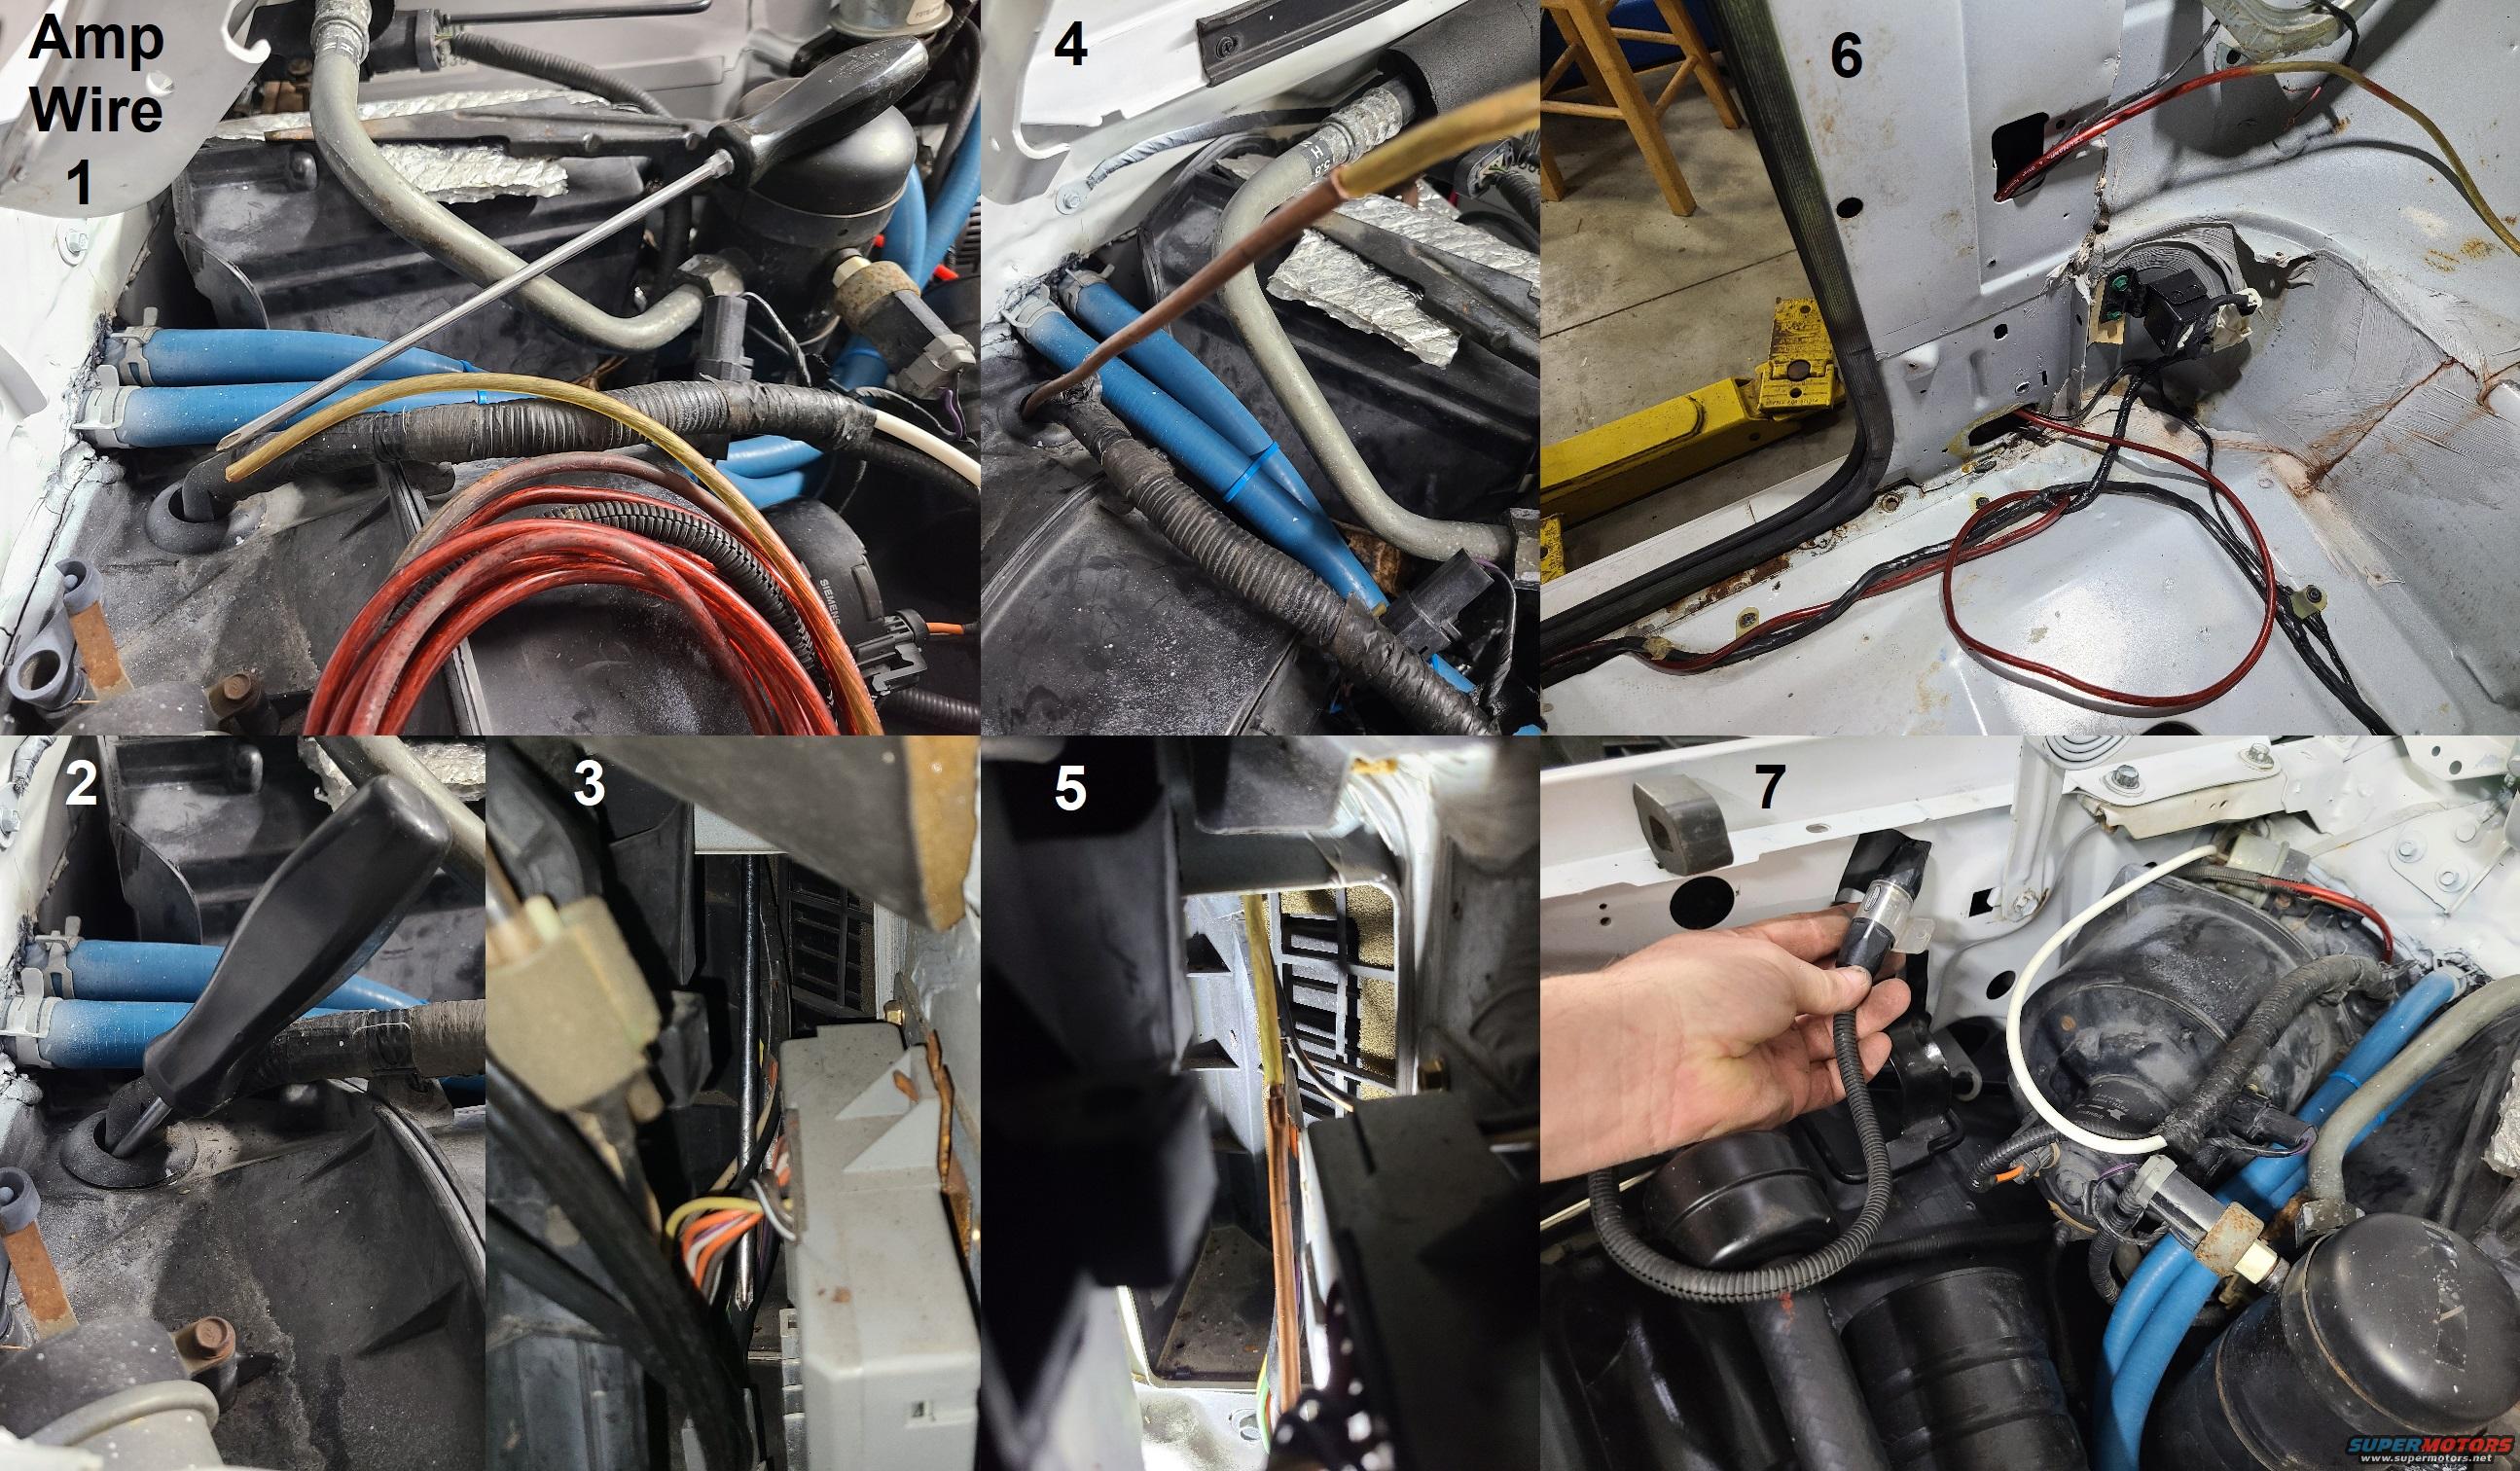
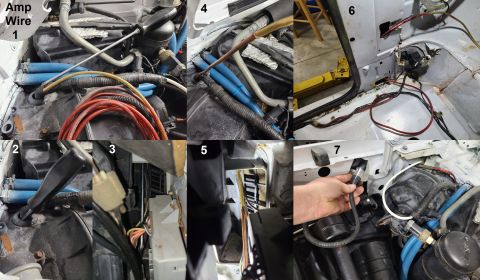
Amp or Inverter Wire Penetration
IF THE IMAGE IS TOO SMALL, click it.

Instead of drilling a hole in the steel firewall to pull a heavy-gauge high-current wire through, simply re-use the factory grommet in the HVAC box.

1) Spread the wires in the grommet gently with a long Phillips screwdriver to make room for the new addition(s).
2) Or (for more or larger wires) puncture the grommet.
3) This penetration brings the wires through the large firewall opening for the recirculate (cabin) air for the HVAC system beside the right kick panel (lower A-pillar).
4) A soft Copper tube may be used as a needle to thread the new wire(s) through the grommet.
5) The tube should be close to the size of the new wire(s).
6) Route the wire under the threshold for installations anywhere behind the front seats. Follow the factory harness routing when possible.
7) DO NOT connect the fuse until the wire is routed and insulated or connected at the far end, so it doesn't short to ground. For more protection, route the new wire through the fender, which is also a good place to keep the fuse holder away from damage.

Amp or Inverter Wire Penetration
IF THE IMAGE IS TOO SMALL, click it.

Instead of drilling a hole in the steel firewall to pull a heavy-gauge high-current wire through, simply re-use the factory grommet in the HVAC box.

1) Spread the wires in the grommet gently with a long Phillips screwdriver to make room for the new addition(s).
2) Or (for more or larger wires) puncture the grommet.
3) This penetration brings the wires through the large firewall opening for the recirculate (cabin) air for the HVAC system beside the right kick panel (lower A-pillar).
4) A soft Copper tube may be used as a needle to thread the new wire(s) through the grommet.
5) The tube should be close to the size of the new wire(s).
6) Route the wire under the threshold for installations anywhere behind the front seats. Follow the factory harness routing when possible.
7) DO NOT connect the fuse until the wire is routed and insulated or connected at the far end, so it doesn't short to ground. For more protection, route the new wire through the fender, which is also a good place to keep the fuse holder away from damage.

Owner caption · Photo 0 of 5000

Is this accurate? Sign in to help verify it.
Comments

No comments yet.

More from this build

1983 Ford Bronco photo Volvo fan relay wiring diagram for a 2-speed electric cooling fan with temperature switch '96 Bronco and F-Series trailer adapter wiring diagram with color-coded wires and connector pinouts Trailer/camper wiring diagrams for 1994 and 1996 with circuit paths and connector callouts Website security verification page with Cloudflare logo and 'Verify you are human' checkbox Website security verification page for ford150.net, showing a bot check in progress 1995 Ford F-150 front grille, headlights, and bumper with a tow hook Front end of a white 1990s Ford truck with blue oval grille badge and black headlight trim, collage

More 1980-1986 Broncos