This document details the removal and installation procedures for a vehicle's transmission and related components.
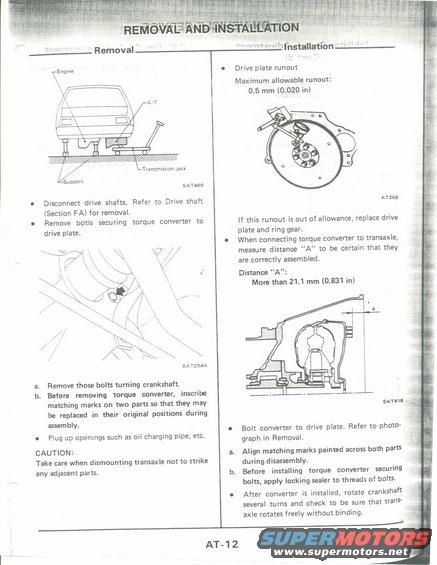
Removal ' Engme TranSmISSIDn .ack 7 ,/ LUDDD" 0 Disconnect drive shafts. Refer to Drive shaft (Section FA) for removal, 0 Remove botls securing torque converter to drive plate. m , . , y" t x Q) \ ' , \ /\JI<#V f f , L . sense SAWMA a. Remove those bolts turning crankshaft b. Before removing torque converter, inscribe matching marks on two parts so that they may be replaced in their original positions during assembly. 0 Plug up openings such as oil charging pipe, etc. CAUTION: Take care when dismounting transaxle not to strike any adjacent parts. MmilstallatfonW Drive plate runout Maximum allowable runout: 0.5 mm (0.020 in) Anee If this runout is out of allowance, replace drive plate and ring gearr When connecting torque converter to transaxle. measure distance "A" to be certain that they are correctly assembled. Distance A": More than 21.1 mm (0.831 in) snus e 7 Bolt converter to drive plate. Refer to photo- graph in Removal. Align matching marks painted across bom pam during disassembly. Before installing torque converter securin hols, apply locking sealer to threads of bolts. After converter is installed, rotate cranksha several turns and check to be sure that trans- axle rotates freely without binding. AT-12
Comments
More from this build

No comments yet.