Home/
Registry/
Ford/
Bronco/
1987-1991/
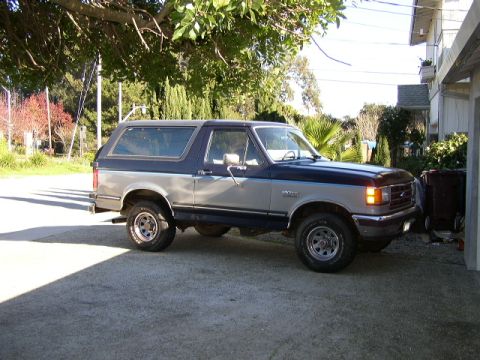
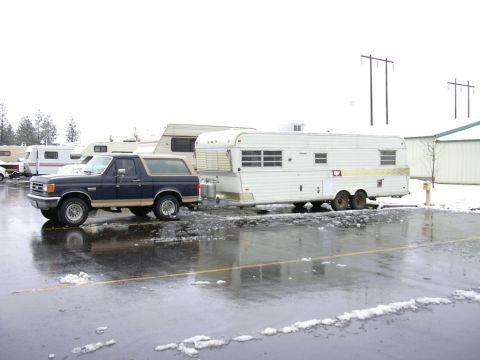
1991 Ford Bronco/
Photo
supermotors.net/registry/media/503388
Installation instruction document page 2, steps 3-5 for body and…
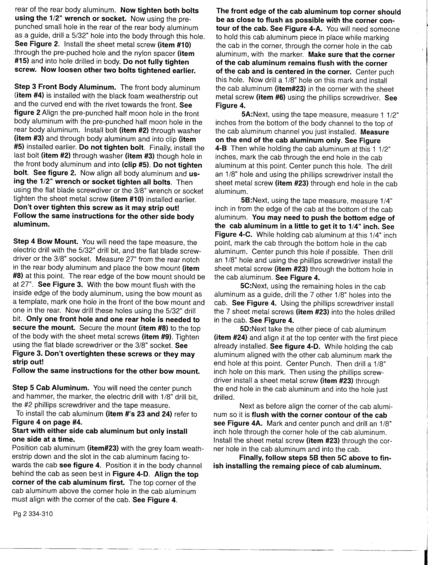
Page 2 of installation instructions (334-310) covering steps 3-5: front body aluminum, bow mount, and cab aluminum installation, with references to Figures 2-4 and various item numbers.
rear of the rear body aluminum. Now tighten both bolts using the 1/2" wrench or socket. Now using the pre- punched small hole in the rear of the rear body aluminum as a guide, drill a 5/32" hole into the body through this hole. See Figure 2. Install the sheet metal screw (item #10) ,through the prepuched hole and the nylon spacer (item #15) and into hole drilled in body. Do not fully tighten screw. Now loosen other two bolts tightened earlier. Step 3 Front Body Aluminum. The front body aluminum (item #4) is installed with the black foam weatherstrip out and the curved end with the rivet towards the front. See figure 2 Align the pre-punched half moon hole in the front body aluminum with the prepunched half moon hole in the rear body aluminum. Install bolt (item #2) through washer (item #3) and through body aluminum and into clip (item #5) installed earlier. Do not tighten bolt. Finally, install the last bolt (item #2) through washer (item #3) though hole in the front body aluminum and into (clip #5). Do not tighten bolt. See figure 2. Now align all body aluminum and us- ing the 1/2" wrench or socket tighten all bolts. Then using the flat blade screwdiver or the 3/8" wrench or socket tighten the sheet metal screw (item #10) installed earlier. Don't over tighten this screw as it may strip out! Follow the same instructions for the other side body aluminum. Step 4 Bow Mount. You will need the tape measure, the electric drill with the 5/32" drill bit, and the flat blade screw- driver or the 3/8" socket. Measure 27" from the rear notch in the rear body aluminum and place the bow mount (item #8) at this point. The rear edge of the bow mount should be at 27". See Figure 3. With the bow mount flush with the inside edge of the body aluminum, using the bow mount as a template, mark one hole in the front of the bow mount and one in the rear. Now drill these holes using the 5/32" drill bit. Only one front hole and one rear hole is needed to secure the mount. Secure the mount (item #8) to the top of the body with the sheet metal screws (item #9). Tighten using the flat blade screwdriver or the 3/8" socket. See Figure 3. Don't overtighten these screws or they may strip out! Follow the same instructions for the other bow mount. Step 5 Cab Aluminum. You will need the center punch and hammer, the marker, the electric drill with 1/8" drill bit, the #2 phillips screwdriver and the tape measure. To install the cab aluminum (item #s 23 and 24) refer to Figure 4 on page #4. Start with either side cab aluminum but only install one side at a time. Position cab aluminum (item#23) with the grey foam weath- erstrip down and the slot in the cab aluminum facing to- wards the cab see figure 4. Position it in the body channel behind the cab as seen best in Figure 4-D. Align the top corner of the cab aluminum first. The top corner of the cab aluminum above the corner hole in the cab aluminum must align with the corner of the cab. See Figure 4. Pg 2 334-310 The front edge of the cab aluminum top corner should be as close to flush as possible with the corner con- tour of the cab. See Figure 4-A. You will need someone to hold this cab aluminum piece in place while marking the cab in the corner, through the corner hole in the cab aluminum, with the marker. Make sure that the corner of the cab aluminum remains flush with the corner of the cab and is centered in the corner. Center puch this hole. Now drill a 1/8" hole on this mark and install the cab aluminum (item#23) in the corner with the sheet metal screw (item #6) using the phillips screwdriver. See Figure 4. 5A:Next, using the tape measure, measure 1 1/2" inches from the bottom of the body channel to the top of the cab aluminum channel you just installed. Measure on the end of the cab aluminum only. See Figure 4-B Then while holding the cab aluminum at this 1 1/2" inches, mark the cab through the end hole in the cab aluminum at this point. Center punch this hole. The drill an 1/8" hole and using the phillips screwdriver install the sheet metal screw (item #23) through end hole in the cab aluminum. SB:Next, using the tape measure, measure 1/4" inch in from the edge of the cab at the bottom of the cab aluminum. You may need to push the bottom edge of the cab aluminum in a little to getit to 1/4" inch. See Figure 4-C. While holding cab aluminum at this 1/4" inch point, mark the cab through the bottom hole in the cab aluminum. Center punch this hole if possible. Then drill an 1/8" hole and using the phillips screwdriver install the sheet metal screw (item #23) through the bottom hole in the cab aluminum. See Figure 4. 50:Next, using the remaining holes in the cab aluminum as a guide, drill the 7 other 1/8" holes into the cab. See Figure 4. Using the phillips screwdriver install the 7 sheet metal screws (item #23) into the holes drilled in the cab. See Figure 4. 5D:Next take the other piece of cab aluminum (item #24) and align it at the top center with the first piece already installed. See figure 4-D. While holding the cab aluminum aligned with the other cab aluminum mark the end hole at this point. Center Punch. Then drill a 1/8" inch hole on this mark. Then using the phillips screw driver install a sheet metal screw (item #23) through the end hole in the cab aluminum and into the hole just drilled. Next as before align the corner of the cab alumi num so it is flush with the corner contour of the cab see Figure 4A. Mark and center punch and drill an 1/8" inch hole through the corner hole of the cab aluminum. Install the sheet metal screw (item #23) through the cor- ner hole in the cab aluminum and into the cab. Finally, follow steps 58 then 5C above to fin- ish installing the remaing piece of cab aluminum.
Is this accurate? Sign in to help verify it.
Comments
More from this build


No comments yet.