
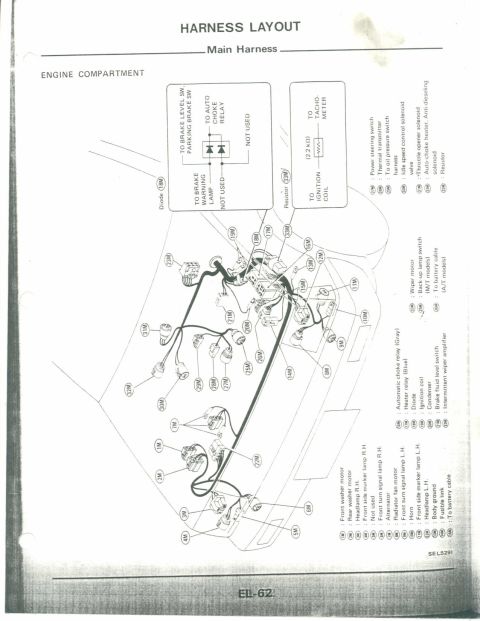
This document page provides repair instructions for component parts, specifically focusing on the mainshaft and gears.
REPAIR FOR COMPONENT PARTS Bearing 1. Thoroughly clean bearing and dry with com~ pressed air. 2, Check bearings for wear, scratches, pitching or flaking. Check tapered roller bearing for a burned out portion as shown in the figure below If dam~ aged, replace outer and inner races as a set. Particular paint to be checked sepass ASSEMBLY 1. Place inserts in the three grooves on the cou- pling sleeve (lst 81 2nd synchronizer, 3rd & 4th synchronizer, 5th synchronizerl. m N t , 71? 1st-an side i 0.! 1mm! szW .3 mm 29.! in: 8330:. I'm ' e l "iii-4m & 5th side Mainshaft and Gears (Contd) 2. Apply gear oil to lst gear inner surface, the install lst gear and 1st baulk ring. 3. Press lst 81 2nd synchronizer hub, paying a tention to its direction ~lstgear,<: ;;:- .. 4. Install snap ring of proper thickness that wil minimize clearance of groove in mainshah. Allowable clearance of groove: 0 - 0.15 mm (0 -0.9059 in) 1st & 2nd synchronizer hub snap ring: mm (in; Pm numbr _ ; . - , - Thickness 32257v1300 20 (0.079) 3225701801 2.1 (0.083)
Comments
More from this build

No comments yet.