This document page provides instructions and diagrams for drive shaft assembly and boot replacement.
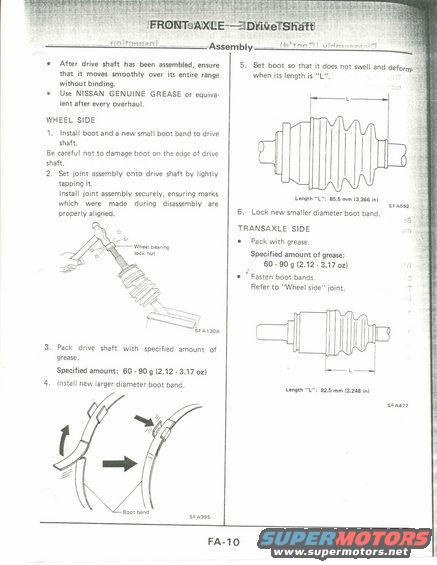
.-. ..._ rin1*:}nn2nl__,~___l Assembly , 0 After drive shaft has been assembled, ensure that it moves smoothly over its entire range without binding. 0 Use NlSSAN GENUINE GREASE or equiva- lent after every overhaul. WHEEL SIDE 1. Install boot and a new small boot band to drive shaft. Be careful not to damage boot on the edge of drive shaft. 2. Set joint assembly onto drive shaft bv lightly tapping it, Install joint assembly securely, ensuring marks which were made during disassembly are properly aligned. Wheel bearing lock nut 3. Pack drive shaft with specified amount of grease. Specified amount: 60 - 90 g (2.12 - 3.17 oz) 4. Install new larger diameter boot band. BDDI hand SF A395 5. Set boot so that it does not swell and deform. when its length Is "L" Ill Length "L": 85.5 mm (3366 in) 6. Lock new smaller diameter boot band, TRANSAXLE SIDE 1 I Pack with grease. Specified amount of grease: 60 - 90 g (2.12 - 3.17 oz) 0 ' Fasten boot bands. ? Refer to "Wheel side joint. F_L*._ L-nnth L": 32.5 mm (1248 m) SFA477 FA-10
Comments
More from this build

No comments yet.