SuperMotors SuperMotors SUPERMOTORS Search — try “orange Bronco on 35s”
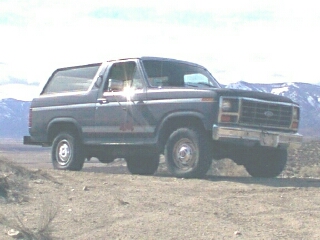
Home/ Registry/ Ford/ Bronco/ 1980-1986/ “That dirty old truck”/ Photo supermotors.net/registry/media/1168104

'92-96 Dash Register ( (F2TZ19893C, F3TZ19893H)) Repair IF THE I…

'92-96 Dash Register ( (F2TZ19893C, F3TZ19893H)) Repair
IF THE IMAGE IS TOO SMALL, click it.

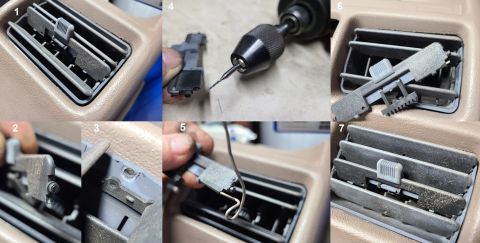
1) This is a common problem with these registers - someone jams a finger between the 3rd fin & another, and the peg shears off leaving the master fin independent of the slave fins (which still move together). Normally, I salvage a master fin from another register with different damage, but I wanted to see how hard it is to repair one.
2) By gently bending the fin and pushing to one side, its pivot peg can be removed from the hole on the other side.
3) If necessary, extract the remains of the sheared peg.
4) I found that a 1/16" drill bit is too large, but I found this smaller carbide burr to be a good fit. I eyeballed it to make a ~1/8" deep hole in the damaged fin.
5) This soft wire is about the same size, so I bent it to make a handle with enough length to protect my fingers as I heated it with a torch & then inserted it in the plastic.
6) After it cooled, I cut the wire off flush with the fin's edge.
7) I inserted the repaired end into the 2 holes first, then set the vertical fins & slide to match each other, bent the master fin, and re-inserted its other pivot.

It's working smoothly so far.

'92-96 Dash Register ( (F2TZ19893C, F3TZ19893H)) Repair
IF THE IMAGE IS TOO SMALL, click it.

1) This is a common problem with these registers - someone jams a finger between the 3rd fin & another, and the peg shears off leaving the master fin independent of the slave fins (which still move together). Normally, I salvage a master fin from another register with different damage, but I wanted to see how hard it is to repair one.
2) By gently bending the fin and pushing to one side, its pivot peg can be removed from the hole on the other side.
3) If necessary, extract the remains of the sheared peg.
4) I found that a 1/16" drill bit is too large, but I found this smaller carbide burr to be a good fit. I eyeballed it to make a ~1/8" deep hole in the damaged fin.
5) This soft wire is about the same size, so I bent it to make a handle with enough length to protect my fingers as I heated it with a torch & then inserted it in the plastic.
6) After it cooled, I cut the wire off flush with the fin's edge.
7) I inserted the repaired end into the 2 holes first, then set the vertical fins & slide to match each other, bent the master fin, and re-inserted its other pivot.

It's working smoothly so far.

Owner caption · Photo 0 of 5000

Is this accurate? Sign in to help verify it.
Comments

No comments yet.

More from this build

1983 Ford Bronco photo Volvo fan relay wiring diagram for a 2-speed electric cooling fan with temperature switch '96 Bronco and F-Series trailer adapter wiring diagram with color-coded wires and connector pinouts Trailer/camper wiring diagrams for 1994 and 1996 with circuit paths and connector callouts 1983 Ford Bronco photo 1983 Ford Bronco photo 1995 Ford F-150 front grille, headlights, and bumper with a tow hook Front end of a white 1990s Ford truck with blue oval grille badge and black headlight trim, collage

More 1980-1986 Broncos