Home/
Registry/
Ford/
Bronco/
1980-1986/
“That dirty old truck”/
Photo
supermotors.net/registry/media/1174647
Close-up of a vehicle's gauge cluster part showing fuel level an…
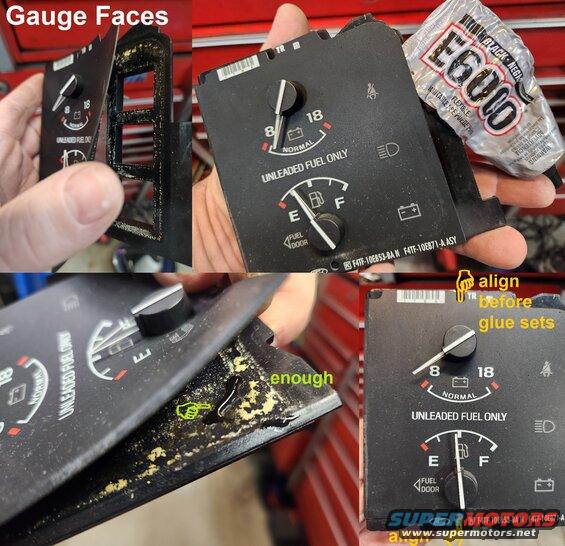
At this age, it's very common for the glue holding the faces on to become brittle and just let go. That then allows the faces to slide down slightly and rest on the needles' hubs, affecting their behavior. It's very easy to add a few drops of new glue (this one dries slowly, allowing the face to be re-positioned for alignment, but there are others) to hold the face where it belongs. Use the notches at the top & bottom center to align the face with the gauge frame.
While it's out, clean everything...

...and consider some of the improvements shown in this photo album (low fuel light, working oil pressure gauge, bezel reinforcements, switch relocation...).
See also:
 .
. 
Is this accurate? Sign in to help verify it.
Comments
More from this build


No comments yet.