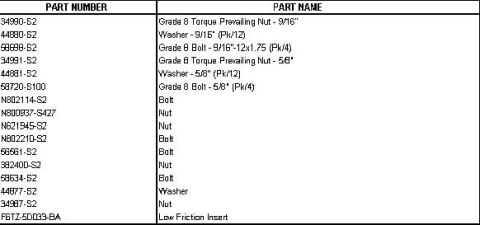
Parts table listing part numbers and names for grade 8 bolts, nu…

97-03-10 Frame NoiseView all 15
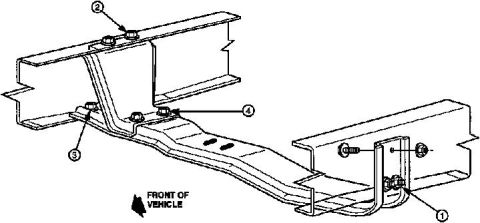
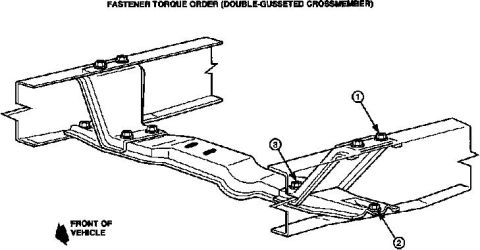
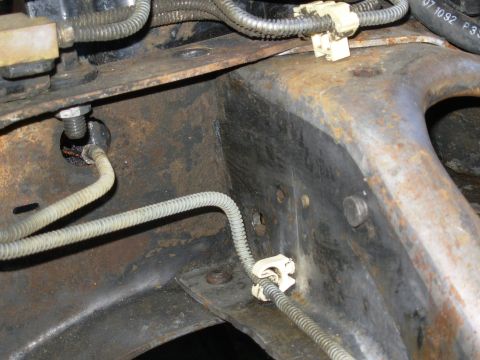
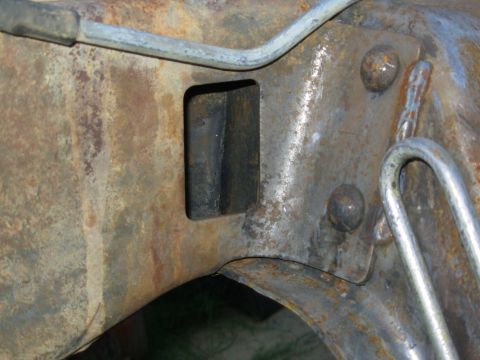
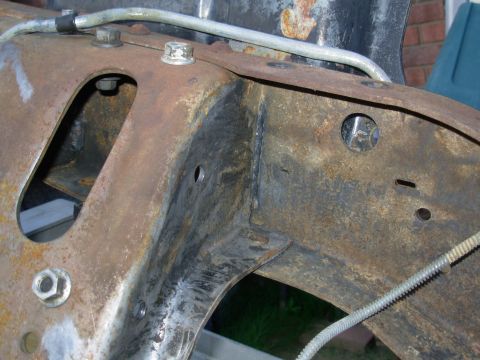
a. Torque the gusset-to-frame bolts (Figure 8, Number 1).
b. Torque the crossmember-to-frame bolts (Figure 8, Number 2).
c. Torque the gusset-to-crossmember bolts (Figure 8, Number 3).
8. Reattach transmission:
a. Lower the transmission.
b. Reattach the transmission using new Nuts (N621945-S2) and torque to 95 ±15 N-m (70 ±11 lb-ft).
9. Inspect gusset/crossmember joint:
a. Visually inspect the joint between the gusset and crossmember. If all fasteners have been torqued properly and any gap exists between the two, shim joint with washers.
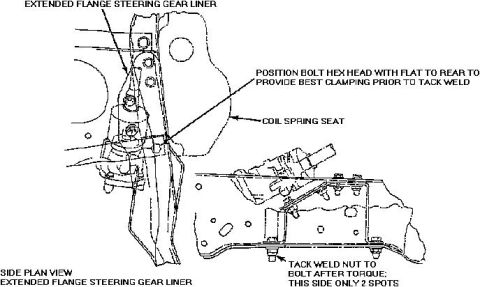
b. Reattach the gusset with new Bolts (N802114-S2) and Nuts (N800937-S427) torqued to 70 ±10.5 N-m (52 ±7 lb-ft).
NOTE:
ON HEAVY DUTY VEHICLES, IT MAY BE NECESSARY TO UPGRADE THE REPLACEMENT FASTENER TO A 9/16" GRADE 8 TORQUE PREVAILING NUT (34990-S2) AND BOLT (58698-S2) TORQUED TO 190 ±4 N-m (140 ±3 LB-FT).
(E) Radius Arm Brackets
NOTE:
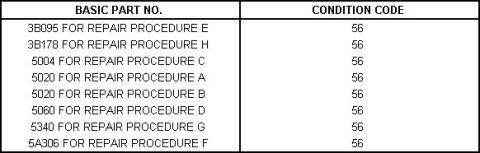
USE WARRANTY DEALER CODING: 3B095, AS BASIC PART NO.
1. Inspect and retorque all radius arm bracket bolt(s) to 135 ±20 N-m (100 ±15 lb-ft).
NOTE:
IF THE BOLT IS VERY LOOSE AND THE BRACKET IS NOT CLAMPED TIGHTLY, INSPECT THE FRAME AND BRACKET HOLES FOR ELONGATION. IF A BRACKET HOLE IS ELONGATED, THE BRACKET MUST BE REPLACED. IF A FRAME HOLE IS ELONGATED, THE ENTIRE FRAME MUST BE REPLACED, OR THE FRAME AND BRACKET HOLES MUST BE DRILLED OUT TO A LARGER SIZE, NOT TO EXCEED 15mm (19/32"), AND A LARGER NUT AND BOLT MUST BE INSTALLED.
2. Inspect the rivets for looseness. Replace any loose or poorly seated rivets using the following procedure:
NOTE:
MOST OFTEN, THE NOISE CAN BE ELIMINATED BY REPLACING ONLY THE MIDDLE RIVET OF THE THREE (3) SECURING THE BRACKET.
a. Remove damaged or loose rivet:
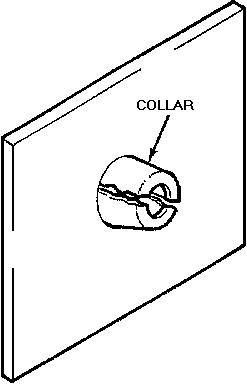
> Drill a 3.175mm (1/8") hole through the rivet.
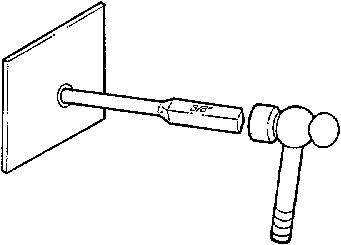
> Redrill the same hole through the shank of the rivet with a 9.525mm (3/8") drill.
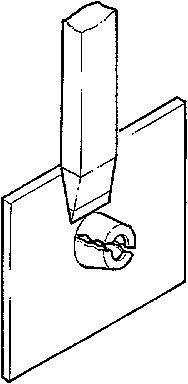
> Remove the rivet head with an air chisel.
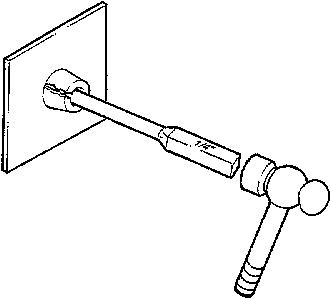
> Drive out the rivet with a punch and hammer.
CAUTION:
DO NOT REMOVE THE FASTENER WITH A CUTTING TORCH BECAUSE DAMAGE TO THE FRAME STRUCTURE IS LIKELY TO RESULT.
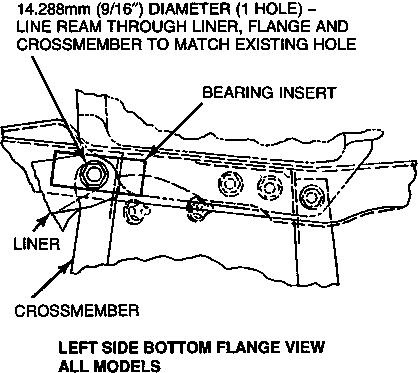
b. Line ream the hole to the replacement bolt size of 12.7mm (1/2").
c. Clean hole of burrs after reaming so that the bolt head and nut will seat properly.
d. Install a new Bolt (N802210-S2) and Nut (N800937-S427), and torque to 133 ±20 N-m (98 ±15 lb-ft).
(F) Spring Towers
NOTE:
USE WARRANTY DEALER CODING: 5A306, AS BASIC PART NO.
Inspect the rivets for looseness. Replace any loose or poorly seated rivets using the following procedure.
1. Remove damaged or loose rivet:
a. Drill a 3.175mm (1/8") hole through the rivet.
b. Redrill the same hole through the shank of the rivet with a 9.525mm (3/8") drill.
c. Remove the rivet head with an air chisel.
d. Drive out the rivet with a punch and hammer.
CAUTION:
DO NOT REMOVE THE FASTENER WITH A CUTTING TORCH BECAUSE DAMAGE TO THE FRAME STRUCTURE IS LIKELY TO RESULT.
2. Line ream the hole to the replacement bolt size of 11.113mm (7/16").
3. Clean hole of burrs after reaming so that the bolt head and nut will seat properly.
4. Install a new Bolt (56561-S2) and Nut (382400-S2), and torque to 89 ±13 N-m (66 ±10 lb-ft).
(G) Front Leaf Spring Brackets
NOTE:
USE WARRANTY DEALER CODING: 5340, AS BASIC PART NO.
Inspect the rivets for looseness. Replace any loose or poorly seated rivets using the following procedure.
1. Remove damaged or loose rivet:
a. Drill a 3.175mm (1/8") hole through the rivet.
b. Redrill the same hole through the shank of the rivet with a 8.731mm (11/32") drill.
c. Remove the rivet head with an air chisel.
d. Drive out the rivet with a punch and hammer.
CAUTION:
DO NOT REMOVE THE FASTENER WITH A CUTTING TORCH BECAUSE DAMAGE TO THE FRAME STRUCTURE IS LIKELY TO RESULT.
2. Install a new Bolt (58634-S2), two (2) Washers (44877-S2) and a Nut (34987-S2). Torque to 62 ±15 N-m (46 ±11 lb-ft).
(H) Axle Pivot Brackets
NOTE:
USE WARRANTY DEALER CODING: 3B178, AS BASIC PART NO.
Inspect and retorque all axle pivot bracket bolts (torque values may vary by model - refer to the appropriate light truck Service Manual for proper torque specifications).
NOTE:
IF THE BOLT IS LOOSE AND THE BRACKET IS NOT CLAMPED TIGHTLY, INSPECT THE FRAME AND BRACKET HOLES FOR ELONGATION. IF A FRAME HOLE IS ELONGATED, THE ENTIRE FRAME MUST BE REPLACED. NO FRAME REPAIRS ARE AUTHORIZED ON THESE #1 CROSSMEMBER HOLES.
OTHER APPLICABLE ARTICLES:
96-15-11
SUPERSEDES: 96-4-11
WARRANTY STATUS: Eligible Under The Provisions Of Bumper To Bumper Warranty Coverage For 1992-96 Model Years, Basic Warranty Coverage For All Others
Click "Next" beside the image above to continue.
See also:
http://www.nloc.net/vbforum/gen-1-lightnings/209927-frame-off-resto-225k-mile-lighting-2.html#post1958385
 .
.  .
.  .
. 
Is this accurate? Sign in to help verify it.
No comments yet.