Ford Steering Column Removal & Installation - Shift Rod Within Tube (Econoline)
Reference · 1975-1979 F-150All 5 service procedures



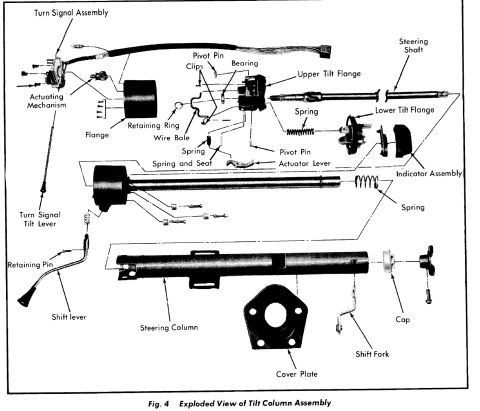
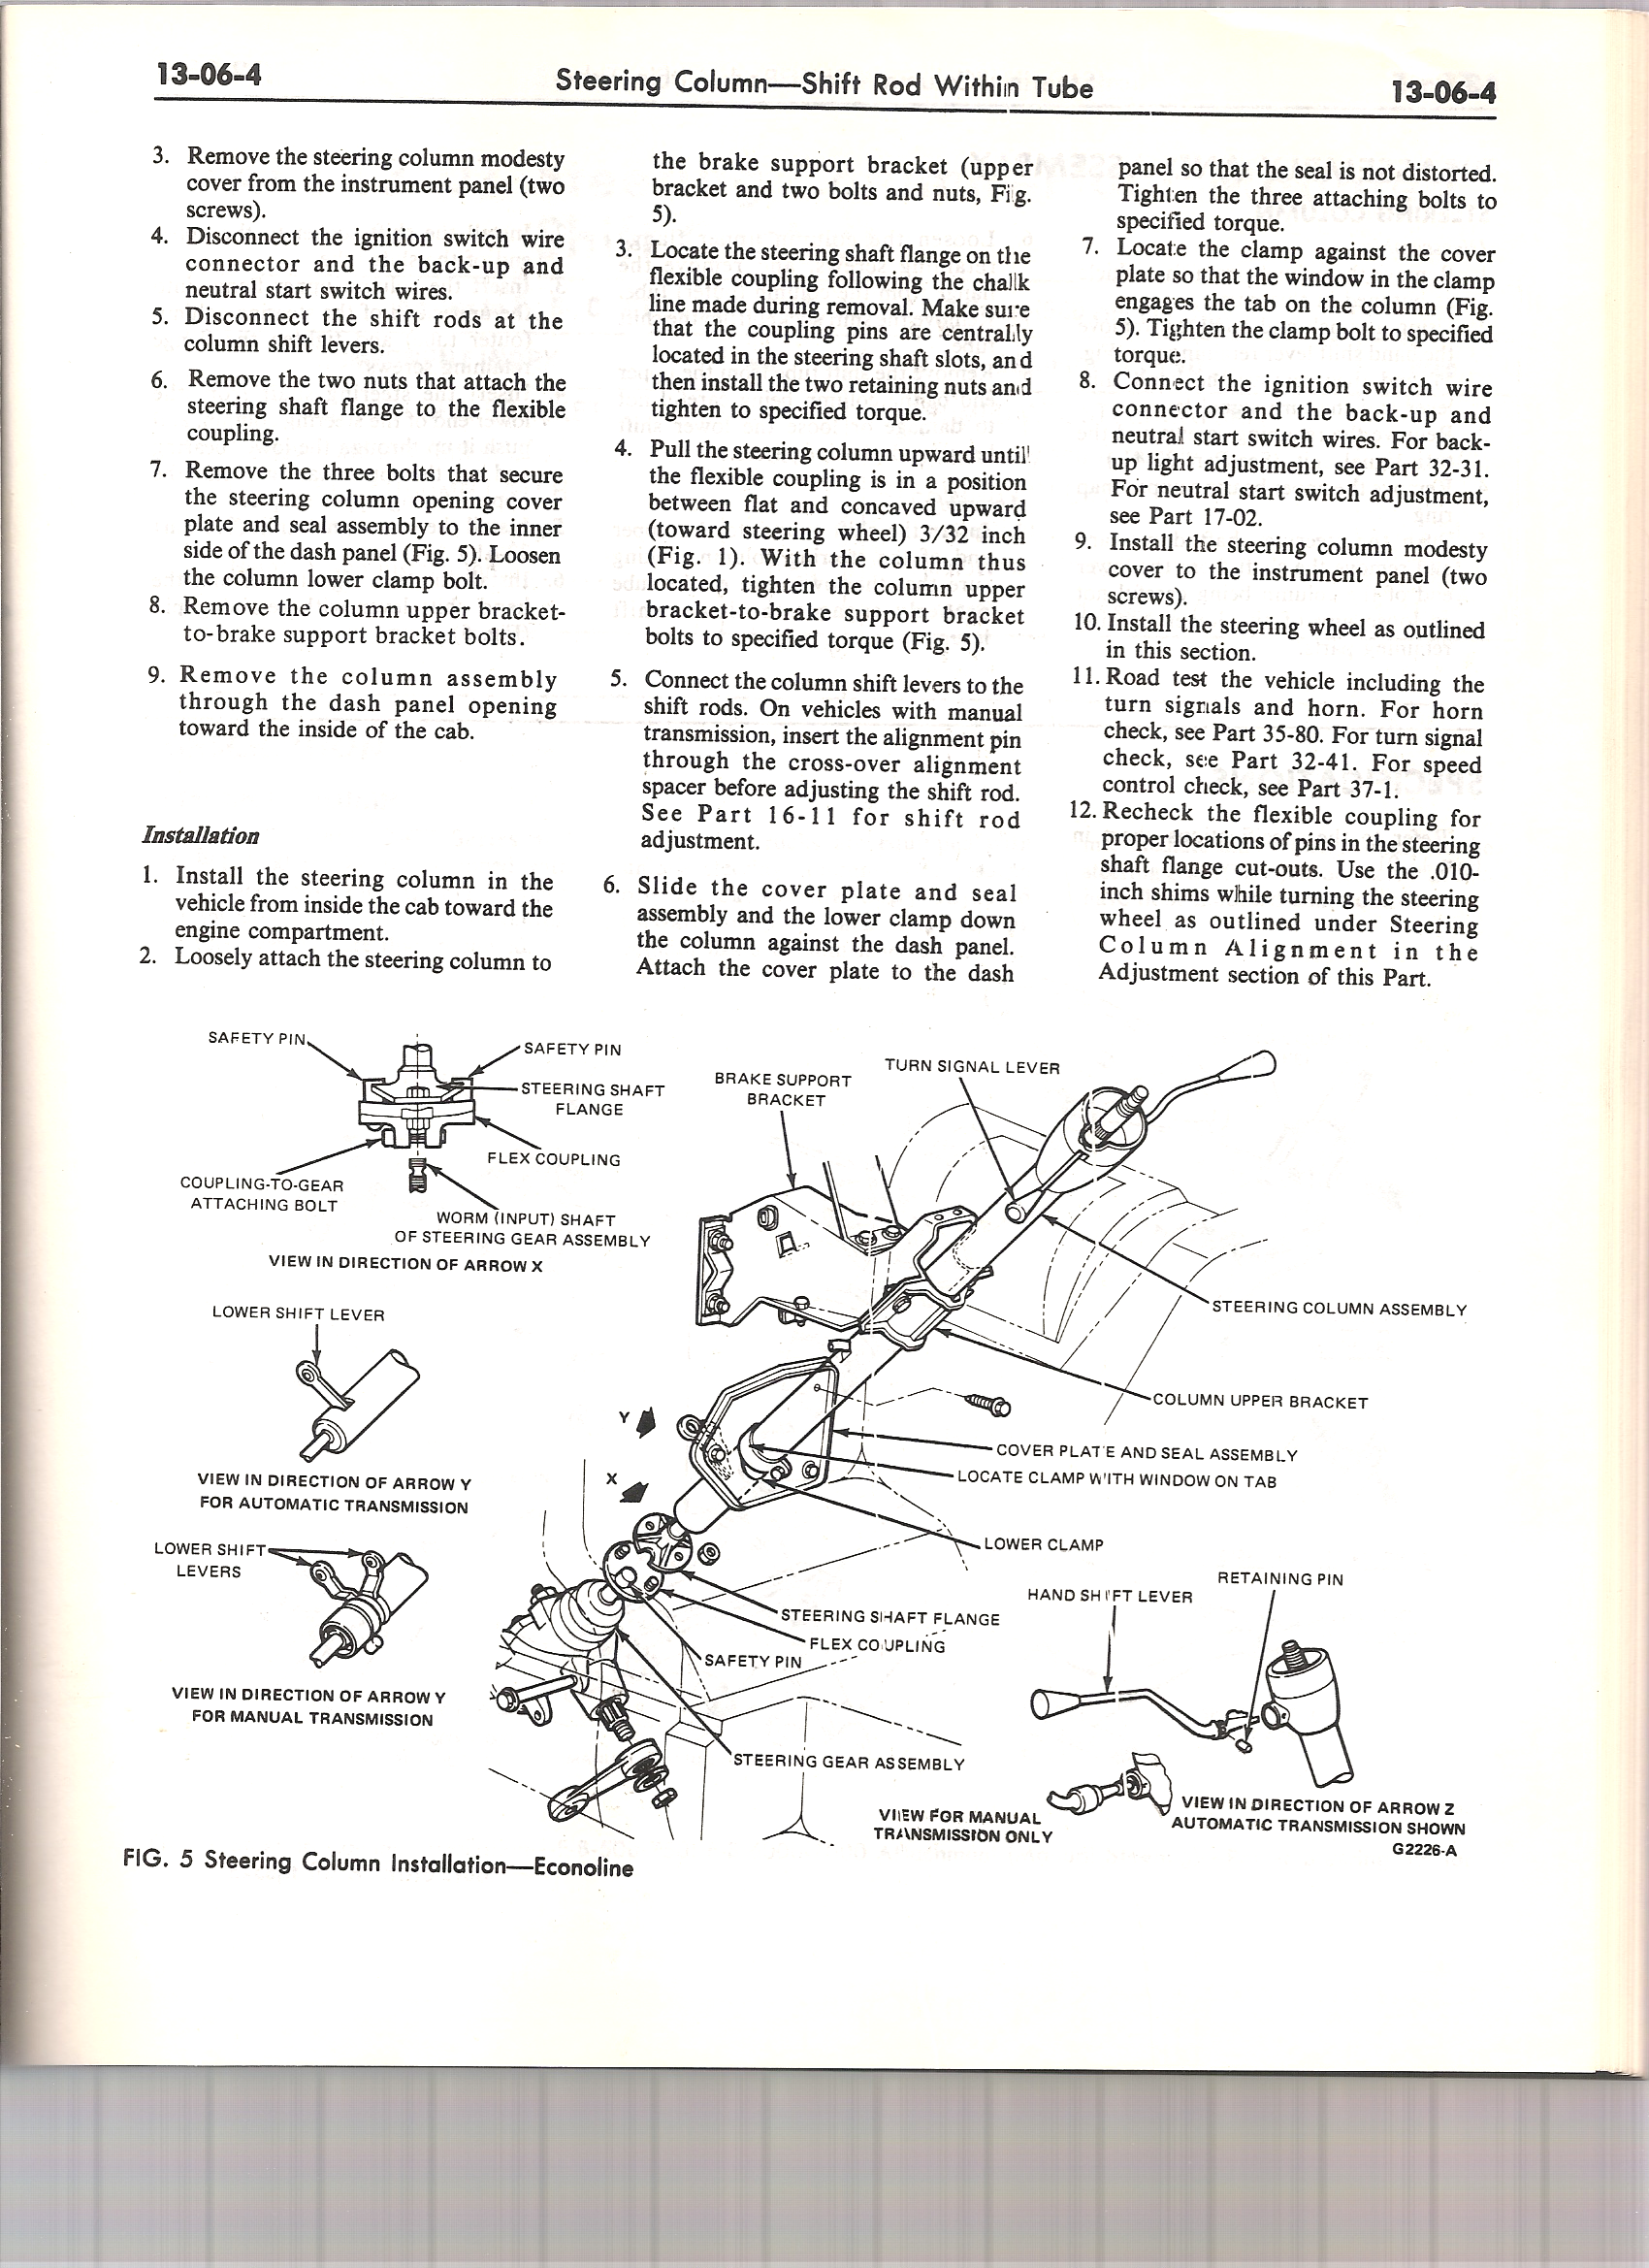
Ford service-manual page 13-06-4 detailing steering-column removal: removing modesty cover and brake support bracket, disconnecting ignition switch and shift rods, and separating the steering-shaft flange from the flexible coupling.
Part of 1975-1979 Ford F-150 Service Procedures
This is page 13-06-4 from a Ford factory shop manual, covering the section "Steering Column: Shift Rod Within Tube." The page completes a removal procedure (steps 3-9), including removing the modesty cover, disconnecting the ignition switch connector and back-up/neutral start switch wires, disconnecting the shift rods, detaching the steering shaft flange from the flexible coupling, and removing the column through the dash panel opening into the cab. It then provides a full 12-step installation procedure: installing the column from inside the cab, aligning the steering shaft flange on the flexible coupling using the chalk line made at removal, setting the coupling between flat and concaved upward 3/32 inch, connecting shift levers (with an alignment pin/cross-over spacer note for manual transmissions, referencing Part 16-11), attaching the cover plate and seal, clamp positioning, reconnecting wiring (referencing Parts 32-31 and 17-02 for adjustments), reinstalling the steering wheel, road testing (referencing Parts 35-80, 32-41, and 37-1), and rechecking the flexible coupling pin locations using.010-inch shims. Figure 5 illustrates steering column installation for the Econoline, with labeled views of the flex coupling, safety pins, shift levers (automatic and manual), brackets, clamps, and steering gear assembly (illustration code G2226-A).
Is this accurate? Sign in to help verify it.
Frequently asked questions
- How is the flexible coupling positioned when installing the steering column?
- Pull the steering column upward until the flexible coupling is in a position between flat and concaved upward (toward the steering wheel) 3/32 inch, then tighten the column upper bracket-to-brake support bracket bolts to specified torque.
- How do you align the steering shaft flange on the flexible coupling during installation?
- Locate the steering shaft flange on the flexible coupling following the chalk line made during removal, make sure the coupling pins are centrally located in the steering shaft slots, then install the two retaining nuts and tighten to specified torque.
- What extra step is required when connecting shift levers on manual transmission vehicles?
- On vehicles with manual transmission, insert the alignment pin through the cross-over alignment spacer before adjusting the shift rod. Shift rod adjustment is covered in Part 16-11.
- How is the steering column removed from the vehicle?
- After removing the modesty cover, disconnecting wiring and shift rods, removing the flange-to-flexible-coupling nuts, cover plate bolts, and upper bracket-to-brake support bracket bolts, the column assembly is removed through the dash panel opening toward the inside of the cab.
- What checks are done after reinstalling the steering column?
- Road test the vehicle including turn signals and horn (horn check: Part 35-80; turn signal check: Part 32-41; speed control check: Part 37-1), and recheck the flexible coupling for proper pin locations in the steering shaft flange cut-outs using .010-inch shims while turning the steering wheel.

No comments yet.