SuperMotors SuperMotors SUPERMOTORS Search: try “orange Bronco on 35s”
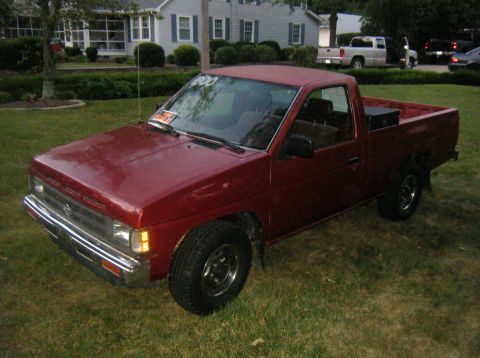
Home/ Registry/ Nissan/ Micra/ 1983-1992/ 1990 Nissan Micra/ Photo supermotors.net/registry/media/252957

Service manual page AT-30 showing illustrated high-reverse clutc…

Service manual page AT-30 showing illustrated high-reverse clutch drum reassembly steps
Service manual page AT-30 showing illustrated high-reverse clutch drum reassembly stepsOriginal file
Service manual page AT-30 showing illustrated high-reverse clutch drum reassembly steps

87 Service ManualView all 403

Oil pump exploded diagram with gears, housing, plate, seal rings, thrust washer plus clearance inspection figu Service manual page AT-24 with oil pump assembly diagrams Exploded diagram of automatic transaxle control valve body identifying each valve, spring, plug and separator Service manual page on automatic transmission control valve body with spring chart and disassembly diagrams Control valve body cleaning and assembly notes with valve body photos and separator plate inspection figures Service manual page AT-28 on automatic transaxle control valve body assembly and adjustment High-reverse clutch exploded diagram with piston, springs, plates, snap rings plus disassembly figures Service manual page AT-30 showing illustrated high-reverse clutch drum reassembly steps Service manual page AT-31 on high-reverse clutch clearance with retainer plate part table Forward clutch exploded diagram with piston, springs, drive and driven plates, snap rings plus service notes Low and reverse brake exploded diagram showing piston, retainer, drive and driven plates and snap ring stacked Brake band and band servo exploded diagram with servo piston, springs, O-rings, washer plus band inspection fi Service manual page on transmission governor valve with exploded diagram and spring chart Service manual page AT-36 on transmission planetary carrier inspection and output shaft disassembly Service manual page AT-37 showing transaxle output shaft and bearing retainer procedures Bearing retainer assembly steps: press seal and O-ring into place, install inner race with shim, cross-section 403photos in this albumView all

Scanned service-manual page 'Repair for Component Parts: High-reverse Clutch (Front)' with illustrated steps for lubricating the clutch drum bushing, assembling the piston, reinstalling the spring retainer with a special tool, and securing the drive plates with a snap ring; page AT-30.

AI caption · Photo 212 of 412

as. .Highirw'selbldlivlrontm ontid) . I my 3. Lubricate clutch drum bushing, and install inner seal and piston seal as illustrated. Be careful not to stretch seals dUring installation. I Never assemble clutch dry; always lubricate its components thoroughly. O Always install piston seal in direction shown in figure below High-reverse Forward clutch (Front) . clutch drum [Rearl SATJIE 4. Assemble piston, being careful not to allow seal to kink or become damaged during installation, After installing, turn piston by hand to ensure that there is no binding / sATaw 5i Rememble springs and retainer. Reinstall snap ringi Be sure snap ring is properly seatedl $T2542000 lJZSOGZ-Al sATau 6. Install driven plates, drive plates. and secure with snap ring. SATJ" AT-30

Is this accurate? Sign in to help verify it.
Comments

No comments yet.

More 1983-1992 Micras