Home/
Registry/
Nissan/
Micra/
1983-1992/
1990 Nissan Micra/
Photo
supermotors.net/registry/media/194427
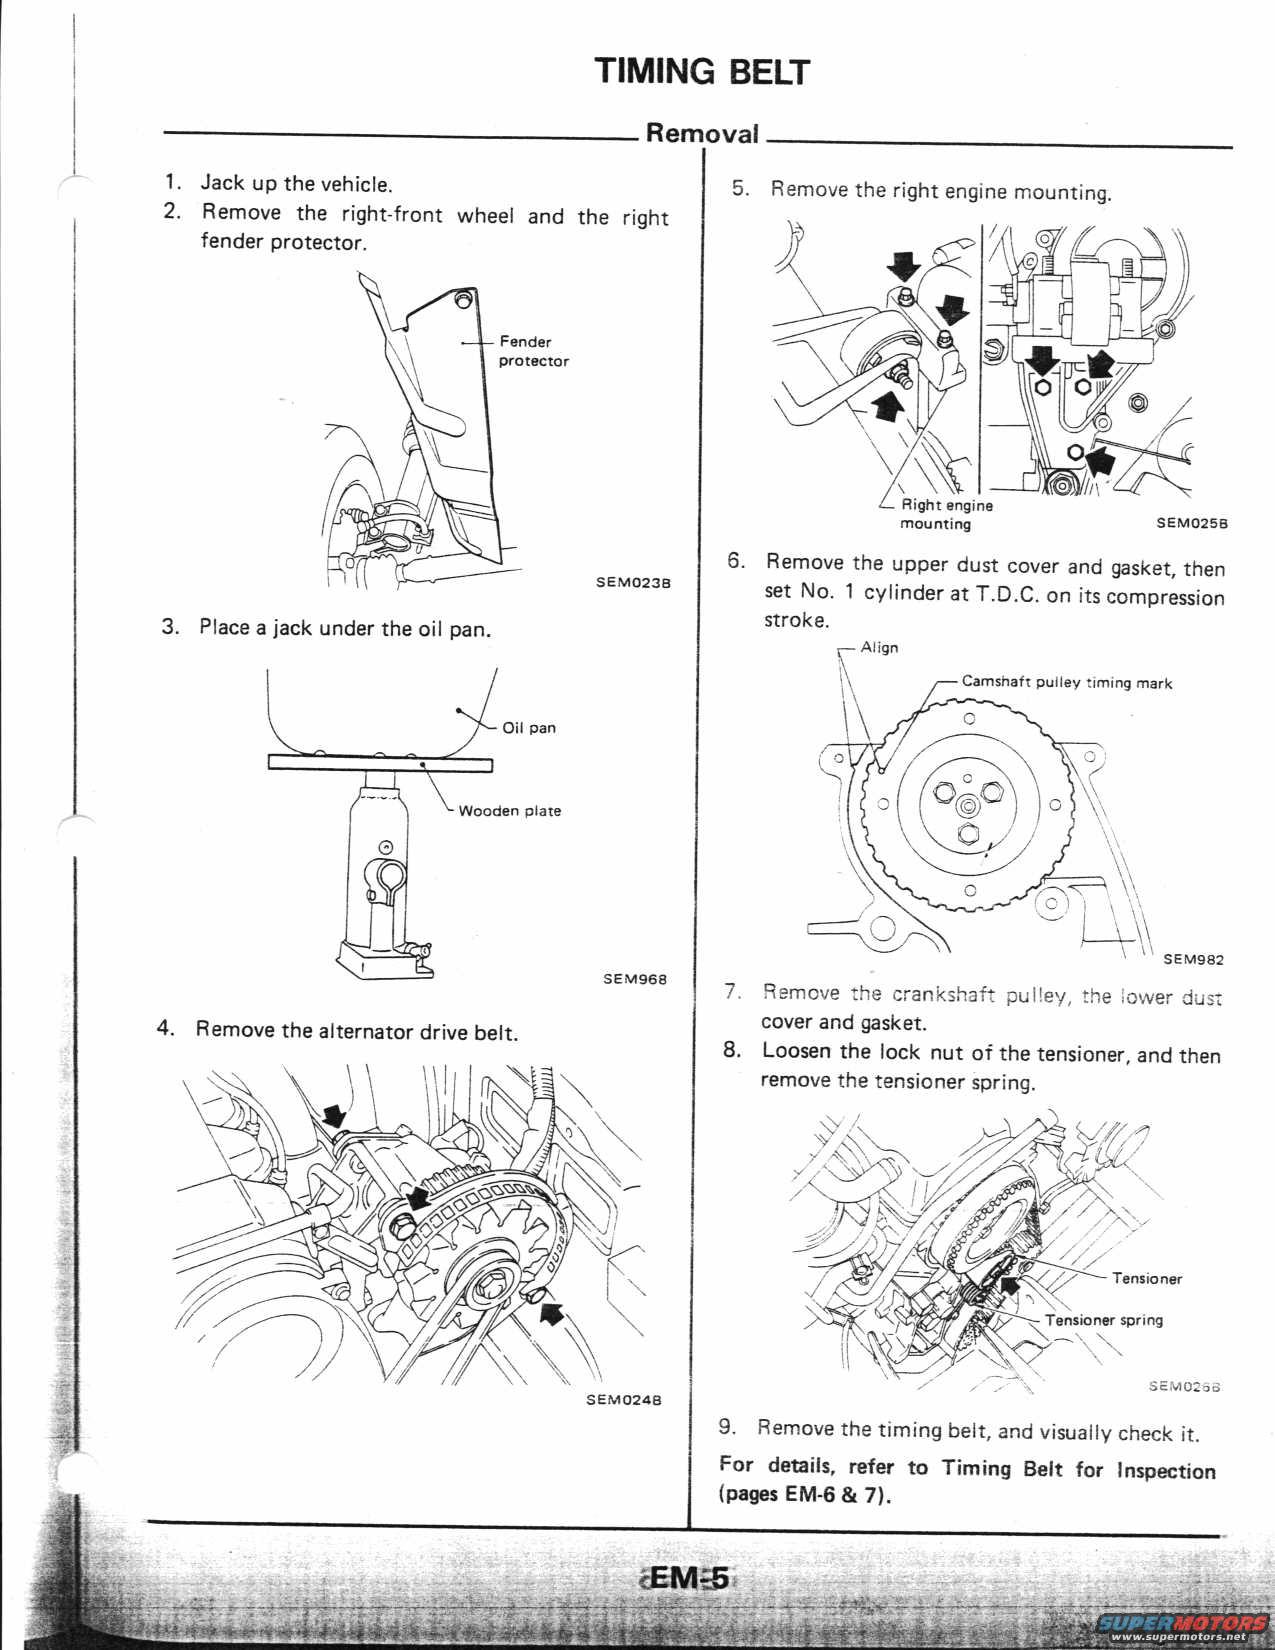
1990 Nissan Micra Timing Belt Removal Procedure - Service Manual Page EM-5
Reference · 1983-1992 MicraAll 115 service procedures
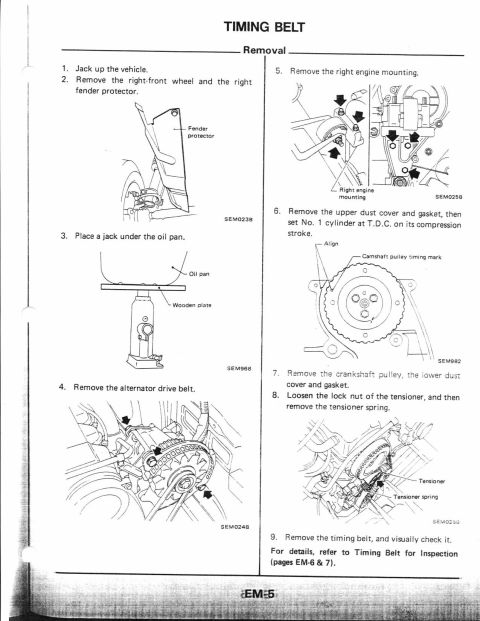
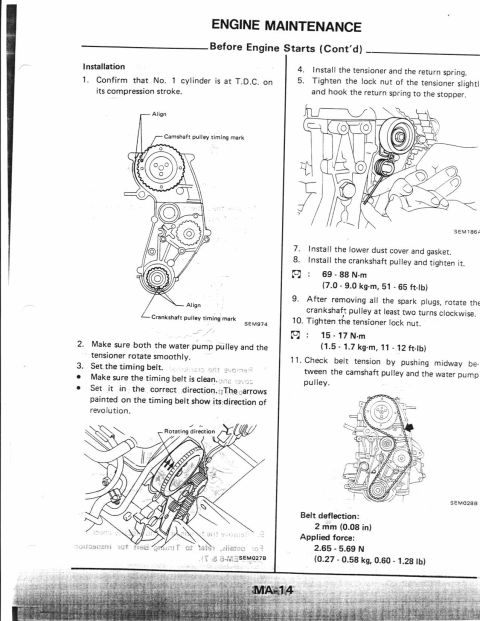
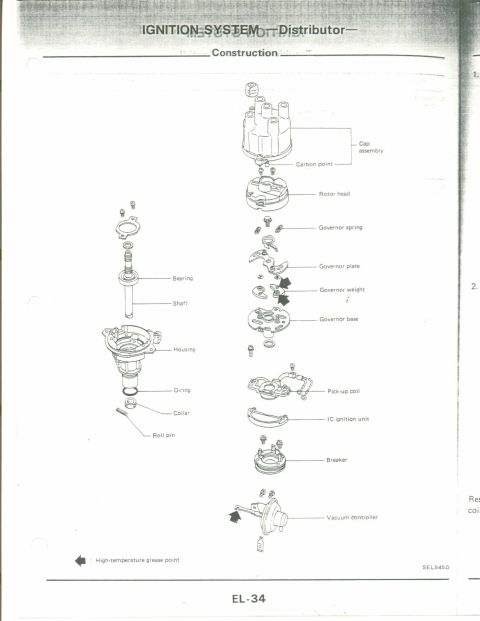
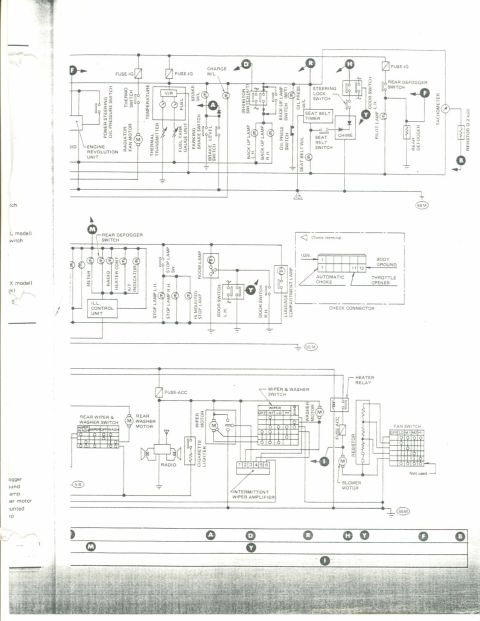
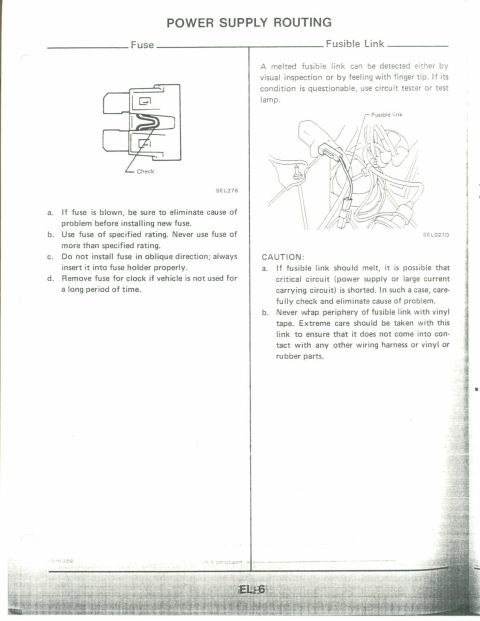
Step-by-step timing belt removal procedure with figures for jacking, drive-belt removal and tensioner release.
Part of 1983-1992 Nissan Micra Service Procedures
This is page EM-5 of a factory service manual, covering the removal procedure for the engine timing belt. The page presents a nine-step procedure with supporting line illustrations. Steps include: jacking up the vehicle; removing the right-front wheel and right fender protector (illustration SEM023B); placing a jack with a wooden plate under the oil pan to support the engine (SEM968); removing the alternator drive belt (SEM024B); removing the right engine mounting (SEM025B); removing the upper dust cover and gasket and setting the No. 1 cylinder at Top Dead Center (T.D.C.) on its compression stroke, aligning the camshaft pulley timing mark (SEM982); removing the crankshaft pulley, lower dust cover and gasket; loosening the tensioner lock nut and removing the tensioner spring (SEM026B); and finally removing the timing belt for visual inspection. The page closes by directing the reader to the Timing Belt Inspection section on pages EM-6 and EM-7. The document itself gives no year, model, or engine identification on this page, but the layout and illustration codes are consistent with a Nissan factory service manual, matching the uploader's claim of a 1990 Nissan Micra. A reader can learn the correct sequence and preparation steps to safely access and remove the timing belt.
Is this accurate? Sign in to help verify it.
Frequently asked questions
- What must be removed to access the timing belt?
- The right-front wheel, right fender protector, alternator drive belt, right engine mounting, upper dust cover and gasket, crankshaft pulley, and lower dust cover and gasket.
- How should the engine be supported when removing the right engine mounting?
- Place a jack under the oil pan with a wooden plate between the jack and the pan.
- What engine position is required before removing the timing belt?
- Set the No. 1 cylinder at T.D.C. (Top Dead Center) on its compression stroke, aligning the camshaft pulley timing mark.
- How is the timing belt tensioner released?
- Loosen the lock nut of the tensioner, then remove the tensioner spring.
- Where is timing belt inspection information found?
- The page refers to 'Timing Belt for Inspection' on pages EM-6 and EM-7.

No comments yet.