Home/
Registry/
Nissan/
Micra/
1983-1992/
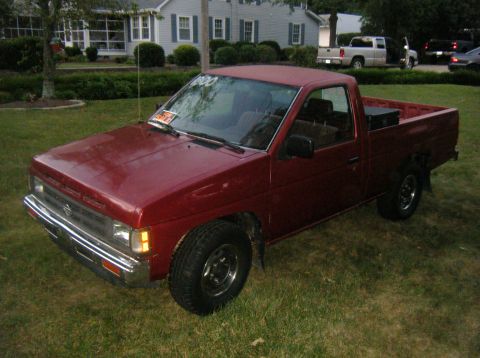
1990 Nissan Micra/
Photo
supermotors.net/registry/media/210354
Nissan Micra Manual Transaxle Disassembly Steps 6-10 - Final Drive & Shifter
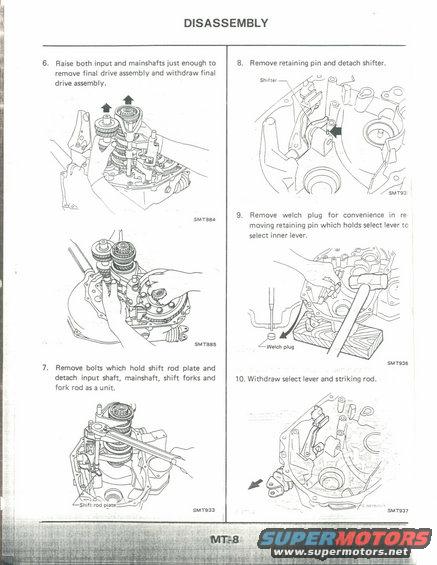
Service manual page MT-8 with step-by-step transaxle disassembly illustrations for final drive, shift rod and select lever removal.
Part of 1983-1992 Nissan Micra Service Procedures
This is page MT-8 from a factory service manual, covering steps 6 through 10 of a manual transaxle disassembly procedure. Step 6 instructs raising both the input shaft and mainshaft just enough to remove and withdraw the final drive assembly (illustrations SMT884 and SMT885). Step 7 covers removing the bolts holding the shift rod plate and detaching the input shaft, mainshaft, shift forks, and fork rod as a unit (illustration SMT933, with a callout identifying the shift rod plate). Step 8 instructs removing the retaining pin and detaching the shifter (illustration labeled 'Shifter'). Step 9 describes removing the welch plug for convenience in removing the retaining pin that holds the select lever to the select inner lever, illustrated with a hammer and punch on a wood block (SMT936). Step 10 instructs withdrawing the select lever and striking rod (SMT937). The page contains no torque specifications, part numbers, or year/model applicability statements, it is purely a sequential teardown procedure supported by line-art illustrations. It was uploaded as part of a manual scan set attributed to a 1990 Nissan Micra.
Is this accurate? Sign in to help verify it.
Frequently asked questions
- How is the final drive assembly removed during transaxle disassembly?
- Raise both the input and mainshafts just enough to remove the final drive assembly, then withdraw the final drive assembly (step 6).
- How are the input shaft, mainshaft and shift forks removed?
- Remove the bolts which hold the shift rod plate, then detach the input shaft, mainshaft, shift forks and fork rod as a unit (step 7).
- Why is the welch plug removed during disassembly?
- The welch plug is removed for convenience in removing the retaining pin which holds the select lever to the select inner lever (step 9).
- How is the shifter detached?
- Remove the retaining pin and detach the shifter (step 8).
- What is removed after the welch plug and retaining pin?
- Withdraw the select lever and striking rod (step 10).
Comments
More from this build

No comments yet.