SuperMotors SuperMotors SUPERMOTORS Search: try “orange Bronco on 35s”
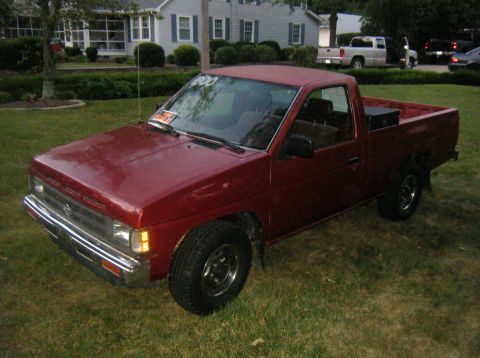
Home/ Registry/ Nissan/ Micra/ 1983-1992/ 1990 Nissan Micra/ Photo supermotors.net/registry/media/252946

Service manual page AT-20 showing automatic transmission disasse…

Service manual page AT-20 showing automatic transmission disassembly steps with diagrams
Service manual page AT-20 showing automatic transmission disassembly steps with diagramsOriginal file
Service manual page AT-20 showing automatic transmission disassembly steps with diagrams

87 Service ManualView all 403

Scanned service-manual page on automatic transaxle removal and installation, AT-13 Automatic transaxle major overhaul exploded view with component callouts and tightening torque key Major overhaul exploded diagram of automatic transaxle showing gears, clutches, servo, governor and case compo Automatic transaxle disassembly: drain fluid, remove converter, oil pan, control valve body and manual valve Nissan automatic transmission disassembly manual page AT-17 with step diagrams Automatic transaxle disassembly steps: lock washer, idler gear bolt, front cover bolts, output shaft, seal bus Disassembly page with exploded breakdown of internal gears, carriers, clutches, snap rings and thrust bearings Service manual page AT-20 showing automatic transmission disassembly steps with diagrams Service manual page AT-21 showing automatic transmission disassembly steps 28 through 31 Service manual page on oil pump repair with diagrams and part tables Oil pump exploded diagram with gears, housing, plate, seal rings, thrust washer plus clearance inspection figu Service manual page AT-24 with oil pump assembly diagrams Exploded diagram of automatic transaxle control valve body identifying each valve, spring, plug and separator Service manual page on automatic transmission control valve body with spring chart and disassembly diagrams Control valve body cleaning and assembly notes with valve body photos and separator plate inspection figures Service manual page AT-28 on automatic transaxle control valve body assembly and adjustment 403photos in this albumView all

Scanned service-manual page AT-20, headed 'Disassembly', covering automatic transmission teardown steps 25-27: securing the flexible brake band with a wire clip, pulling the parking pawl shaft, and removing the low and reverse brake retainer and piston, with line-art figures.

AI caption · Photo 202 of 412

To prevent brake linings from cracking or peeling, do not stretch the flexible band unnecessarily. Before removing the brake band, always secure it with a clip as shown in the gure below. Leave the clip in position after removing the brake band. FlElele type hand brake LAppmxim-my 2 mm (0.05 in) an. wir- SATSSS 25. Pull out parking pawl shaft, then remove park- ing pawl and return spring. Parkin pawl s aft sATzsi 27. Remove low and reverse brake piston with compressed air. Be sure to hold low and reverse brake piston with nylon cloth so that they do not jump out. valon cloth 5AT282 If compressed air is not available, remove it with a screwdriver. SAT657 AT-20

Is this accurate? Sign in to help verify it.
Comments

No comments yet.

More 1983-1992 Micras