Home/
Registry/
Ford/
Bronco/
1992-1996/
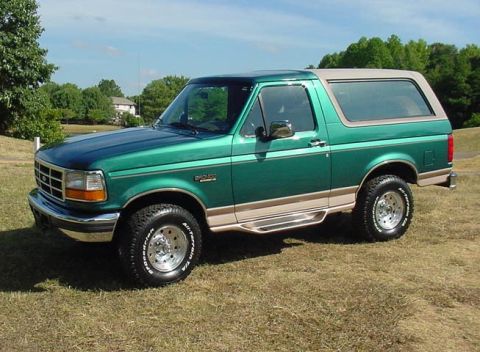
1993 Ford Bronco/
Photo
supermotors.net/registry/media/975560
Ford/Dodge Dual-Axis Adjustable Camber Bushing Installation Instructions
Reference · 1992-1996 BroncoAll 142 service procedures
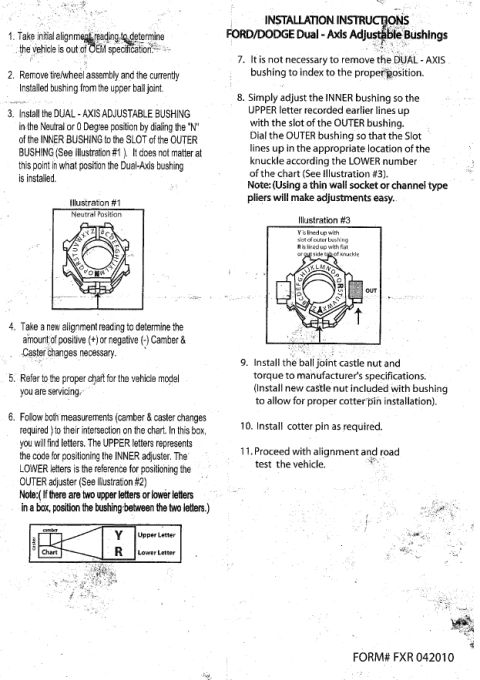
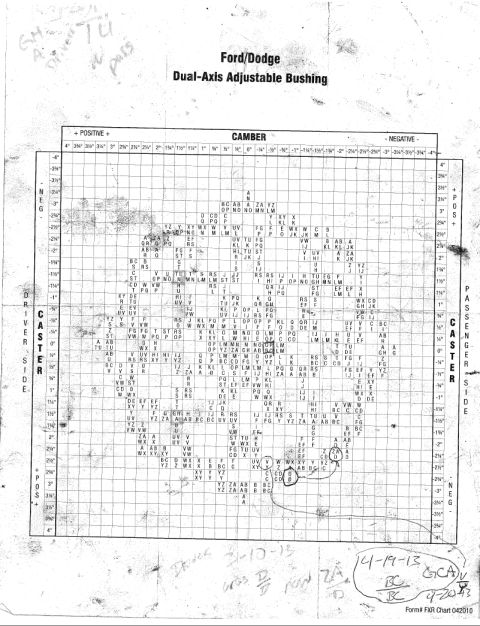
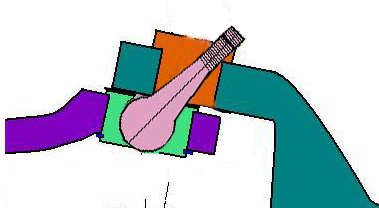


Step-by-step install instructions for Ford/Dodge Dual-Axis adjustable ball-joint bushings: dial inner bushing N to outer-bushing slot, use upper/lower letter chart to set camber and caster, torque castle nut to spec.
Part of 1992-1996 Ford Bronco Service Procedures
This document is a one-page set of installation instructions for Ford/Dodge Dual-Axis Adjustable Bushings, used to adjust camber and caster at the upper ball joint. The 11-step procedure explains: taking an initial alignment reading to confirm the vehicle is out of OEM specification; removing the tire/wheel and the existing upper ball joint bushing; installing the dual-axis bushing in the Neutral (0 degree) position by aligning the "N" of the inner bushing with the slot of the outer bushing (Illustration #1); taking a new alignment reading; consulting the vehicle-specific chart where the intersection of required camber and caster changes yields upper and lower letter codes (Illustration #2); and indexing the inner bushing's upper letter to the outer bushing slot while dialing the outer bushing's slot to the knuckle location per the lower letter (Illustration #3). It notes the bushing need not be removed to re-index, that a thin wall socket or channel-type pliers ease adjustment, and that a new castle nut is included for proper cotter pin installation. Final steps cover torquing the castle nut to manufacturer's specifications, installing the cotter pin, and performing a final alignment and road test. The form is identified as FORM# FXR 042010.
Is this accurate? Sign in to help verify it.
Frequently asked questions
- How do I install a dual-axis adjustable camber/caster bushing?
- Take an initial alignment reading, remove the tire/wheel and the existing upper ball joint bushing, then install the dual-axis bushing in the Neutral (0 degree) position by dialing the "N" of the inner bushing to the slot of the outer bushing. Take a new alignment reading, use the chart to find upper/lower letter codes, index the bushings accordingly, torque the castle nut to spec, install the cotter pin, and re-align and road test.
- What do the upper and lower letters on the adjustment chart mean?
- The UPPER letter is the code for positioning the INNER adjuster, and the LOWER letter is the reference for positioning the OUTER adjuster. If a chart box has two upper or two lower letters, position the bushing between the two letters.
- Do I need to remove the dual-axis bushing to change its adjustment?
- No. The instructions state it is not necessary to remove the dual-axis bushing to index it to the proper position; simply rotate the inner and outer bushings to the chart positions.
- What tools make adjusting the bushing easier?
- The instructions note that using a thin wall socket or channel-type pliers will make adjustments easy.
- Does the bushing kit include a new castle nut?
- Yes. A new castle nut is included with the bushing and should be installed to allow proper cotter pin installation; torque it to manufacturer's specifications.

No comments yet.