SuperMotors SuperMotors SUPERMOTORS Search: try “orange Bronco on 35s”
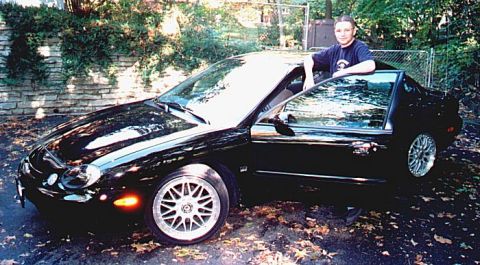
Home/ Registry/ Ford/ Taurus/ 1996-1999/ “mike”/ Photo supermotors.net/registry/media/194022

Mercury Sable front air dam installation instructions with 12 st…

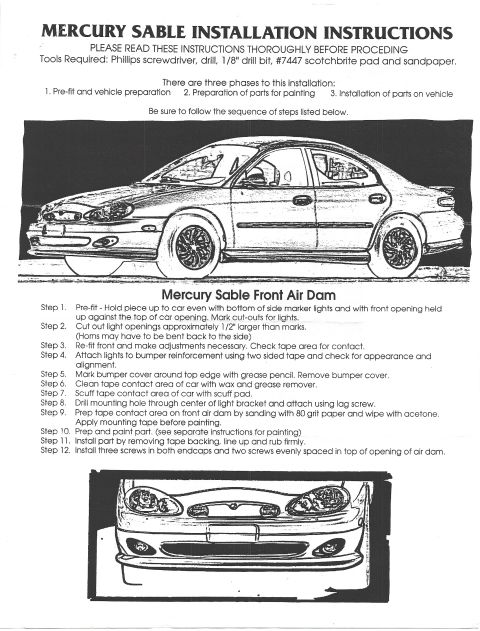
Mercury Sable front air dam installation instructions with 12 steps and car drawings
Mercury Sable front air dam installation instructions with 12 steps and car drawingsOriginal file
Mercury Sable front air dam installation instructions with 12 steps and car drawings

Reference · 1996-1999 TaurusAll 18 service procedures
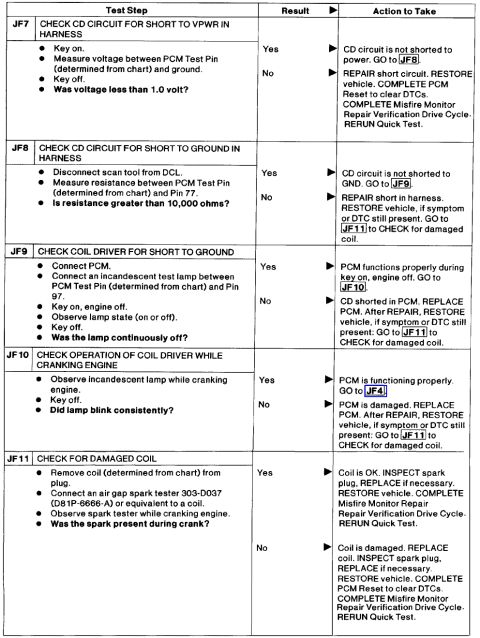
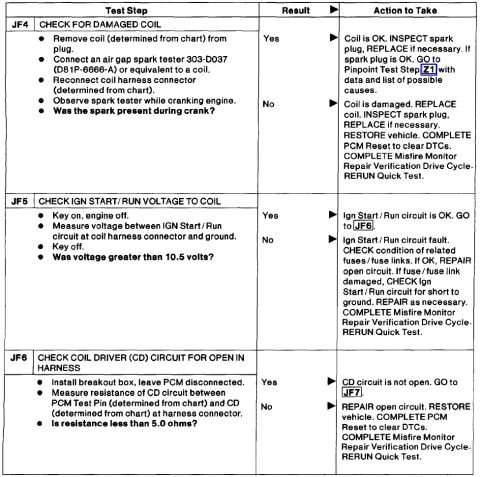
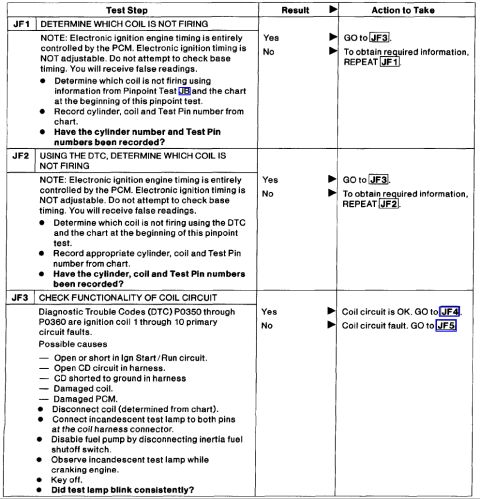
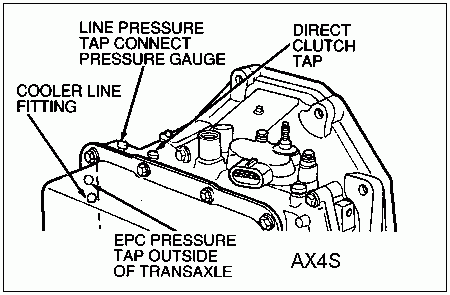
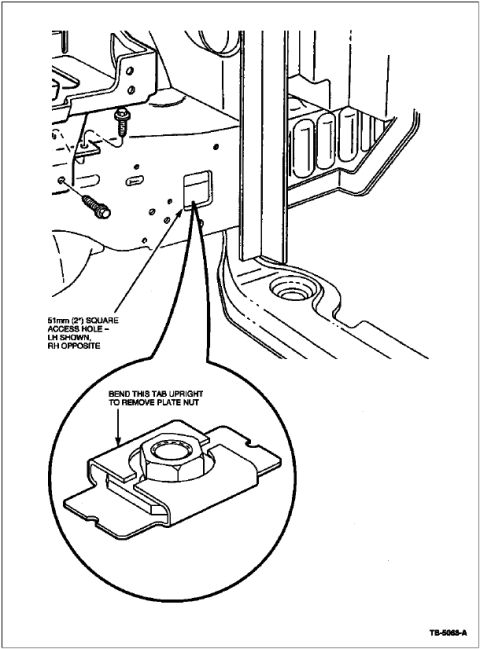
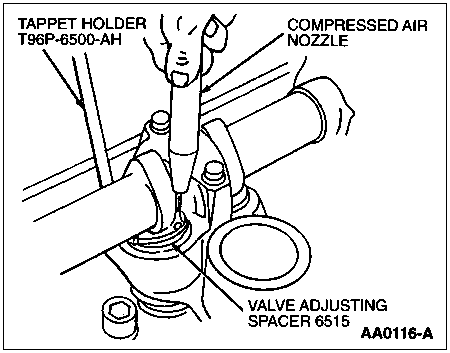
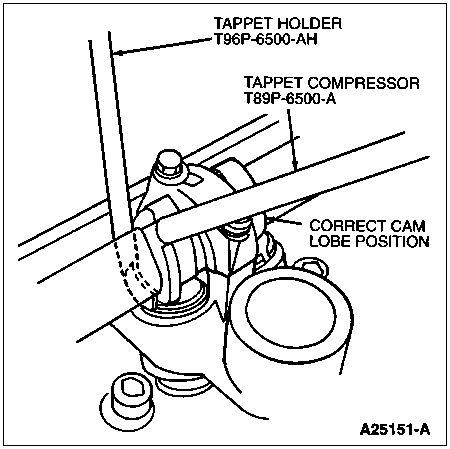
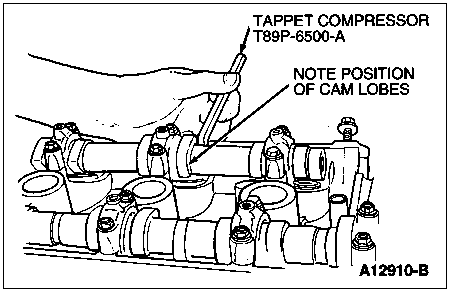
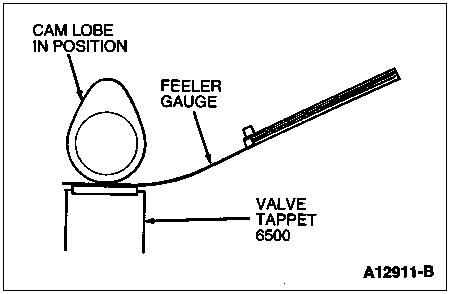
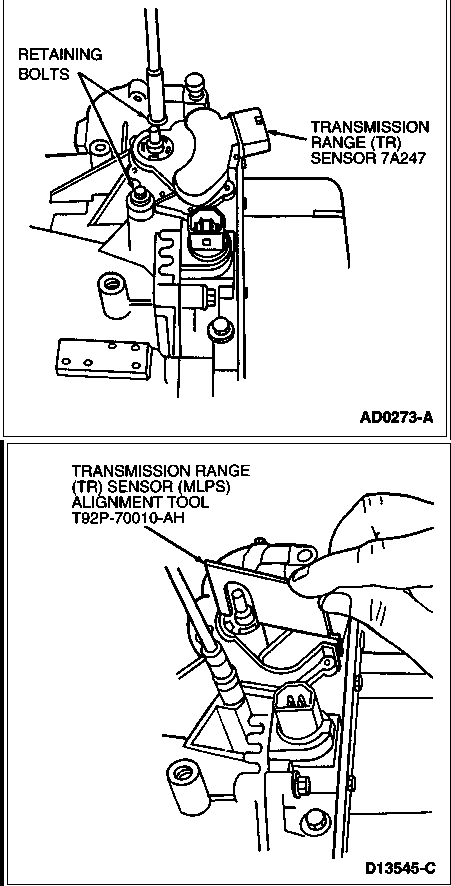
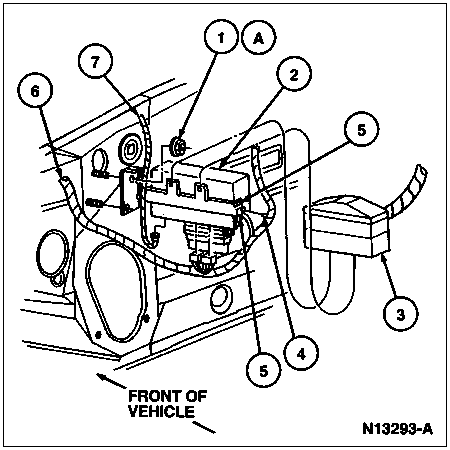
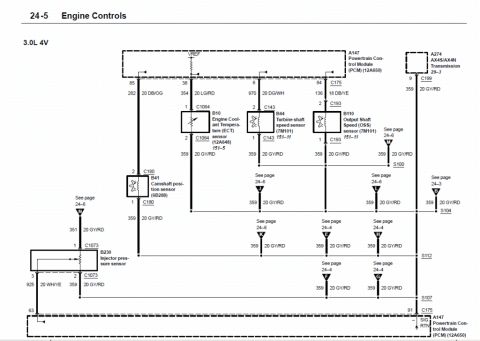
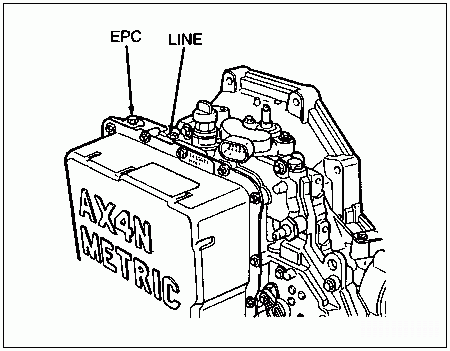
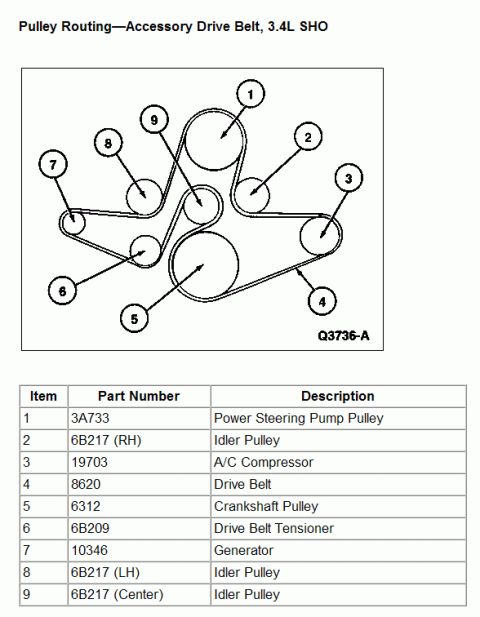
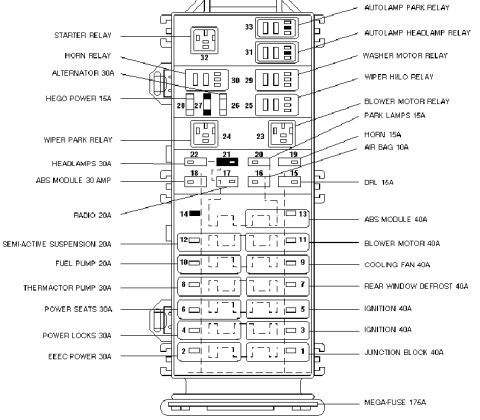
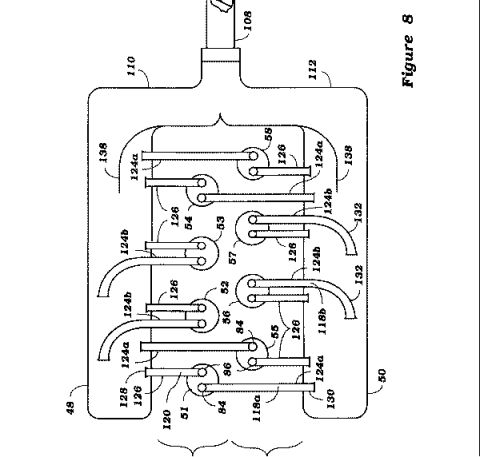
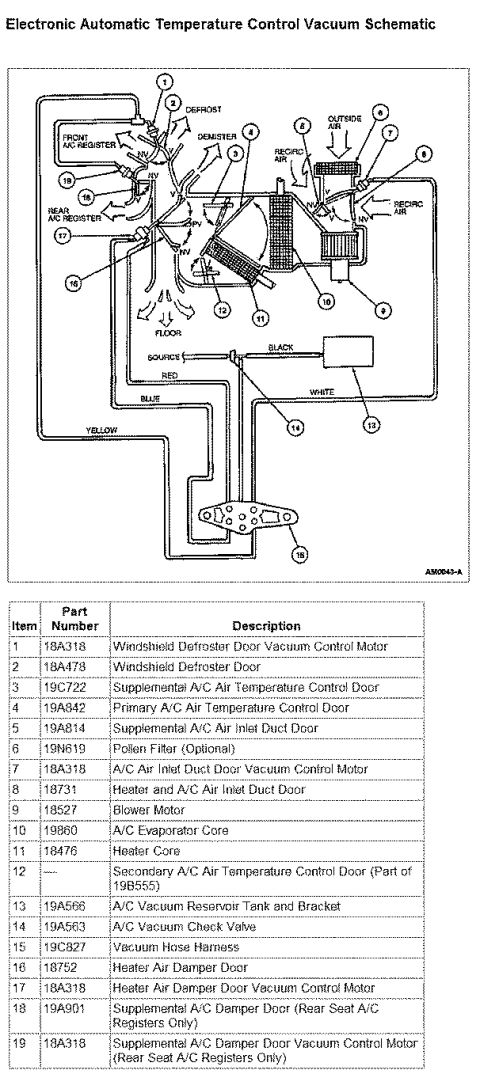
Mercury Sable front air dam installation instructions with 12 steps and car drawings Ford Pinpoint Test JF7-JF11: Coil Driver (CD) Circuit & Ignition Coil Diagnosis Ford Pinpoint Test JF4-JF6: Ignition Coil & Coil Driver Circuit Misfire Diagnosis Ford Pinpoint Test JF1-JF3: Ignition Coil Not Firing Diagnosis (DTC P0350-P0360) Ford AX4S Transaxle Pressure Test Port Locations Diagram - Line, EPC, Direct Clutch Ford Taurus Front Subframe Plate Nut Removal Diagram - Access Hole & Tab Ford Valve Shim Removal with Compressed Air - Tappet Holder T96P-6500-AH Diagram Ford Tappet Holder T96P-6500-AH & Compressor T89P-6500-A Placement Diagram Ford Tappet Compressor T89P-6500-A Placement Diagram - DOHC Valve Shim Service Ford Valve Clearance Check Diagram - Feeler Gauge Between Cam Lobe & Tappet 6500 Ford Transmission Range (TR) Sensor Location & Alignment Tool T92P-70010-AH 1997 Ford Taurus RAP Module Location Diagram (N13293-A) - Service Illustration 18service procedures1996-1999 Ford Taurus More reference Aeroform price list of Taurus/Sable and Tempo/Topaz air dams, side skirts, valances and spoilersBrochure Ford Taurus 3.0L Duratec Camshaft/ECT/OSS Sensor Wiring Diagram - PCM VREFWiring diagram Ford AX4N Transaxle Pressure Test Port Locations - EPC & Line Pressure DiagramManual page Ford Wheels Exploded Parts Diagram - Steel & Alloy Wheels, Covers, Nuts (F0239980-01)Exploded parts 1999 Ford Taurus 3.0L V6 Dyno Results - 125.1 HP / 135.7 Ft-Lbs Curve SheetSpec plate Ford Taurus SHO 3.4L V8 Serpentine Drive Belt Routing Diagram & Pulley GuideSchematic 1997 Ford Taurus Gen 3 Engine Compartment Fuse Box Diagram - Fuse & Relay ChartFuse chart V8 Prototype Intake Manifold Runner Horns Patent Drawing: Figure 8 Plenum LayoutBlueprint 1997 Ford Taurus EATC Vacuum Schematic - Hose Routing & Part NumbersVacuum routing

Mercury Sable front air dam installation sheet listing tools, three phases and 12 steps from prefit to screw mounting, with vehicle drawings.

Part of 1996-1999 Ford Taurus Service Procedures

AI caption · Photo 599 of 675

MERCURY SABLE INSTALLATION INSTRUCTIONS PLEASE READ THESE INSTRUCTIONS THOROUGHLY BEFORE PROCEDING Tools Required: Phillips screwdriver, drill, 1/8 drill bit, #7447 scotchbrite pad and sandpaper. There are three phases to this installation: 1. Pret and vehicle preparation 2. Preparation of parts for painting 3. installation of parts on vehicle . 7,, fa . ~~ 1,. Step 1. Step 2. Step 3. Step 4. Step 5. Step 6. Step 7. Step 8. Step 9. Step to. Step ll. Step l2. Be sure to follow the sequence of steps listed below. M rcury Sable Front AIr Dam Prefit Hold piece up to car even with bottom of side marker lights and with front opening held up against the top of car opening. Mark cutouts for lights. Cut out light openings approximately 1/2" larger than marks. (Horns may have to be bent back to the side) Refit front and make adjustments necessary. Check tape area for contact. Attach lights to bumper reinforcement using two sided tape and check for appearance and alignment. Mark bumper cover around top edge with grease pencil. Remove bumper cover. Clean tape contact area of car with wax and grease remover. Scuff tape contact area of car with scuff pad. Drill mounting hole through center of light bracket and attach using lag screw. Prep tape contact area on front air dam by sanding with 80 grit paper and wipe with acetone. Apply mounting tape before painting. Prep and paint part. (see separate instructions for painting) Install part by removing tape backing. line up and rub firmly. Install three screws in both endcaps and two screws evenly spaced in top of opening of air dam.

Is this accurate? Sign in to help verify it.

Comments

No comments yet.

More 1996-1999 Tauruss