Home/
Registry/
Ford/
Bronco/
1980–1986/
“That dirty old truck”/
Tailgate Tech
supermotors.net/registry/2742/12689
Album section
Tailgate Tech
From 1983 Ford Bronco “That dirty old truck” — documented by Steve83.
199 photos
151 videos
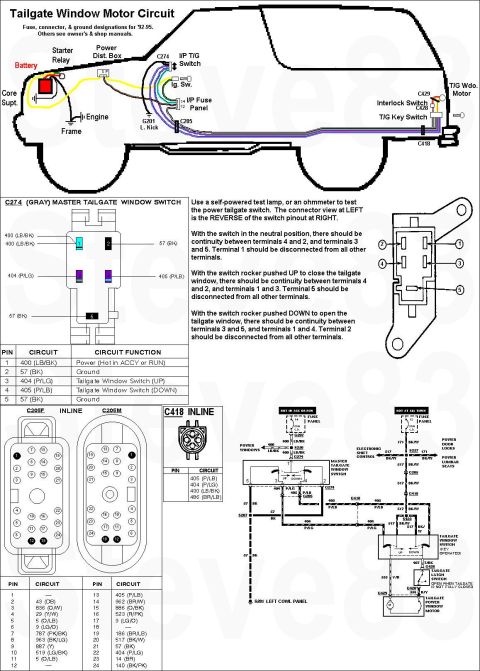
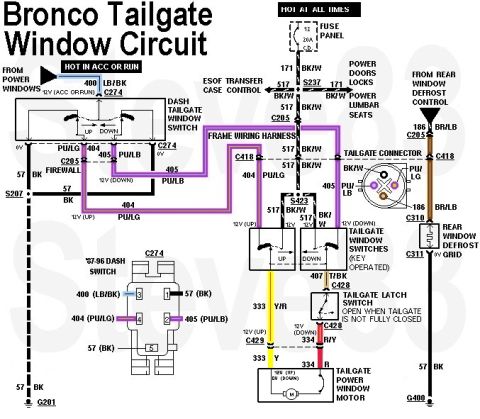
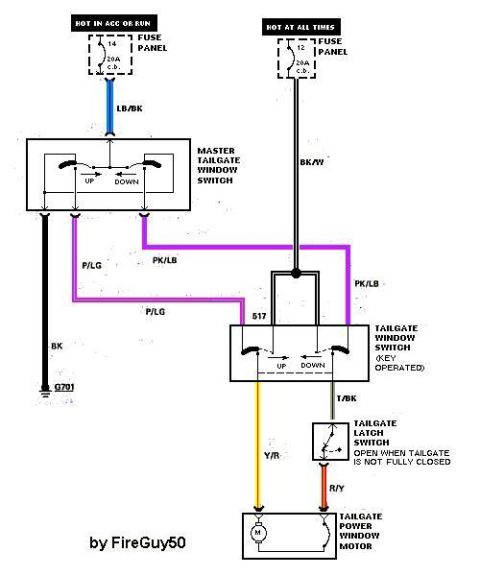

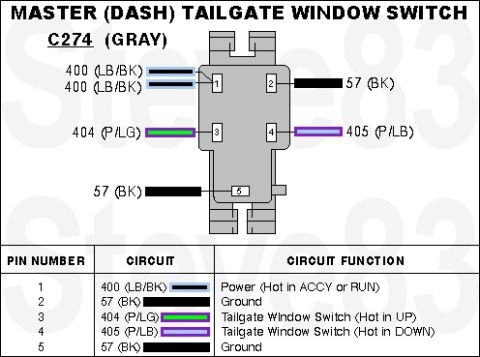
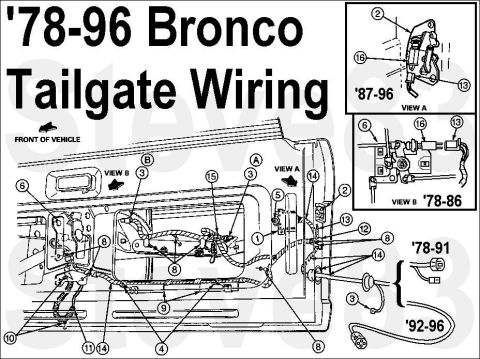
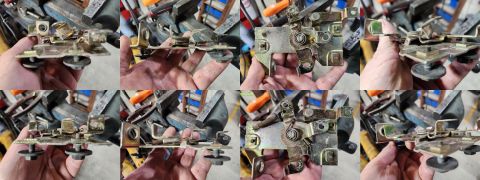
![1983 Ford Bronco - '87-91 Tailgate Switches IF THE IMAGE IS TOO SMALL, click it. . See also: [url=https://www.supermotors.net/registry/media/1174802] https://…](https://www.supermotors.net/thumb/1174803-480.jpg)
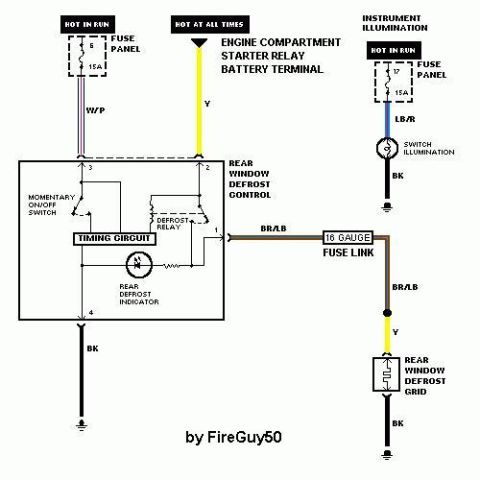
![1983 Ford Bronco - Defroster Circuit '92-96 IF THE IMAGE IS TOO SMALL, click it. . See also: [url=https://www.supermotors.net/registry/media/692844] https://w…](https://www.supermotors.net/thumb/1174777-480.jpg)

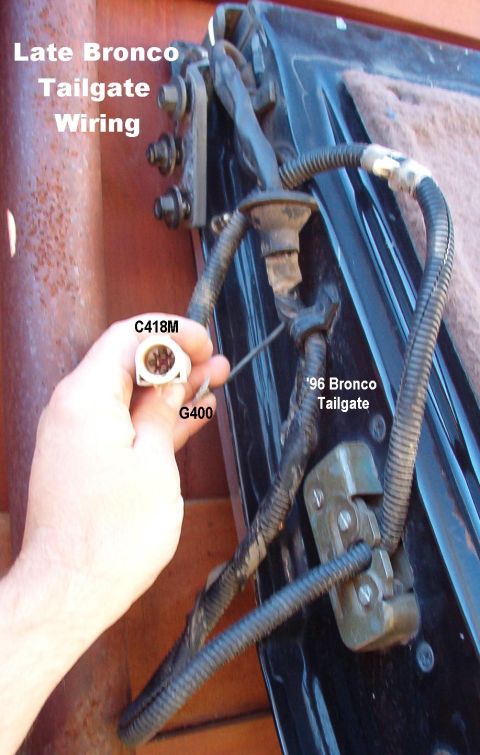
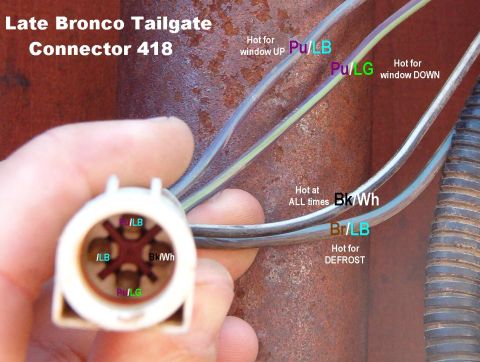
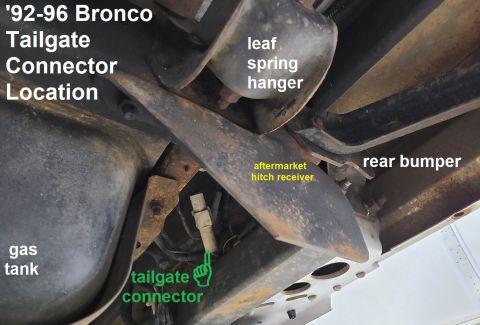
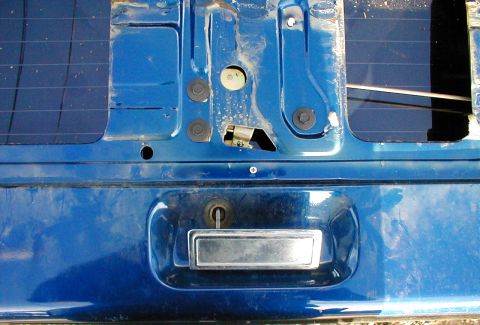
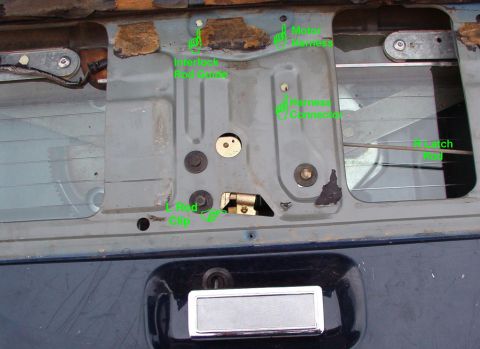
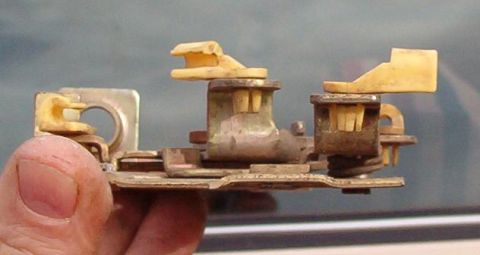
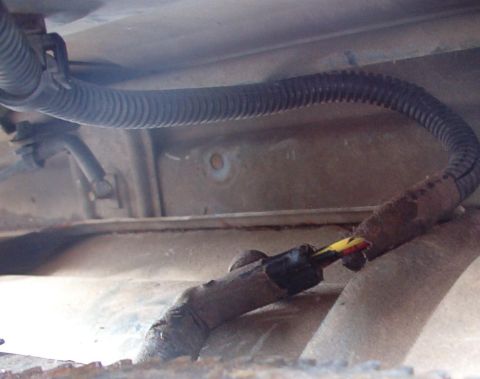
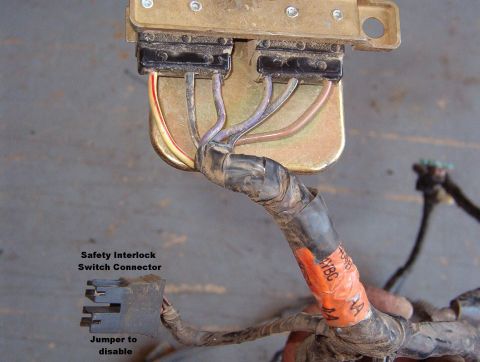
![1983 Ford Bronco - Tailgate Connector '87-91 IF THE IMAGE IS TOO SMALL, click it. . See also: [url=https://www.supermotors.net/registry/media/692844] https://…](https://www.supermotors.net/thumb/1174771-480.jpg)
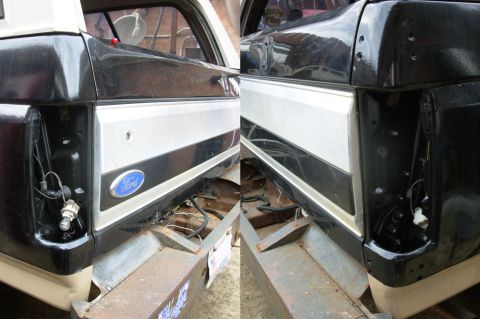
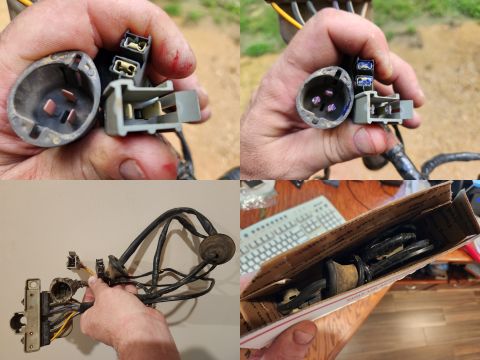
![1983 Ford Bronco - Tailgate Connector Comparison IF THE IMAGE IS TOO SMALL, click it. . See also: [url=https://www.supermotors.net/registry/media/692844] http…](https://www.supermotors.net/thumb/1174772-480.jpg)

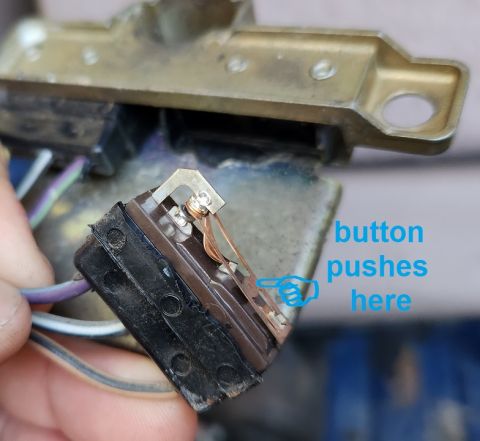
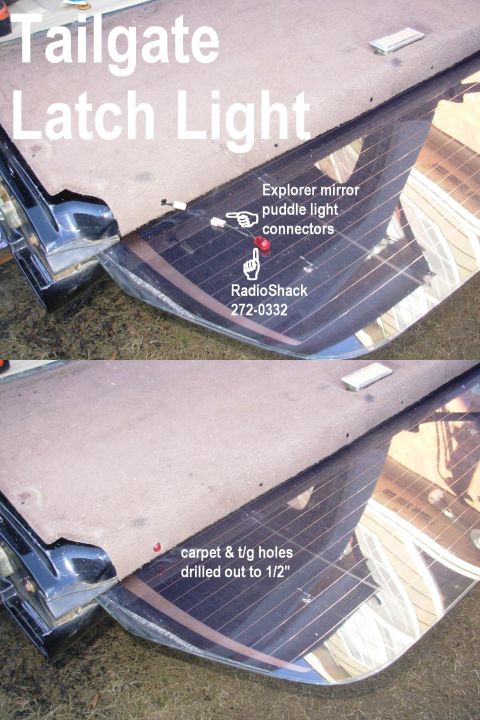
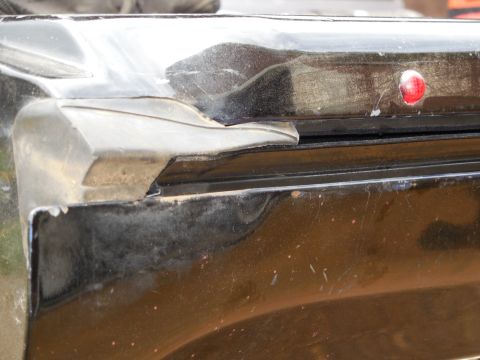
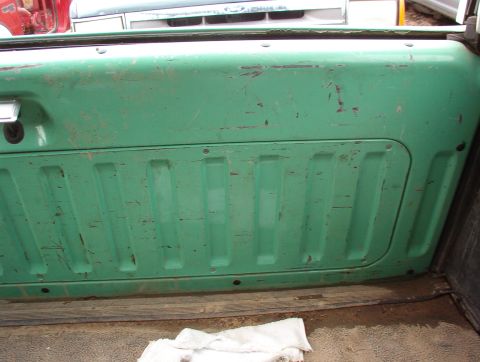
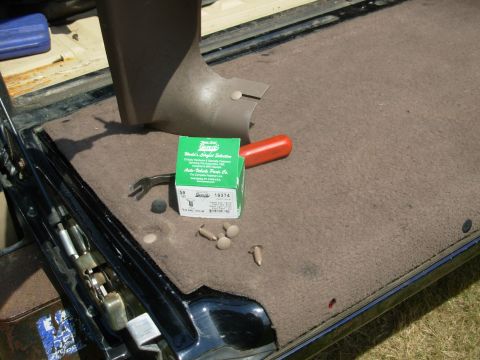
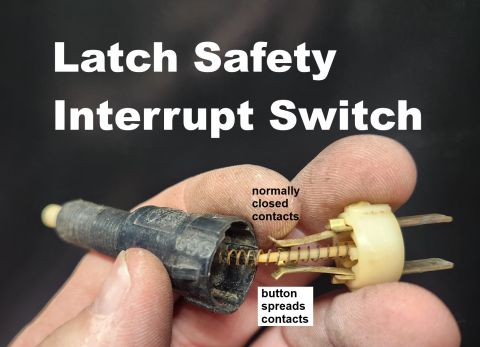
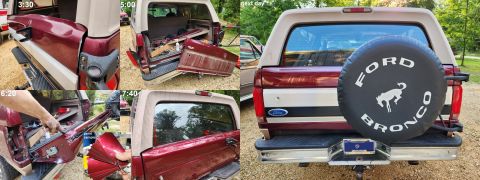
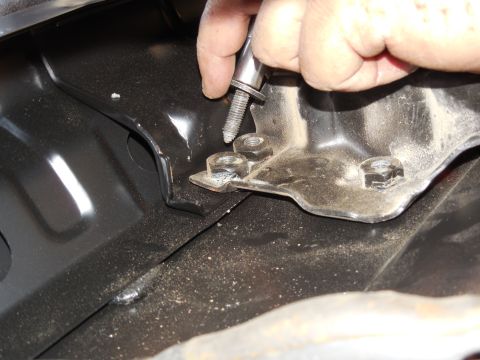
![1983 Ford Bronco - Bronco Tailgate Safety Latch Light [url=https://www.supermotors.net/registry/media/71412] https://www.supermotors.net/getfile/71412/thumbna…](https://www.supermotors.net/thumb/922714-480.jpg)

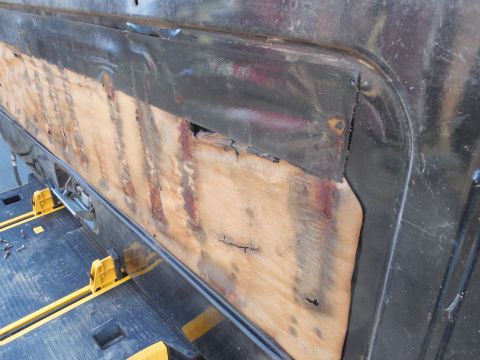
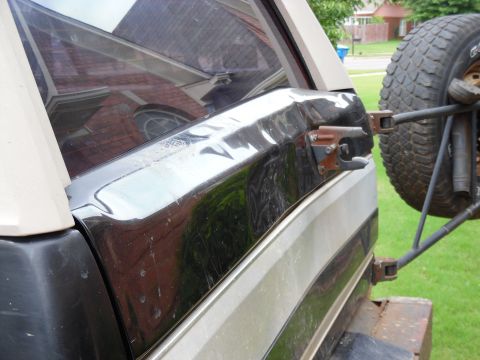
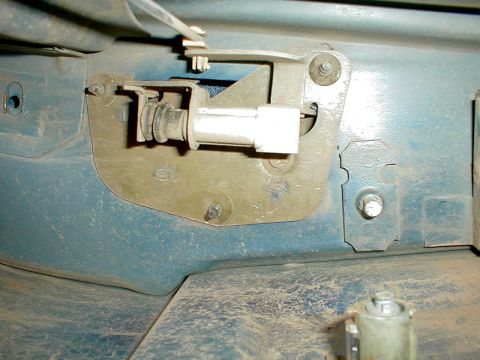
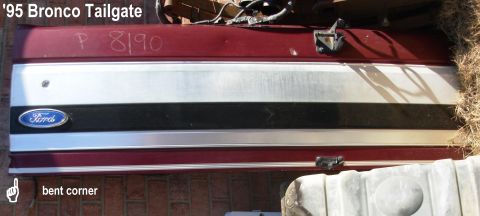
![1983 Ford Bronco - View from the driver's side [url=https://www.supermotors.net/vehicles/registry/media/546453] https://www.supermotors.net/getfile/546453/thu…](https://www.supermotors.net/thumb/160790-480.jpg)
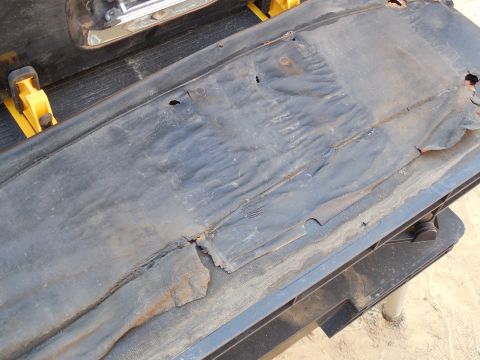
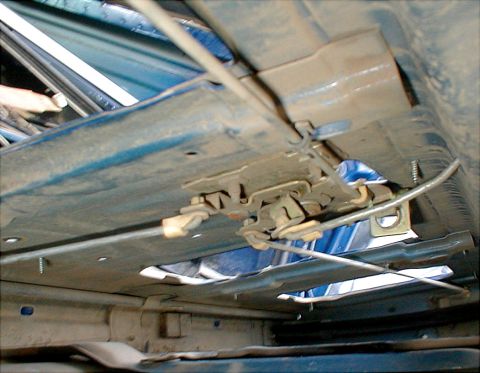
![1983 Ford Bronco - View from the passenger side [url=https://www.supermotors.net/vehicles/registry/media/546453] https://www.supermotors.net/getfile/546453/th…](https://www.supermotors.net/thumb/160793-480.jpg)

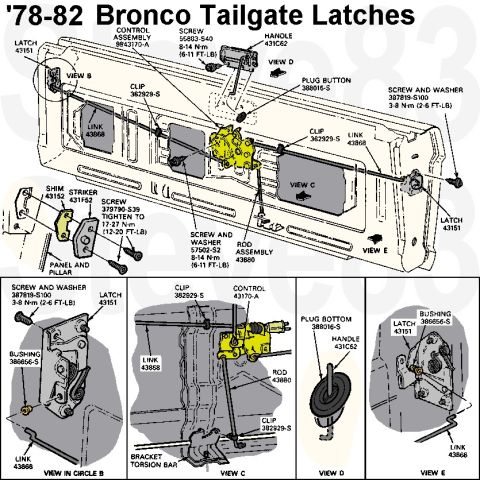
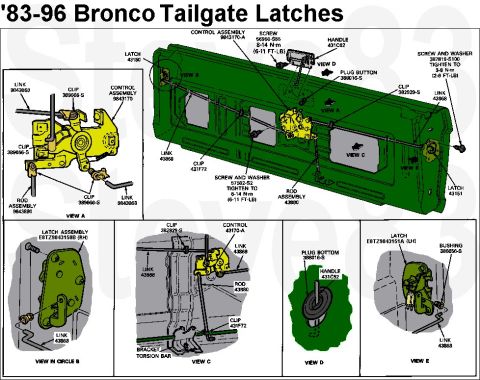

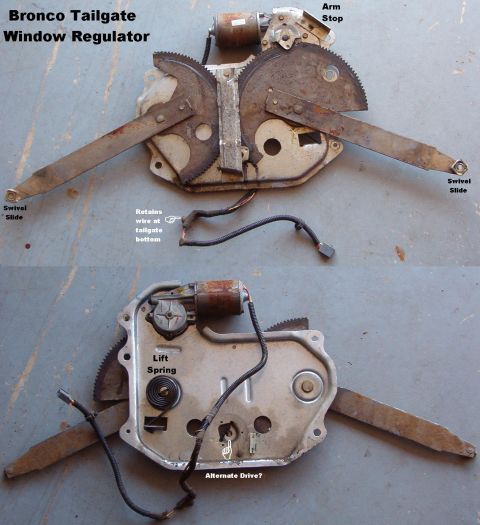
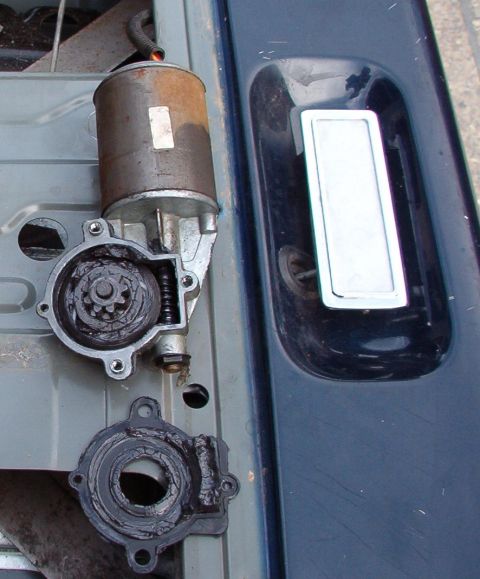


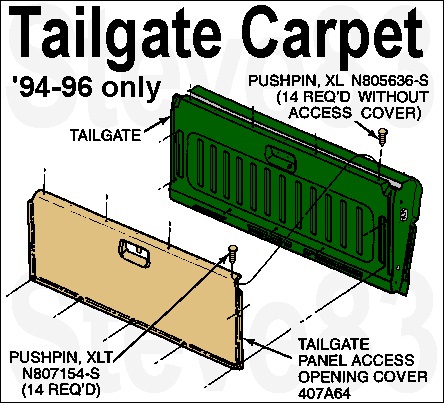
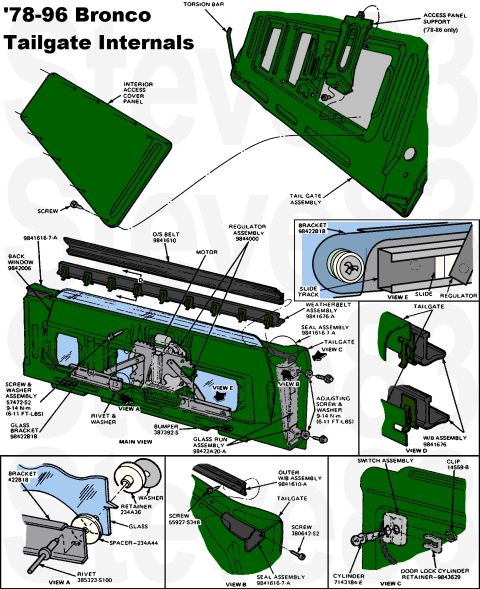
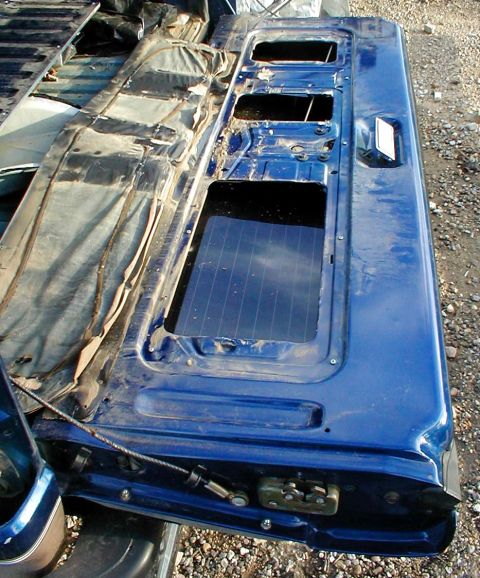
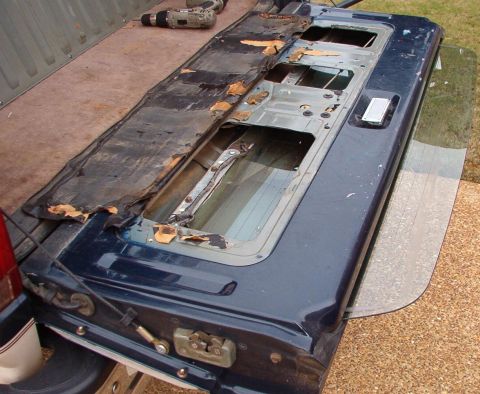
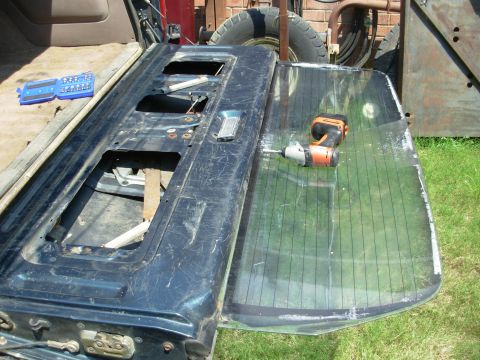
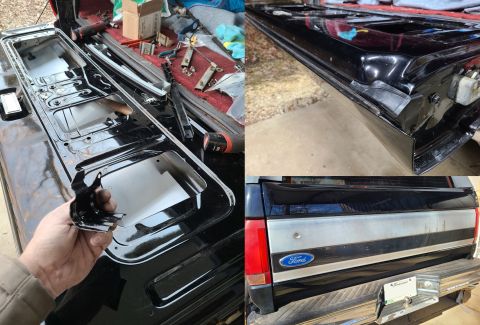
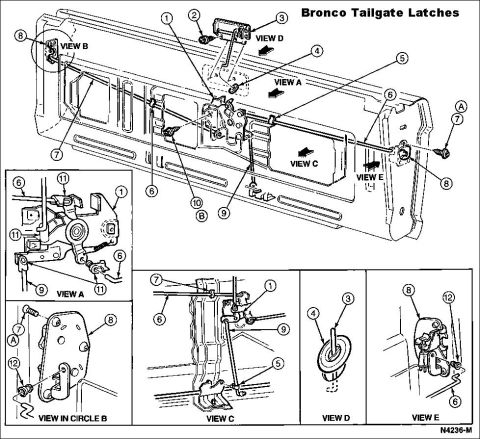
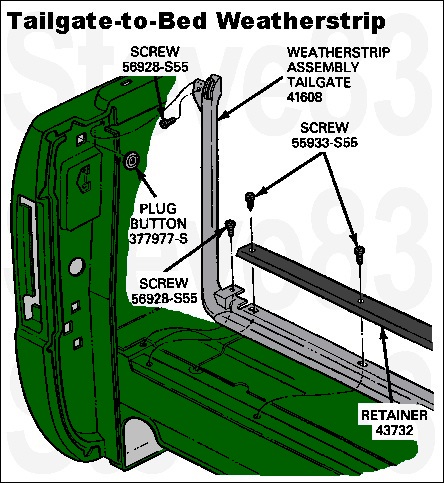
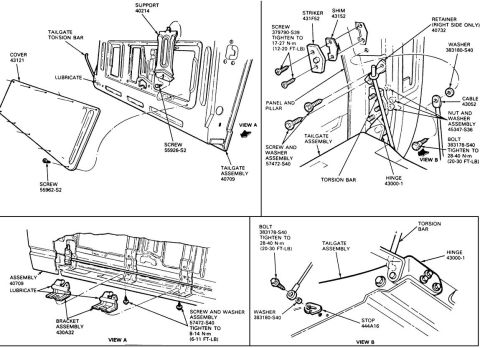
![1983 Ford Bronco - Exploded Tailgate IF THE IMAGE IS TOO SMALL, click it. [url=https://www.supermotors.net/vehicles/registry/media/546453] https://www.supermo…](https://www.supermotors.net/thumb/980125-480.jpg)

![1983 Ford Bronco - SOLD Bronco Tailgate Wiring Harness from '90 fits '80-91 [url=https://www.supermotors.net/registry/media/930203] https://www.supermotors.ne…](https://www.supermotors.net/thumb/567847-480.jpg)
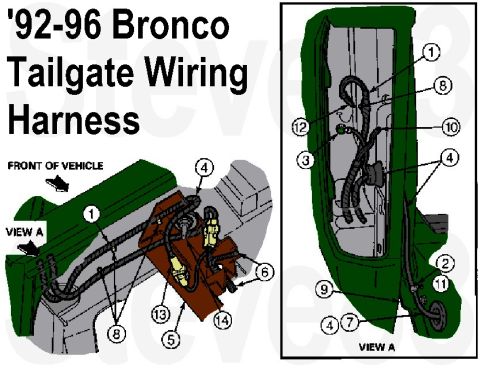
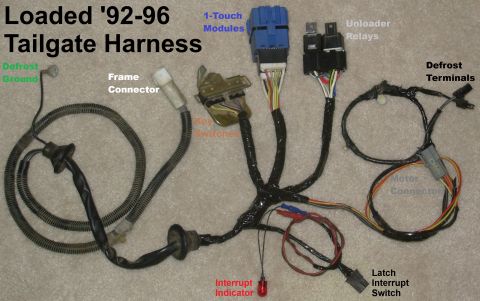
![1983 Ford Bronco - Tailgate Wiring Harness from a '95 Bronco with defrost. [url=https://www.supermotors.net/registry/media/930203] https://www.supermotors.net…](https://www.supermotors.net/thumb/517002-480.jpg)
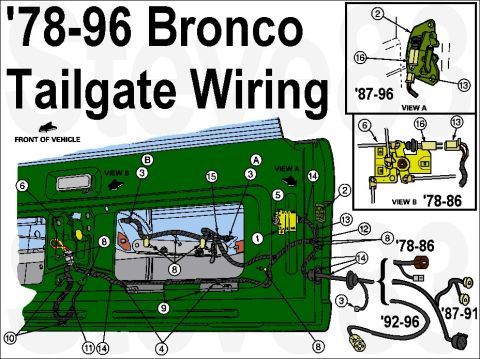
![1983 Ford Bronco - SOLD Tailgate Harness fits '78~86 with or w/o defrost. [url=https://www.supermotors.net/registry/media/930203] https://www.supermotors.net/…](https://www.supermotors.net/thumb/673144-480.jpg)
![1983 Ford Bronco - Tailgate Wiring Harness from '95 Bronco with defrost [url=https://www.supermotors.net/registry/media/930203] https://www.supermotors.net/ge…](https://www.supermotors.net/thumb/517033-480.jpg)
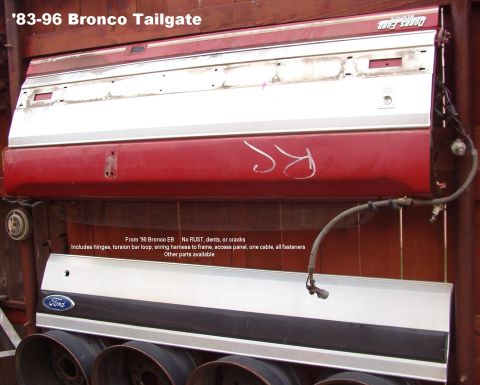
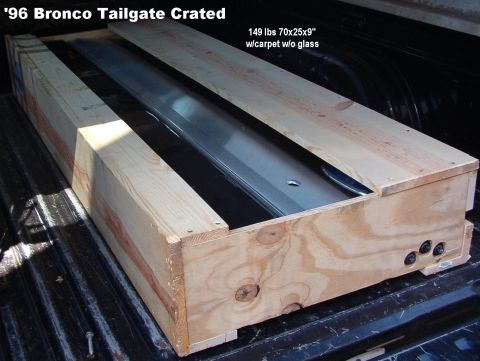
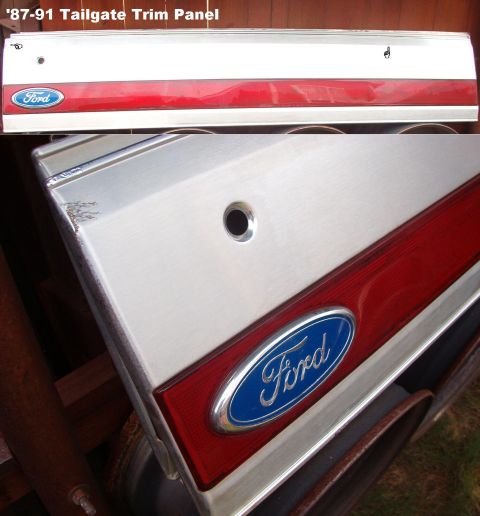
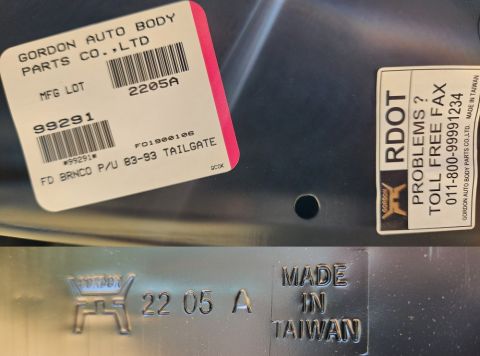
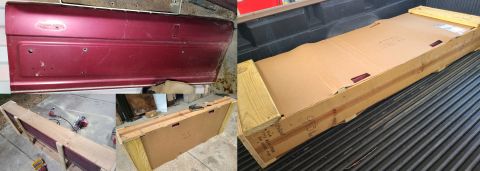
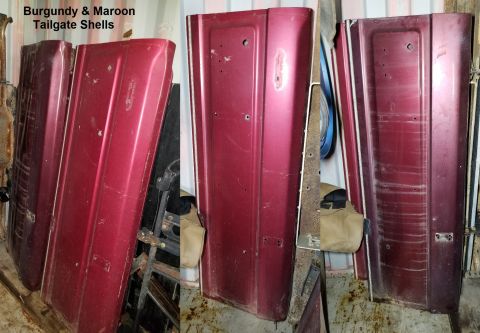
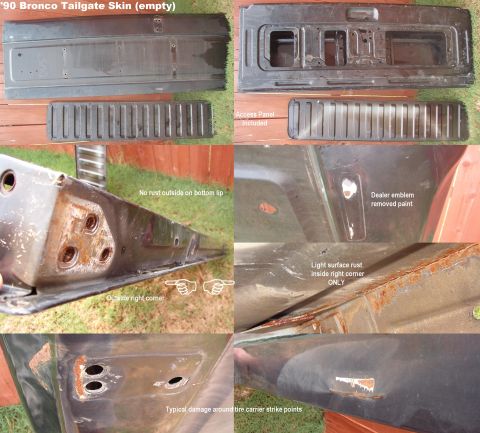
![1983 Ford Bronco - SOLD Red Tailgate Shell E8TZ-9840700-A IF THE IMAGE IS TOO SMALL, click it. [url=https://www.supermotors.net/registry/media/1168084] https:…](https://www.supermotors.net/thumb/964510-480.jpg)
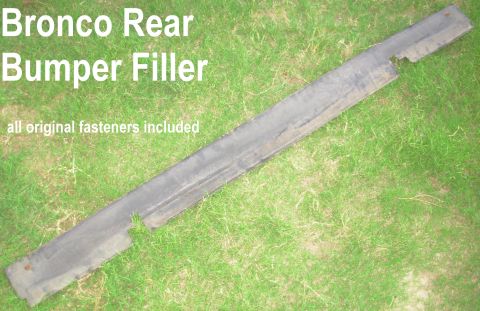
![1983 Ford Bronco - SOLD Rear Bumper Filler for '80-96 Bronco with step bumper & NO body lift [url=https://www.supermotors.net/registry/media/922798] https://w…](https://www.supermotors.net/thumb/682442-480.jpg)